Appendix D- Custom Template
Introduction
With SSA 12.2, you can create map information templates (which are now created as angular components. These can be created by:
- Custom Template Designer — Using Template Designer to visually pick what you want and save the template. The designer will generate the code for the template.
- Custom Script — Writing your own template from scratch (if you are familiar with writing typescript code and creating angular components)
- Modifying Template — Using template designer and then changing the code once it has been created.
\customerconfigurations\analyst\theme\infotemplates folder. Finally, you can map them to the table for which they were designed in Admin Console in a map configuration.The template designer is just a way to visually create a Custom Map Information Template. It lets you choose the columns from the table, add charts etc.
For more information about the template designer, refer to the section on "Using the Template Designer" in the SSA User Guide.
Adding a New Custom Template Component in the Analyst Platform
This section describes how to write your own custom template from scratch (if you are familiar with writing typescript code and creating angular components). Please follow the steps given below:
- Write your module and component in same typescript file with the same filename. For example,
TestTemplate.ts- Naming convention for the component and the module (case sensitive):
- The module name should be prefixed with same name as that of the file and suffixed with 'Module'. For example-
TestTemplateModule - Also, the component name should be prefixed with same name as that of the file and suffixed with 'Component'. For example-
TestTemplateComponent
- The module name should be prefixed with same name as that of the file and suffixed with 'Module'. For example-
- A simple module that exports a single component could be written like:
@NgModule({ imports: [CommonModule], declarations: [TestTemplateComponent], exports: [TestTemplateComponent] }) export class TestTemplateModule { }; - Template URLs/style URLs should be controller URLs, such as:
@Component({ selector: 'test-template', templateUrl: '../controller/theme/infotemplates/testTemplate.html', styleUrls: ['../controller/theme/infotemplates/testTemplate.css'] }) - Analyst Platform will pass context data objects in custom components that have feature attribute data, along with some additional data.
 data = {
  feature: { [name: string]: CalloutFeatureColumnObject };
  infoSource?: GeoJSONFeature; // Could be a point(callout) or an annotation(mapinformation).
    namedTableRef: string;  // namedTable that is representing that layer
}
You need to declare following input with the fixed name "data".
class TestTemplateComponent {
    @Input() data: any;
}
Note: Refer to API-DOC for "LayerInfoFeatureTemplateData" type to see the structure of this "data" object - Feature attributes value and type could be accessed in your template by using data.feature[<attributeName>].value and data.feature[<attributeName>].type
If you get feature attribute name in variable name ‘key’ then<strong>{{ data.feature["URL"].name }}</strong>: <a target="_blank" href="{{ data.feature[URL].value }}"> <img src="{{ data.feature.URL.value }}" /> </a><div *ngIf="data.feature[key].type === 'image' then imageBlock else defaultBlock"> </div> <ng-template #imageBlock> <strong>{{ data.feature[key].name }}</strong>: <a target="_blank" href="{{ data.feature[key].value }}"> <img src="{{ data.feature[key].value }}" /> </a> </ng-template> <ng-template #defaultBlock> <strong>{{ data.feature[key].name }}</strong>: {{ data.feature[key].value }} </ng-template>
- Naming convention for the component and the module (case sensitive):
- Once a template component typescript (
.ts) file and dependenthtml/cssfiles have been created, you can copy them to the\customerconfigurations\analyst\theme\infotemplatesfolder. - Finally, you can map them to the table in map configuration in the Admin Console.
- Go to the adminconsole application and click the "Map Configs" tab.
- Select the desired mapconfig from the drop-down.
- Select the "Template Mappings" tab under the mapconfigs view.
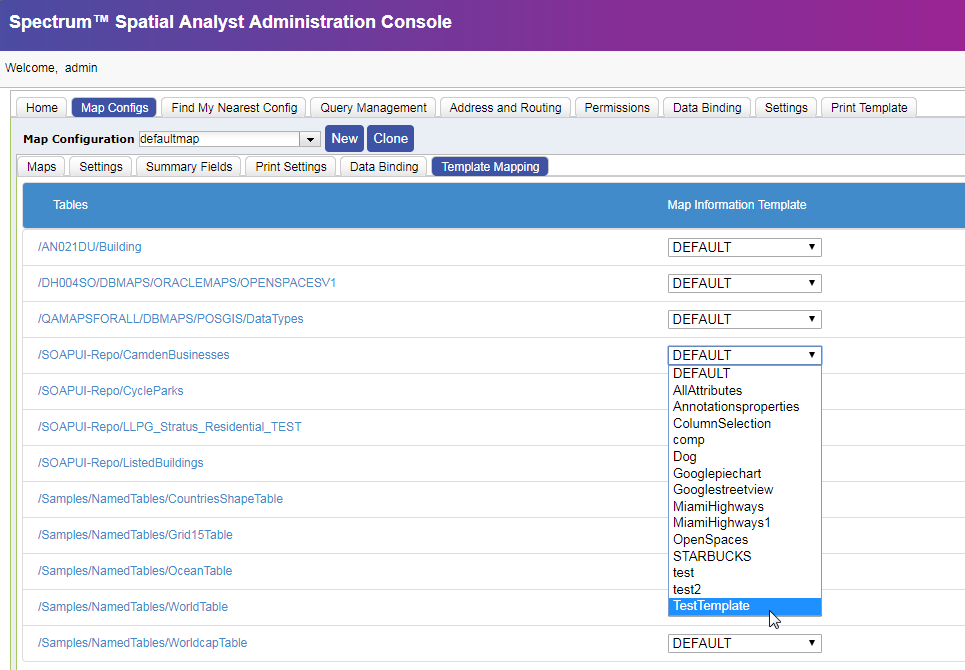
- Under the Map Information Template column, the custom-designed template component will be listed in the drop-downs. Select custom component for the desired table listed under the Tables column and then click Save.