Working with Web Services and Scripts
You can import Web services as well as Winshuttle Transaction and Winshuttle Query scripts into your solution to enable features such as address verification, email verification, and more.
Importing a service or script into your solution consists of 3 key actions:
- Importing a Web service or script.
- Creating a Field Mapping to map fields in the script to fields in your form.
- Editing a Field Mapping in the service or script.
Note: If you plan to run Query scripts via Winshuttle SAP Integration Server, you must have the Winshuttle Function Module installed.
Supported Web service bindings and message types
Supported message types |
Supported WSDL bindings |
|
Not supported
|
|
|
Importing a Web service or Script
To import a Web service for use in your solution, do the following:
- Click the Solution tab.
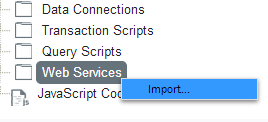
- In the Solution pane, right-click Web Services, and then click Import.
- On the Import screen, do one of the following:
- Click Choose File to browse to a WSDL file.
- Select URL, and then type the URL to the WSDL file.
- If necessary, type your credentials (Domain, Username, Password). This section applies only if you selected URL (above).
- Click Next.
- In the list of services, check the box for the service(s) you wish to import.
- Click Next, and then see Creating a Field Mapping(below).
Make sure of the following when working with repeating groups or repeating tables
When working with Repeatingelements of any type (i.e. Repeating Groups and/or Repeating Tables) within a Web Service (or elsewhere), make sure of the following:
- Any field within a Repeating Content folder within the Form Data tree is also in the form within a repeating container.
- All non-repeating fields in the Form Data tree are non-repeating in the form.
Failure to follow the above guidelines may result in unintended behavior while working with repeating elements when running a Web Service.
Creating a Field Mapping
The following procedure describes how to create a Field Mapping for an imported Web service.
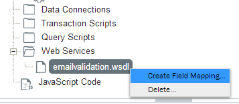
- In the Solution Pane, click Web Services to expand it.
- Right-click the Web service, and then click Create Field Mapping.
- Under Description, type a description for the Web service.
- Under Group Name, select a group from the menu or type a name for the Group. The name must begin with an alphabetic character or underscore, and it can contain only alphanumeric characters and underscores. The name can be the name of an existing group, or a new group that you want to create.
NOTE: Selecting an existing Group along with the Use Existing Input/Output Fields will force the import to look into that specific group for existing fields.
(See Working with Groups for additional information.) - Check/Clear Generating Repeating Section (as required).
- Select an upload option:
- Single Upload - When you want to upload the records sequentially. It will be slower in comparison to the Bulk Upload option though. The logs get updated sequentially for each record as the upload gets completed.
- Bulk Upload - When you want to upload the records in bulk. We recommend that you use this option when the number of records are less than 100. The logs get updated simultaneously with multiple entries (one for each record) as soon as the bulk upload is completed. If you want to access this bulk upload feature, please reach out to your Sales account representative for more details.
- This option is enabled only when you select the Generate Repeating Section check box.
- It is not advised to use batch uploads for more than 100 records as it may lead to time-out issues.
- This number may vary based on your form and it is advisable to test out with an Excel data source to determine the threshold value.
- To change the web service import type to enable the bulk upload option for an existing script, either the mapping needs to be re-created or the script needs to be added again. You could also delete the mapping and create a new one.
- Under Mapping Name, type a name for the service.
- Under Operation, click the arrow and then select an operation from the menu.
- Under Connection, choose one of the following:
- Use the Logged in Windows Account (this is the default) to use the currently logged in account.
- Use the Specified Account. Type the Domain, User Name, and Password for the account.
- Click Generate to open the Editing a Field Mapping box.
- If you wish to create new field mappings, click Yes at the dialog box, and then continue to Managing Field Mappings, beginning with step 4. (Otherwise, click No to finish the operation.)
Notes:
Editing a Field Mapping
If you are using the same input value in more than one script, but do not wish to have the same field in your form more than once, you can change the way your fields are mapped.
- Click the Solution tab.
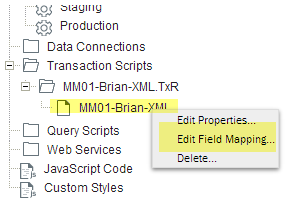
- In the Solution tree, expand Transaction Scripts, Query Scripts, or Web Services to view mapped scripts.
- Right-click a script mapping in the Solution tree, and click Edit Field Mapping.
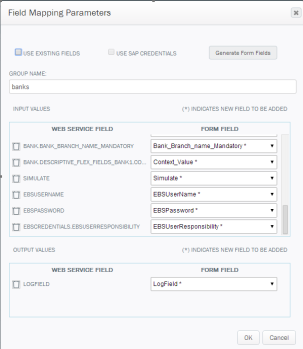
- Under Web Service Field, a list of fields is displayed.
- In the Form Field column, click the drop-down menu to select the field that you want Web Service Field to map to. Do this for each field you wish to map.
- Click OK to finish.
Important:Be sure not to delete input fields from the form. Instead, enter the skip field indicator (the default is the / character), and then hide the field so that it is not used. For more information, see the Skip Indicator section in Run settings for Transaction and Filter Mapper settings.
Deleting the field will cause the script to upload a blank field and overwrite any existing value.
Notes:
- If Use Existing Fields is checked, Composer will map to form fields that already exist in the schema with the same name. In the Form Field list, fields marked with an asterisk (*) indicates fields do yet exist in the schema and will be created (regardless of whether use Existing fields is checked or not).
If Use existing fields is not checked and a field does not have an asterisk by it, Composer will generate a new, unique field name using a suffix ‘_n’ (where n=a number). - The Use SAP Credentials checkbox is enabled if you are mapping to a Winshuttle Query or Transaction script. This option includes the SAP Credentials fields in the mapping, and enables you to defer authentication to SAP for the person using the form.
In the Solution Tree, you can right-click a mapped field to view the menu options.
Field mapping parameters

Copyright 2018, 2022 Precisely