Manage Repository Validation Rules
The list of validation rules maintained by a repository’s profile are available for use by the repository, but are not automatically added to a repository’s list of validation rules.
Managing a repository’s validation rules is performed in the Enable Classic UI. To add or remove a profile validation rule from a repository’s list of validation rules:
-
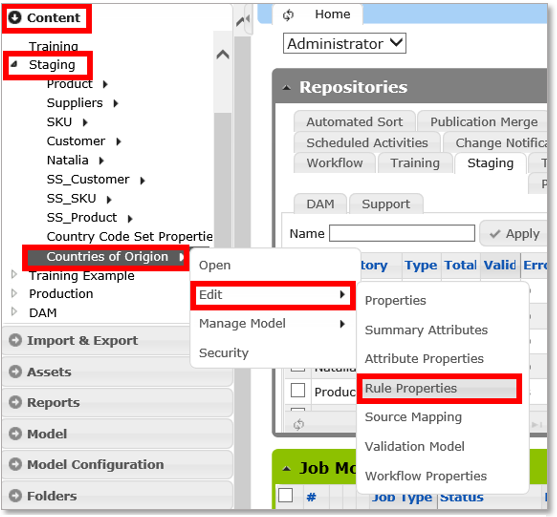
Log into the Enable Classic UI, open the Content tab,
and open the folder of the repository to be managed. Click the triangle
icon to the right of the repository’s name, click the Edit
button, and select Rule Properties.
Open the Repository's Rule Properties
-
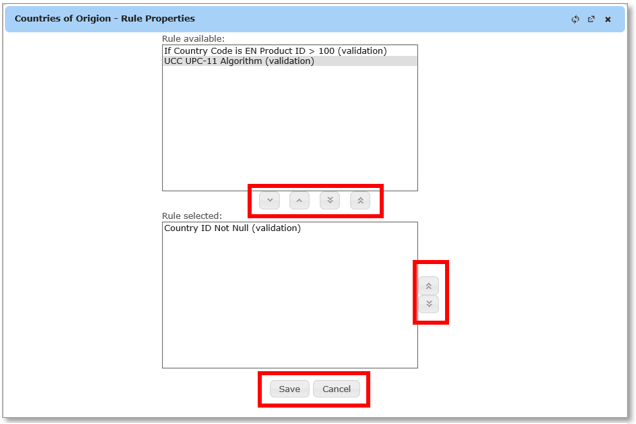
The repository’s Rule Properties dialog will appear.
Repository Rule Properties
- To add a validation rule to the repository, select the rule and use the down arrow button between the Rule Available and Rule Selected lists to
move the rule to the Rule Selected list.
To add all the validation rules to the repository, click the double down arrow button between the Rule Available and Rule Selected lists to move all the rules to the Rule Selected list.
To remove a validation rule from the repository, select the rule and use the up arrow button between the Rule Available and Rule Selected lists to move the rule to the Rule Available list.
To remove all validation rules from the repository, use the double up arrow button between the Rule Available and Rule Selected lists to move all the rules to the Rule Available list.
To reorder the list of the repository’s validation rules, select one or more rules in the Rule Selected list, then click the double up or double down button to the right of the Rule Selected list.
- When the Rule Selected list has been edited as desired, click the Save button to save the changes and exit, or click the Cancel button to exit without saving the changes.

Copyright 2007, 2023 Precisely