EnterWorks User Groups
Add a User Group
To create user group:
-
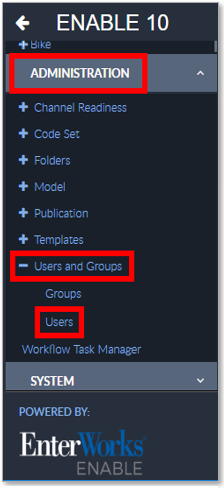
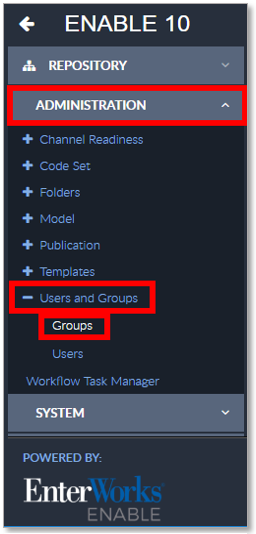
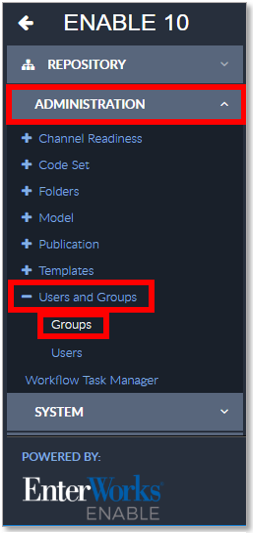
Open the Groups tab by opening the Feature Sidebar, opening the Administration tab, opening the Users and Groups folder, and selecting Groups.

Open the Groups Tab
-
The Groups tab will appear which lists all the defined
user groups. Click the Add Group button on the Groups tab’s Activity Bar.
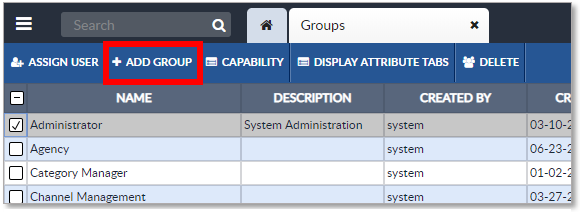
Add Group
- A new group entry will be added to the top of the list of users.
- Double-click the attribute values to edit the group as desired.
Delete a User Group
To delete user group:
-
Open the Groups tab by opening the Feature Sidebar, opening the Administration tab, opening the Users and Groups folder, and selecting Groups.

Open the Groups Tab
-
The Groups tab will appear which lists all the defined
user groups. Click the Delete button on the Groups tab’s Activity Bar.
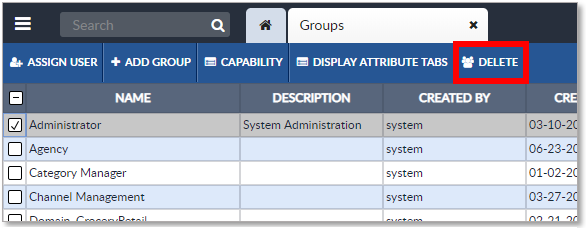
Delete a Group
- A confirmation window will appear, asking if you wish to delete the group. Click Yes to delete the group.
Manage User Group Memberships
Users can be added or removed from groups through two methods:
Manage Group Membership in the Users Tab
To manage group membership in the Users tab:
-
Open the Users tab by opening the Features Sidebar, opening the Administration tab, opening the Users and Groups folder, and selecting Users.
Open the Users Tab
-
The Users tab will open.

The Users Tab
-
Select the desired user and click the Assign Group
button on the Users tab’s Activity Bar.
The User – Groups dialog will open.
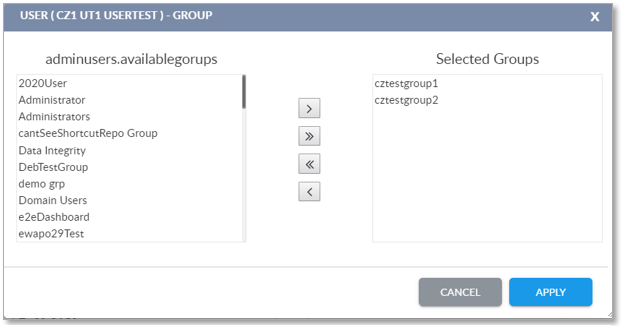
Assign a User to Groups
-
To add the user to a group, select the group from the Available Groups column and click the right-arrow button
 to move the group to the Selected Groups column.
- Click the Apply button to save your changes and exit, or click the Cancel button to exit without saving your changes.
To remove the user from a group, select the group from the Selected Groups column and click the left-arrow button ![]() to
move the group to the Available Groups column.
to
move the group to the Available Groups column.
Manage Group Membership in the Groups Tab
To manage group membership in the Groups tab:
- Open the Groups tab by opening the Features Sidebar, opening the Administration tab, opening the Users and Groups folder, and selecting Groups. The Groups tab will open.
Assign User to Group from Groups Tab
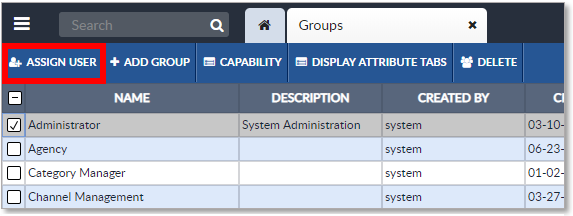
-
Select the desired user and click the Assign User
button on the Groups tab’s Activity Bar.
The Groups - Users dialog will open.
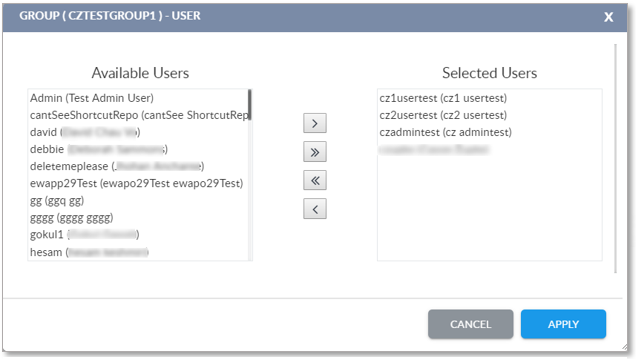
Assign Users to a Group
- To add the user to a group, select the user from the Available Users column and click the right-arrow button to
move the user to the Selected Users column.
- To remove the user from a group, select the user from the Selected Users column and click the left-arrow button
 to
move the user to the Available Users column.
to
move the user to the Available Users column.
- Click the Apply button to save your changes and exit, or click the Cancel button to exit without saving your changes.
Assigning Group Capabilities
Group Capabilities are functions that members of the group will be able to perform.
To edit the group’s Capabilities:
-
Open the Groups tab by opening the Features Sidebar, opening the Administration tab, opening the Users and Groups folder, and selecting Groups.
Open the Groups Tab
- The Groups tab will open.
Add Group Capabilities
-
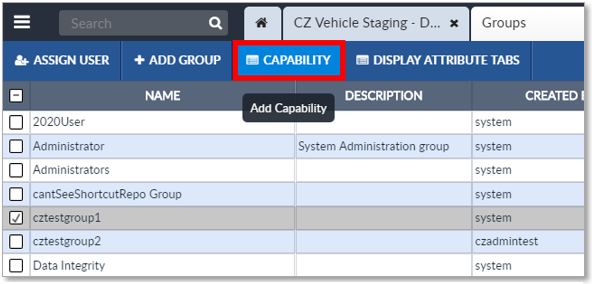
Select the group whose Capabilities you wish to edit, and click the Capability button on the Groups tab’s Activity Bar. The Capability tab will
open.
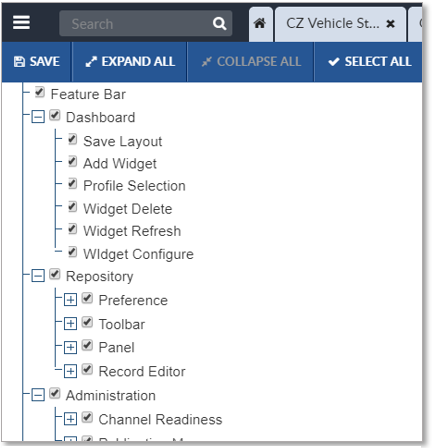
Select Group Capabilities
- Use the buttons on the tab’s Activity bar to expand and collapse the Capability Tree as desired.
- Check and uncheck Capabilities to grant them or revoke them for the user group.
- To save your changes, click the Save button on the Capability tab’s Activity Bar.
- To exit the Capability tab, close the tab.
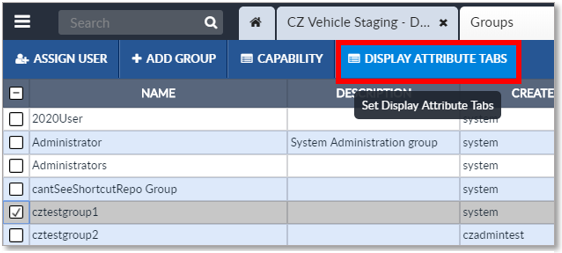
Assign Profile Tab Visibility to a Group
For users of a group to be able to see a profile’s attribute tab when they are viewing a repository based on that profile, they must have Visibility for that tab enabled. Note that setting a tab’s visibility does not change the security settings for the tab; it only makes the tab visible.
To grant Visibility for a tab:
- Open the Groups tab by opening the Features Sidebar, opening the Administration tab, opening the Users and Groups folder, and selecting Groups.
Open the Groups Tab
- The Groups tab will open.
Define Visibility
-
Select the group whose Visibilities you wish to edit, and click the Display Attribute Tabs button on the Groups tab’s Activity Bar. The Set DisplayAttributes tab will open.
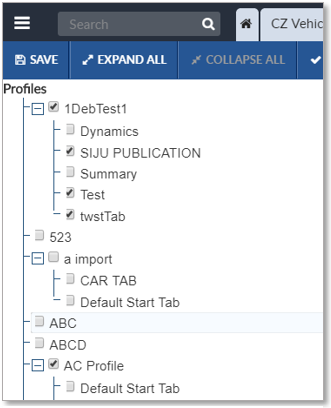
Select Profile Visibility
- Use the buttons on the tab’s Activity bar to expand and collapse the Profile Tab Tree as desired.
- Check and uncheck profile tabs to grant or revoke visibility to the user group.
- To save your changes, click the Save button on the Set Display Attributes tab’s Activity Bar
- To exit the Set Display Attributes tab, close the tab.

Copyright 2007, 2023 Precisely