Syndicating a Channel
In order to syndicate a Channel, the Channel must be configured for transmission. Once configured, the Channel’s valid data may be syndicated.
To syndicate a Channel, open the Channel Readiness View.
To open the Channel Readiness View, first open the Feature Sidebar by clicking the Features Sidebar icon ![]() on the far left of the Tab Bar. Open the Administration tab,
open the Channel Readiness folder and select Inbound or Outbound.
on the far left of the Tab Bar. Open the Administration tab,
open the Channel Readiness folder and select Inbound or Outbound.
The Channel Readiness View tab will appear.
|
Channel Readiness View |
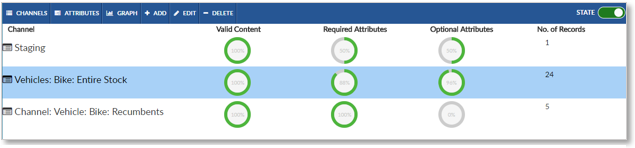
If any changes have been made to the Channel or any its records, update the Channel Statistics. (See Update Channel Statistics.)
Select the Channel that is to be syndicated. It will be highlighted in blue.
Begin the syndication by clicking the Update Statistics button to the right of the Channel’s name (it looks like an index card). A Job Specification window will appear.
|
Start Transmitting to Syndication Channel |
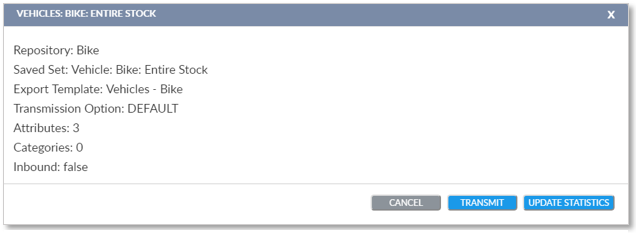
The Job Specification window notes the repository affected, the Saved Set of records to be validated, the Export Template to use, the transmission option, and the number of attributes and Category Attributes selected. Click the Transmit button to begin syndication and return to the Channel Readiness View. Click the Cancel button to return to the Channel Readiness View without syndicating the Channel.
If the Transmit button was selected, a Confirmation window will appear that asks if EnterWorks should start the syndication. Select Run to begin transmission and return to the Channel Readiness View. Click the Cancel button to return to the Channel Readiness View without syndicating the Channel.
A syndication job is created and placed in the Job Queue. To view the job’s progress, open the Job Monitor from the Features Sidebar’s System tab or open a Job Monitor Widget in the Dashboard.

Copyright 2007, 2023 Precisely