Managing Widgets
Add a Widget
To add a Widget to a Dashboard, click theAdd Widget button on theDashboard’s Activity Bar. A blank Widget is added to the Dashboard. The blank Widget has not yet been configured.
|
Add a Widget |
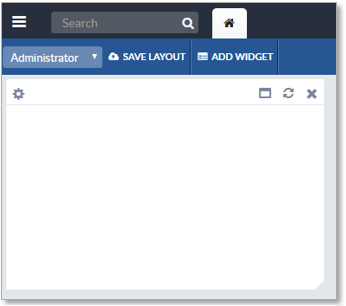
To see and access the Widget’s Activity Bar, hover over
the top of the blank Widget’s window. The Widget’sActivity Bar consists of (left to right): a Settings icon ![]() , a Title, aMaximize icon
, a Title, aMaximize icon ![]() , a Refresh icon
, a Refresh icon ![]() , and a Close Window icon
, and a Close Window icon ![]() . See the
Widget Reference Guide section for more details.
. See the
Widget Reference Guide section for more details.
|
Widget Activity Bar |

See Configure a Widget for instructions on configuring a new Widget.
Users with sufficient permissions can click theSave Layout button on theDashboard’s Activity Bar to save theDashboard’s new configuration as theDashboard for the user group specified in the Dashboard Selector dropdown list. If the user of Personal Dashboards has been enabled, the user can click the Save Layout button to save the configuration as their new personal Dashboard.
WARNING: Remember to click the Save Layout button to save any changes to the Dashboard or all changes (new report Widgets, Widget size changes, Widget positions, etc.) will be lost.
Configure a Widget
To configure the Widget for a certain purpose:
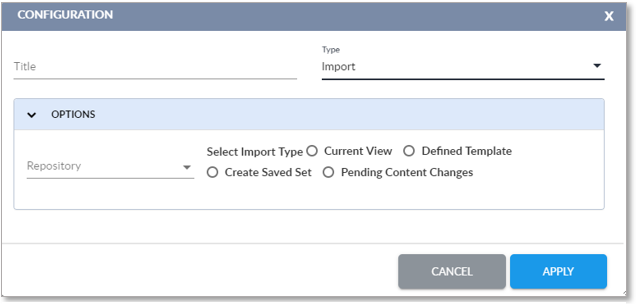
- Click the Widget’s Settings
 icon . A Configuration window will appear.
Configure a Widget
- Enter a title for the Widget in the Configuration window’s Title field. This is the title the Widget will display, so it is recommended that the user select a title that names the Widget and indicates what type of Widget it is, for instance, “Product Repository Status Report”.
- Select the desired type of Widget in the Configuration window’s Type dropdown list. Configuration options applicable to the selected Widget type will appear.
- Configure the Widget as desired. For detailed instructions on configuring different types of Widgets, see the appropriate subsection in the Configuring Widgets section of this document.
- Click the Apply button to save any changes to the Widget or click the Cancel button to exit without saving changes.
WARNING: Remember to click the Save Layout button to save any changes to the Dashboard or all changes (new report Widgets, Widget size changes, Widget positions, etc.) will be lost.
Remove a Widget
To remove a Widget from the Dashboard, click the Close Window icon ![]() on the Widget’s upper right corner.
on the Widget’s upper right corner.
|
Widget Activity Bar |
The Widget will be removed from the Dashboard.
WARNING: Remember to click the Save Layout button to save any changes to the Dashboard or all changes (new report Widgets, Widget size changes, Widget positions, etc.) will be lost.
Change the Size of a Widget
Widgets are displayed on a grid system – when they are repositioned or sized, their location or size will snap to the next gridline. A shaded background box indicates what their new position or size will be. Note that moving or resizing a Widget may cause the other Widgets to be rearranged to make room for it.
To change the size of a Widget, move the cursor to any edge or corner of the Widget. When the double headed arrow appears, click and drag the Widget window to the desired size, then release the mouse button. Depending on the type of Widget, the content of the Widget will be distributed across the new space.
Click the Maximize icon ![]() to expand the Widget to fill the
screen space.
to expand the Widget to fill the
screen space.
Click the Restore icon ![]() to return the Widget to the size it
was before the Widget size was maximized.
to return the Widget to the size it
was before the Widget size was maximized.
|
Widget Activity Bar |
WARNING: Remember to click the Save Layout button to save any changes to the Dashboard or all changes (new report Widgets, Widget size changes, Widget positions, etc.) will be lost.
Move a Widget
Widgets are displayed on a grid system – when they are repositioned or sized, their location or size will snap to the next gridline. A shaded background box indicates what their new position or size will be. Note that moving or resizing a Widget may cause the other Widgets to be rearranged to make room for it.
To move a Widget, position the cursor on the Widget’s Activity Bar. The cursor will change into a picture of a hand. Click and drag the Widget to the desired position. Note that other Widgets will change position to accommodate the new position of the Widget.
|
Widget Activity Bar |
WARNING: Remember to click the Save Layout button to save any changes to the Dashboard or all changes (new report Widgets, Widget size changes, Widget positions, etc.) will be lost.
Refresh a Widget
Note that the content of Widgets do not auto-refresh. The user must refresh a Widget to update the data it displays.
To refresh the contents of a Widget, click the Refresh
icon ![]() on the upper right of a Widget’s Activity Bar.
on the upper right of a Widget’s Activity Bar.
|
Widget Activity Bar |

Copyright 2007, 2023 Precisely