Adding or Modifying Conditions and Expressions

A condition defines the criteria used to determine if a record is an "exception" and needs to be routed for manual review. Typically this means that you want to define conditions that can consistently identify records that either failed automated processing earlier in the dataflow or that have a low degree of confidence and therefore should be reviewed manually.

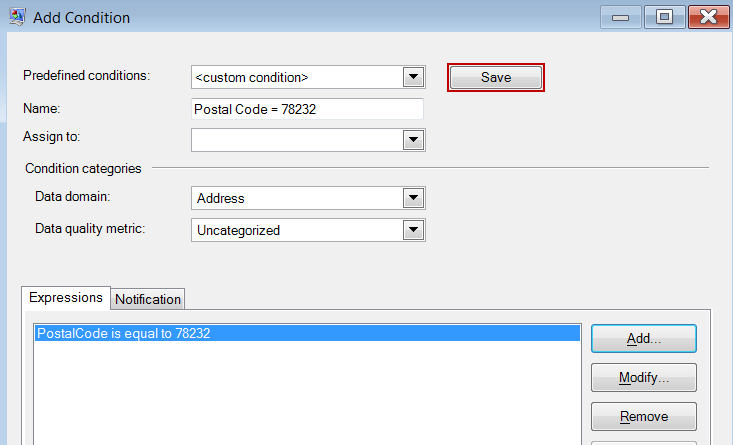
The Exception Monitor stage enables you to create predefined conditions and custom conditions using the Add Condition dialog box. Predefined conditions are available to all dataflows, while custom conditions are available only to the dataflows for which they were created. The configuration process is almost identical for both types; however, to create a predefined condition you must save the condition by completing the fields and clicking Save, shown in the red box below.

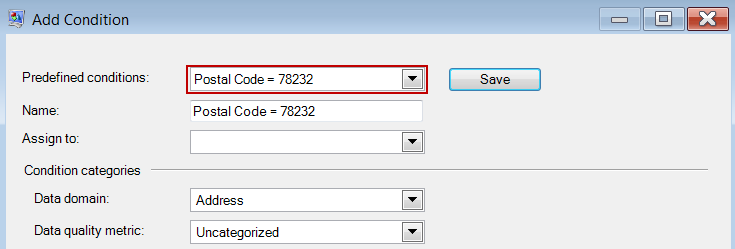
After you have saved a custom condition, the Predefined conditions field changes to show the name of the condition rather than "<custom condition>".

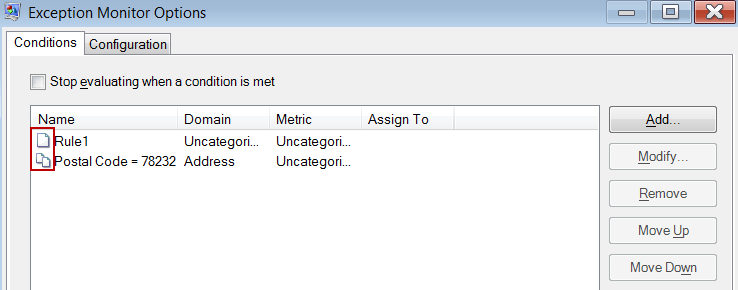
After you have created predefined or custom conditions, they will appear on the Conditions tab of the Exception Monitor Options dialog box. As shown in the following image, the icon next to the name of the condition identifies it as either a predefined condition or a custom condition. A dual-document icon designates a predefined condition, and a single document icon designates a custom condition.

  1. In the Conditions tab of the Exception Monitor Options window, click Add to create a new condition, or Modify to edit an existing condition. Complete these fields:
    • Predefined Conditions—Select a predefined condition or retain "<custom condition>" in the dropdown to create a new condition.
    • Name—A name for the condition. The name can be anything you like. Since the condition name is displayed in the Business Steward Portal, you should use a descriptive name. For example, "MatchScore<80" or "FailedDPV". If you try to give a new condition a name that is identical to an existing condition but with other characters appended to the end (for example, "FailedDPV" and "FailedDPV2"), you will be asked whether you want to overwrite the existing condition as soon as you type the last character that matches its name (using our example, "V"). Say "Yes" to the prompt, finish naming the condition, and when you press OK or Save, both conditions will be visible on the Exception Monitor Options dialog box. The new condition will not overwrite the existing condition unless the name is 100% identical.
    • Assign to—Select a user to whom the exception records meeting this condition should be assigned. If you do not make a selection in this field, the excepion records will automatically be assigned to the user who ran the job.
    • Data domain—(Optional) Specifies the kind of data being evaluated by the condition. This is used solely for reporting purposes to show which types of exceptions occur in your data. For example, if the condition evaluates the success or failure of address validation, the data domain could be "Address"; if the condition evaluates the success or failure of a geocoding operation, the data domain could be "Spatial", and so forth. You can specify your own data domain or select one of the predefined domains:
      • Account—The condition checks a business or organization name associated with a sales account.
      • Address—The condition checks address data, such as a complete mailing address or a postal code.
      • Asset—The condition checks data about the property of a company, such as physical property, real estate, human resources, or other assets.
      • Date—The condition checks date data.
      • Email—The condition checks email data.
      • Financial—The condition checks data related to currency, securities, and so forth.
      • Name—The condition checks personal name data, such as a first name or last name.
      • Phone—The condition checks phone number data.
      • Product—The condition checks data about materials, parts, merchandise, and so forth.
      • Spatial—The condition checks point, polygon, or line data which represents a defined geographic feature, such as flood plains, coastal lines, houses, sales territories, and so forth.
      • SSN—The condition checks U.S. Social Security Number data.
      • Uncategorized—Choose this option if you do not want to categorize this condition.
    • Data quality metric —(Optional) Specifies the metric that this condition measures. This is used solely for reporting purposes to show which types of exceptions occur in your data. For example, if the condition is designed to evaluate the record's completeness (meaning, for example, that all addresses contain postal codes) then you could specify "Completeness" as the data quality metric. You can specify your own metric or select one of the predefined metrics:
      • Accuracy—The condition measures whether the data could be verified against a trusted source. For example, if an address could not be verified using data from the postal authority, it could be considered to be an exception because it is not accurate.
      • Completeness—The condition measures whether data is missing essential attributes. For example, an address that is missing the postal code, or an account that is missing a contact name.
      • Consistency—The condition measures whether the data is consistent between multiple systems. For example if your customer data system uses gender codes of M and F, but the data you are processing has gender codes of 0 and 1, the data could be considered to have consistency problems.
      • Interpretability—The condition measures whether data is correctly parsed into a data structure that can be interpreted by another system. For example, social security numbers should contain only numeric data. If the data contains letters, such as xxx-xx-xxxx, the data could be considered to have interpretability problems.
      • Recency—The condition measures whether the data is up to date. For example, if an individual moves but the address you have in your system contains the person's old address, the data could be considered to have a recency problem.
      • Uncategorized—Choose this option if you do not want to categorize this condition.
      • Uniqueness—The condition measures whether there is duplicate data. If the dataflow could not consolidate duplicate data, the records could be considered to be an exception.
  2. You must add at least one expression to the condition. An expression is a logical statement that checks the value of a field. To add an expression, click Add. To modify an existing expression, click Modify. Complete these fields:
    • Expression created with Expression Builder—Select this option to create a basic expression.
    • Custom expression—Select this option to write an expression using Groovy scripting. If you need to use more complex logic, such as nested evaluations, use a custom expression. For more information, see Using Custom Expressions in Exception Monitor.
    • If other expressions are already defined for this condition, you can select an operator in the Logical operator field. One of the following:
      • And—This expression must be true in addition to the preceding expression being true in order for the condition to be true.
      • Or—If this expression is true the condition is true even if the preceding expression is not true.
    • If you chose to create an expression with expression builder the following fields are available:
      • Field name—Select the field that you want this expression to evaluate. The list of available fields is populated based on the stages upstream from the Exception Monitor stage.
      • Operator—Select the operator you want to use in the evaluation.
      • Value—Specify the value you want the expression to check for using the operator chosen in the Operator field.
  3. Click Add to add the expression. Click Close when you are done adding expressions.
  4. Use the Move Up and Move Down buttons to change the order in which expressions are evaluated.
  5. Click the Notification tab if you want Exception Monitor to send a message to one or more email addresses when this condition is met a specific number of times. That email will include a link to the failed records in the Exception Editor of the Business Steward Portal, where you can manually enter the correct data. If you do not wish to set up notifications, skip ahead to step 11. To stop receiving notifications at a particular email address, remove that address from the list of recipients in the Send notification to line of the Notification tab on the Modify Condition dialog box.
    Note: Notifications must be set up in the Management Console before you can successfully use a notification from within Exception Monitor. See the Administration Guide for information on configuring notifications.
  6. Enter the email address(es) to which the notification should be sent. Separate multiple addresses with commas, spaces, or semicolons.
  7. Designate the point at which you want a notification to be sent. You can have it sent upon the first occurrence of the condition, or you can have it sent when the condition has been met a specific number of times. The maximum value is 1,000,000 occurrences.
  8. Check the Send reminder after box if you want reminder messages sent to the designated email address(es) after the initial email.
  9. Enter the number of days after the initial email that you want the reminder email to be sent.
  10. Click Remind daily if you want reminder messages sent every day following the first reminder email.
  11. Enter the Subject for the email notification.
  12. If you want to save this condition for reuse as a predefined condition, click Save. If you modify an existing condition and click Save, you will be asked if you want to overwrite the existing condition; note that if you overwrite a predefined condition, those changes will take effect for all dataflows that use the condition.
  13. When finished working with expressions, click OK.
  14. Add or modify additional conditions as needed.
  15. Use the Move Up and Move Down buttons to change the order in which conditions are evaluated. The order of the conditions is important only if you have enabled the option Stop evaluating when a condition is met. For information about, see Configuration Tab.
  16. When finished, click OK.