Populating a Fact Table
After you have populated the dimension tables in your data warehouse, you are ready to populate the fact table. You populate a fact table with numeric measurements from tables in the OLTP database.
The following procedure describes how to use Spectrum™ Technology Platform to populate a fact table in your data warehouse. In this procedure, you will create a dataflow reads in source data from a table in your source database, replaces natural keys from the source tables with surrogate keys from the dimension tables, then loads the updated record containing the surrogate keys and the fact data from source tables into the fact table.
-
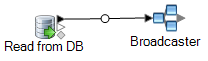
Drag a Broadcaster stage onto the canvas and connect the source stage to it.
Your dataflow now looks like this:
-
Drag one Query DB stage onto the canvas for each dimension table in your data warehouse and connect them to the Broadcaster stage.
For example, if you have four dimension tables in your data warehouse, drag four Query DB stages onto the canvas. Your dataflow would look like this:
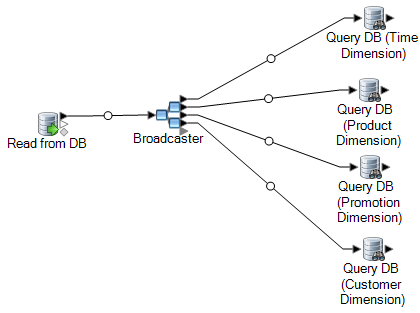
The Query DB stages will be used to look up the surrogate key for each dimension using the natural key from the data source. The surrogate key will then replace the natural in each record being loaded into the fact table.
Tip: You can modify the name of the stage to make it easy to see which table each stage queries. -
Configure each Query DB stage so that it looks up the surrogate key for each natural key from the data source. To do this:
For example, a Query DB stage that looks up the surrogate key for a product name would look like this:
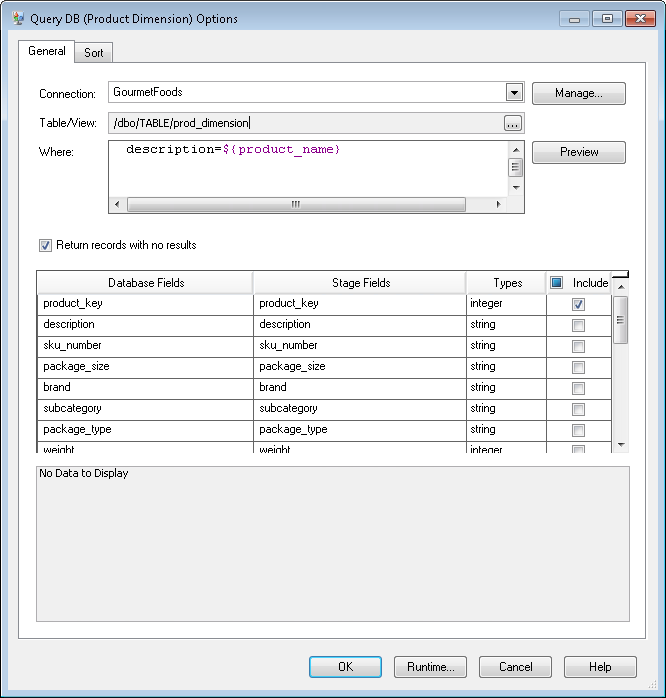
In this example, the query looks up the product key by finding the record in the
prod_dimensiontable where the value in thedescriptioncolumn matches the value in the dataflow fieldproduct_name. The stage returns theproduct_keyfield from the table and adds it to the dataflow, as indicated by the checked box in the Include column. -
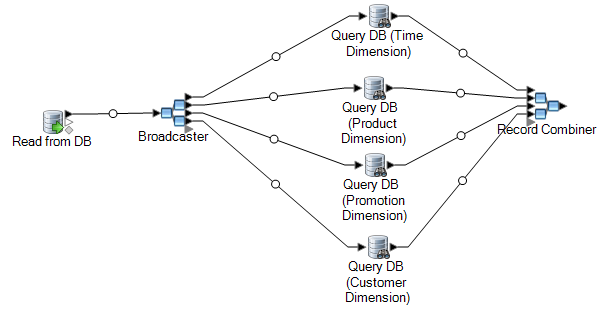
Drag a Record Combiner stage to the canvas and connect all the Query DB stages to it.
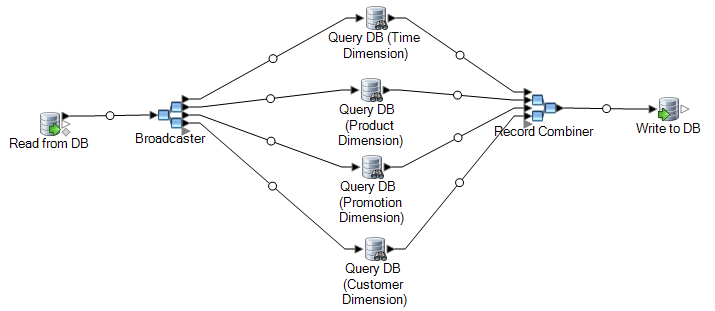
Your dataflow should now look like this:
-
Drag a Write to DB stage onto the canvas and connect it to the Record Combiner stage.
Your dataflow should now look like this:
Example of Replacing Source Data with Keys from the Dimension Table
Consider this record:
March 28 2013,Parsley Garlic Pasta,Mile High Gourmet Market,78.35In this example, there is a date field, followed by a product name (Parsley Garlic Pasta), a customer (Mile High Gourmet Market) and an amount (78.25). The data warehouse has dimension tables for the date, product name, and customer, so the natural keys in the record need to be replaced with the surrogate keys from the dimension tables. To accomplish this, the dataflow would have three Query DB stages, one that looks up the surrogate key for the date, one that looks up the surrogate key for the product name, and one that looks up the surrogate key for the customer.
Each Query DB would have a WHERE statement that looks up the surrogate key.
As a result of these lookups, the record might look like this when written to the fact table:
711,1,15,78.35Notice that the natural keys for date, product name, and customer have been replaced with surrogate keys.