Flattening HL7 Data
HL7 data is organized hierarchically. Since many stages require data to be in a flat format, you may have to flatten the data in order to make the data usable by downstream stages for things like address validation or geocoding.
The following procedure describes how to use a Splitter stage to flatten HL7 data.
-
Connect all the Splitter stages.
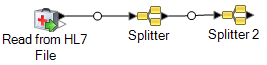
You should now have a data flow that looks like this:
Example
You have the following HL7 data and you want to validate the
address in the PID
segment.
MSH|^~\&||.|||199908180016||RAS^O17|ADT.1.1698594|P|2.7
PID|1||000395122||SMITH^JOHN^D||19880517180606|M|||One Global View^^Troy^NY^12180||(630)123-4567|||S||12354768|87654321
In order to do this you need to convert that address data to flat data so that it can be processed by the Validate Address stage. So, you create a dataflow containing a Splitter followed by a Validate Address sage, like this:

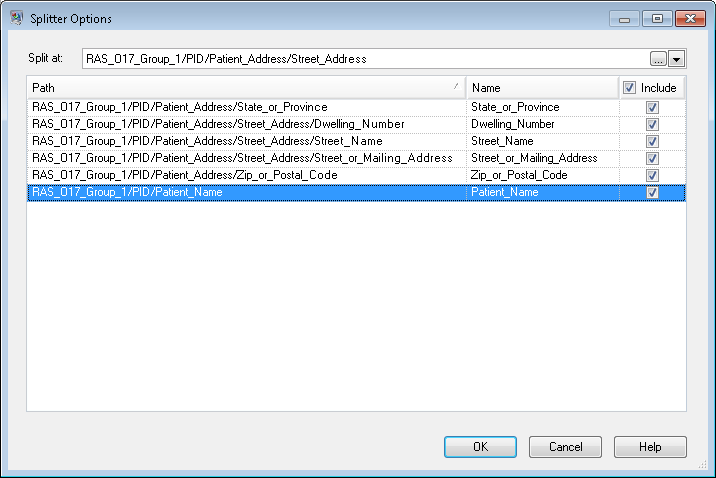
The Splitter stage is configured to split at the PID/Patient_Address/Street_Address component, which converts this data to flat data.
The channel that connects the Splitter stage to the Validate Address stage renames the fields to use the field names required by Validate Address: Street_or_Mailing_Addres is renamed to AddressLine1, State_or_Province is renamed to StateProvince, and Zip_or_Postal_Code is renamed to PostalCode.
In this example, the output is written to an XML file containing this data.
<?xml version='1.0' encoding='UTF-8'?>
<XmlRoot xmlns:xsi="http://www.w3.org/2001/XMLSchema-instance"
    xmlns:xsd="http://www.w3.org/2001/XMLSchema">
    <PatientInformation>
        <Confidence>95</Confidence>
        <RecordType>Normal</RecordType>
        <CountryLevel>A</CountryLevel>
        <ProcessedBy>USA</ProcessedBy>
        <MatchScore>0</MatchScore>
        <AddressLine1>1 Global Vw</AddressLine1>
        <City>Troy</City>
        <StateProvince>NY</StateProvince>
        <PostalCode>12180-8371</PostalCode>
        <PostalCode.Base>12180</PostalCode.Base>
        <PostalCode.AddOn>8371</PostalCode.AddOn>
        <Country>United States Of America</Country>
        <Patient_Name>
            <Family_Name>
                <Surname>SMITH</Surname>
            </Family_Name>
            <Given_Name>JOHN</Given_Name>
            <Second_and_Further_Given_Names_or_Initials_Thereof>
             D
            </Second_and_Further_Given_Names_or_Initials_Thereof>
        </Patient_Name>
    </PatientInformation>
</XmlRoot>