Write to Model with flat file input
The Write to Model dataflow that uses a flat file for input looks like this:

Configuring Read from File
- Employee ID
- Name
- Title
- Manager ID
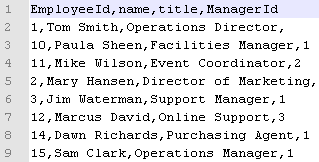
Notice that two employees do not have manager IDs. These employees (Tom Smith and Mary Hansen) are both directors and therefore have no manager in this exercise. All other employees have a number in the ManagerID field that refers to the employee who is their manager. For example, Paula Sheen's record has "1" in the ManagerID field, indicating that Tom Smith is her manager.
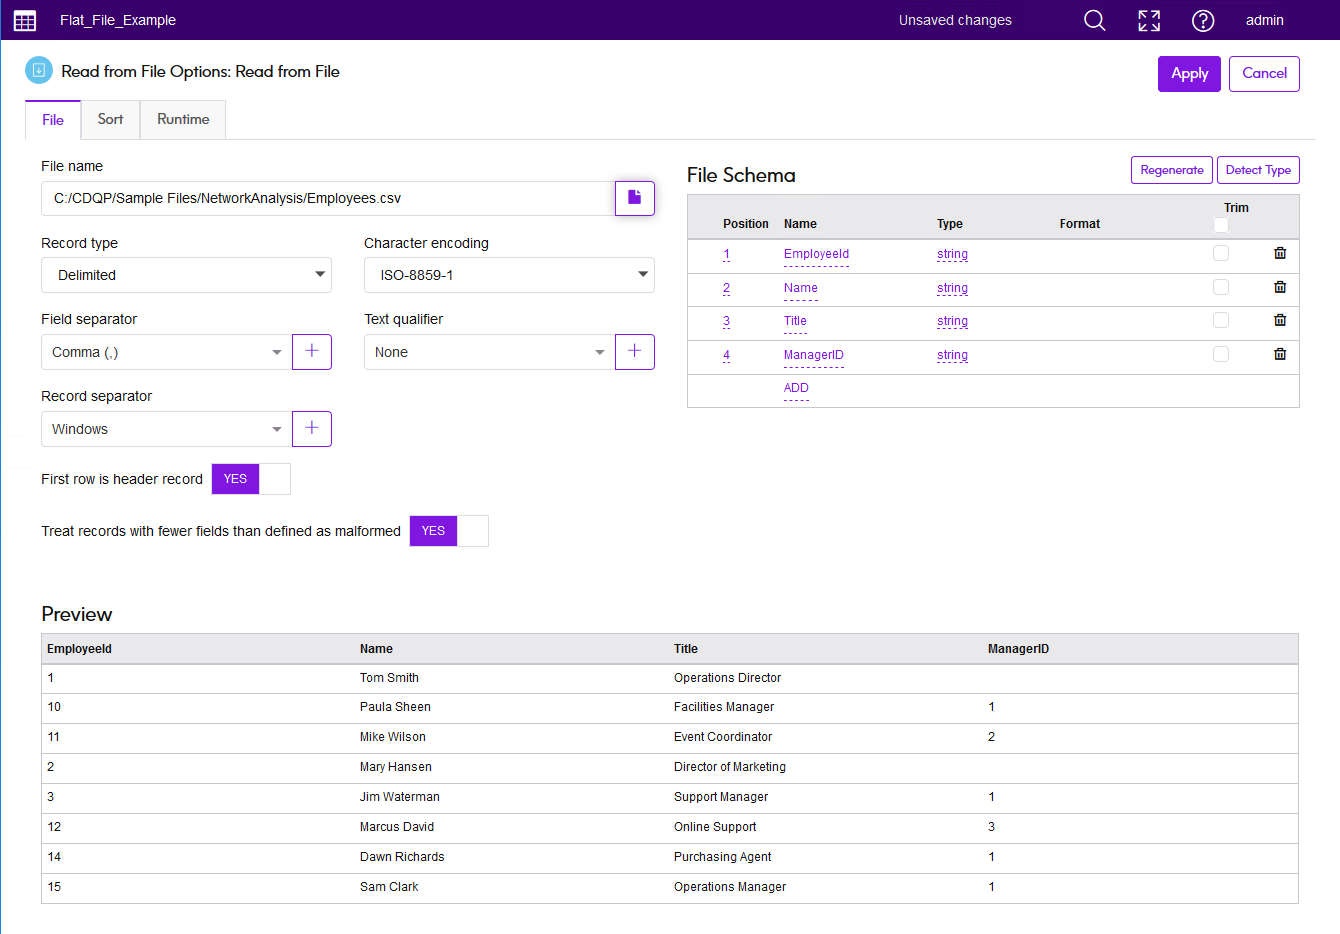
The Read from File stage options appear as follows when the stage is configured to work with this input file:
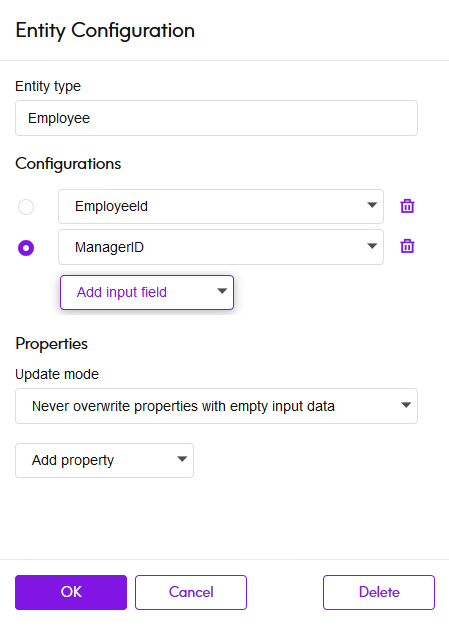
Configuring Write to Model
Next we configure the Write to Model stage. After naming the model "Employees" we configure the stage to include the entities and relationships that will comprise the model.
Because we are creating a model that is similar to an organization chart, our entities are employees who are assigned numeric IDs. The first thing we do is drag New Entity Type to the canvas. In the Entity type box, we type "Employee". Under Configurations we select "EmployeeId". Under properties we add Name and Title as we want those fields brought in as properties for the Employee entity type. In each case we leave the Property name set to the same as the Source field.
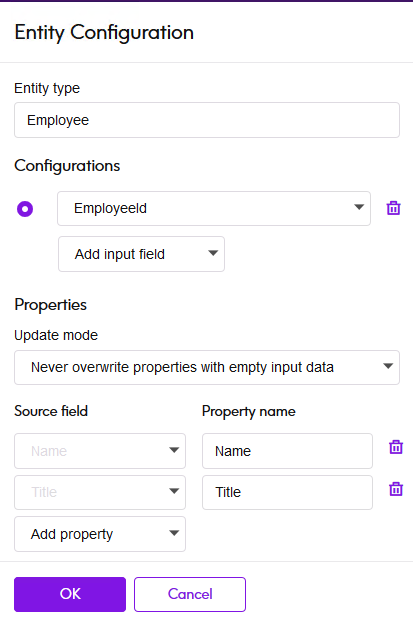
In the Update mode box, we configure the processing options for the configuration. This option specifies whether properties can be updated in the model once they are in place and if they should overwrite existing data. For instance, in our example, Mary Hansen would be encountered twice because on record 4, she is referred to as an employee, but on record 3, she is referred to as a manager. When Write to Model processes Mary for the second time, it could potentially overwrite or remove data that was populated the first time that it processed Mary Hansen. By selecting Never overwrite properties with empty data (which is the default), any updates that occur will create new properties and overwrite existing properties, but they will not blank out properties that were set in the first instance and missing in a subsequent instance. This also ensures that the order in which these records are read has no impact on the model.

If we selected Always update properties, data would always be overwritten and only the last set of property data would be reflected in the model. If we selected Update properties unless all input is null, data would always be overwritten unless every field in the new record were blank. Finally, if we selected Never overwrite non-empty properties, the first set of data for any given field would be retained, unless that field were blank. In that case, the first set of non-blank data would be retained. In this case we select the default, Never overwrite properties with empty input data.
We repeat these steps to "ManagerId" as a second configuration. Although ManagerID and EmployeeID are different fields in the input file, both are configurations of "Employee". If we set ManagerID to a different type, the model would contain two entities for mid-level managers. For example, Jim Waterman would have an entity as an employee and an entity as a manager. With both entities being set to "Employee" as the type, mid-level managers such as Jim will have just one entity in the model. That entity will have other entities coming into it (from employees) and another entity going out of it (to their respective manager). Note that we do not add properties to the ManagerID entities because the values in those fields (name, title) apply to the employees, not the managers. Also, we accept the Never overwrite properties with empty data default selection on the Updates tab.

We click OK to save this entity type. This displays the Employee entity type on the canvas.
Now we configure relationships. The first thing we do is click the Employee entity type and drag a relationship line to itself. This displays the Relationship Configuration panel. The relationship between entities reflects the reporting structure (employee to manager). In the Relationship label box, we enter the text, "reports_to". Under connections, we select "Employee:EmployeeId->Employee:ManagerID". This defines the EmployeeID as the source and ManagerID as the target of a relationship. We could reverse the relationship by specifying "manages" instead of a "reports_to", in which case we would choose the reverse permutation of source and target fields. Once again we choose to Never overwrite properties with empty input data.
The completed Relationship Configuration is as follows:
The configuration of this dataflow is complete and results in the following model, as depicted on the canvas.
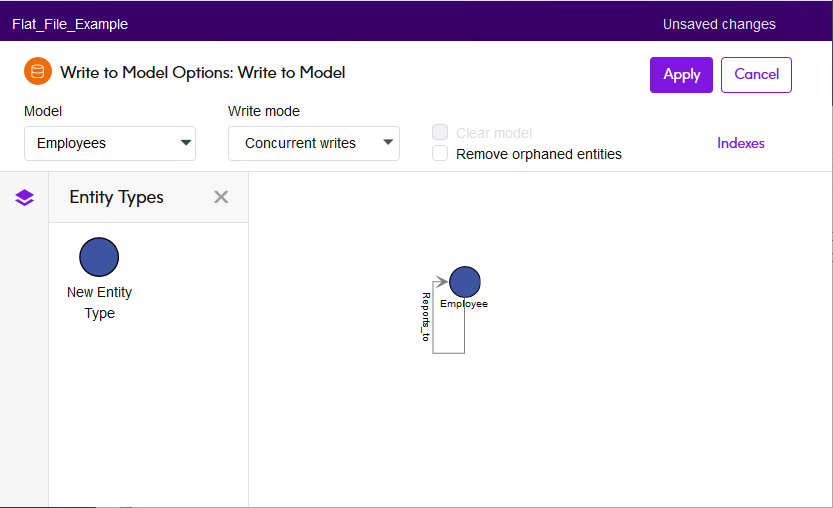
We click Apply to save the model.
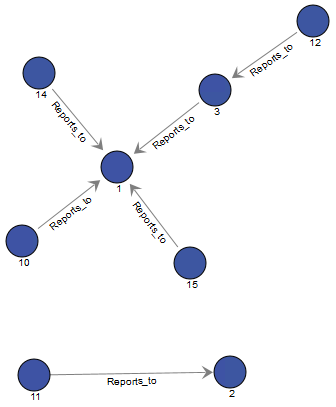
When we run the flow, this results in the following graph database as viewed on the Context Graph Visualization Canvas ![]() . On the Canvas you can view properties by clicking an entity.
. On the Canvas you can view properties by clicking an entity.
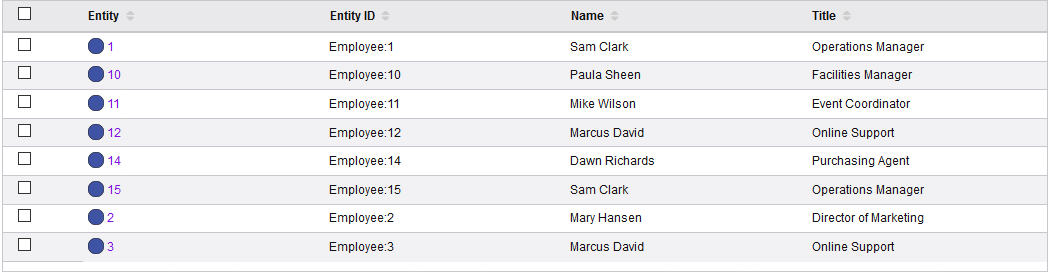
Another way to view this same data is in the Context Graph Visualization Table View ![]() . In Table View you can view property values simultaneously for multiple entities.
. In Table View you can view property values simultaneously for multiple entities.