Creating Customized Brand for SSA
From SSA 12.0 onwards, a new file brand.css has been introduced through
which you can customize banner and branding for SSA.
- HTML banner
- Brand.css
HTML Banner
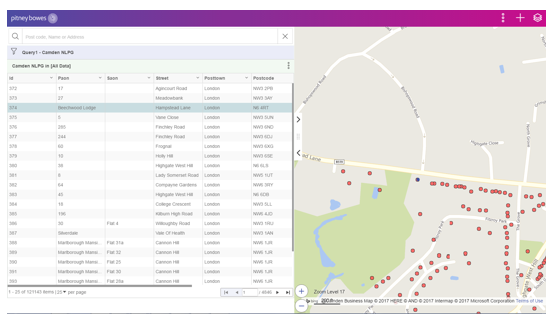
This is in reference to section that appear on top part of the application. You can use this space to add your organization’s logo and apply colors in accordance with your brand guidelines.
For reference, refer to: Customerconfigurations > analyst > theme > banner > default
Duplicate the default folder containing Pitney Bowes banner and edit the index.html file to suit your brand identity. You can create your own HTML banner as well. The HTML banner that you create would be referred in the brand.css file.
Brand.css
We have introduced a .css file to manage all branding related aspects
through brand.css. Through this file you are given ability to:
- change color related properties of SSA’s UI elements to suit your organization’s brand.
- choose if banner should be visible or not,
- provide reference to the banner file to be used in your brand,
- optionally provide a separate reference for banner on mobile devices,
- choose if navigation buttons i.e. “Options”, “Add” and “Legends” button should appear within the banner or on the map
You can find the brand.css file in the default brand’s folder:
Customerconfigurations > analyst > theme > branding > default > brand.cssOr you can also download it from here.
Creating a New Brand
- To create a new brand for mobile-first SSA, go to the branding folder.
Customerconfigurations > analyst > theme > branding > default > brand.css - Create a new folder, you can provide a suitable name for the folder.
- The folder name is the brand name you can reference for a map-configuration from SSA admin console.
- Copy the
brand.cssfile into the new brand folder you created.
Creating a new brand Using brand.css to customize your brand
- No
Banner
Set the following
.cssproperties to "display:none;" in case you do not want to display banner#banner { display: none; } #mobileBanner{ display: none; } - With
banner
Set the following
.cssproperties to "display:BLOCK;" in case you want to display banner.#banner { display: BLOCK; } #mobileBanner { display: BLOCK; } - Referencing Banner
You can refer to the HTML banner within the
brand.cssfile by modifying the path of the file (update only the BOLD section)./* Banner_URL = *** /theme/banner/default/index.html *** */Note: Please be careful while updating this property, do not remove the comments or change the ***, as our java-script program looks for the *** to pick the html file's path -
Referencing Mobile
Banner
You can refer to a different banner in the same brand for mobile devices.
For setting different banner on mobile, set following property-(update only the BOLD section)
/* Mobile_Banner_URL = **** /theme/banner/default/index.html **** */If this property is not specified, the banner reference Step a will be used for mobile as well.
Note: Please be careful while updating this property, do not remove the comments or change the ****, as our java-script program looks for the **** to pick the HTML file's path. -
Position of Navigation
Buttons
The navigation buttons can be moved below the custom banner/ default banner by modifying the “top” css property according to the height of banner in px as below:
#navigationIcon.iconContainer {
top: 50px;
}
Note: The height of default PB banner is 50px. -
Changing color property of UI
elements
We have added instructions as comments within the brand.css file so that it provides you contextual help for each of the UI property in the
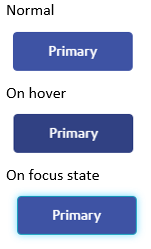
.cssfile. It allows you to modify following UI elements.- Primary button
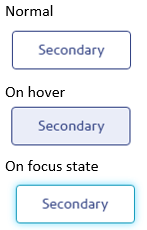
- Default button
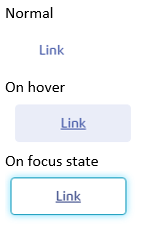
- Link button
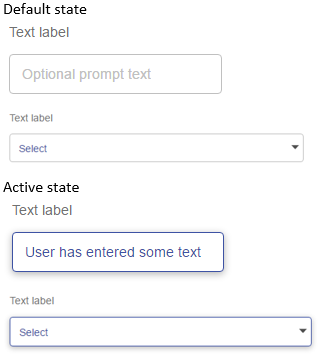
- Form Elements
- Accordions
- Tables
- Token/ Badge color

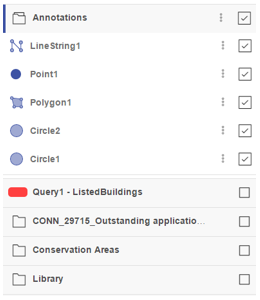
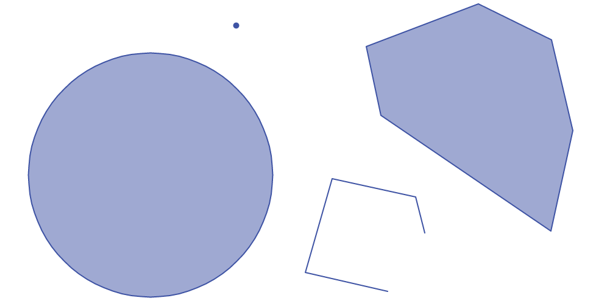
- Default annotation color
- Tabs (active state)

- Date Picker
- Primary button
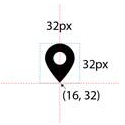
Changing the locator marker for the map in your custom brand