Applies to:
- Winshuttle Foundation
Adding a SQL Server data connection to Winshuttle Composer

The data connection (the table name) appears in the solution tree panel, under Data Connections.

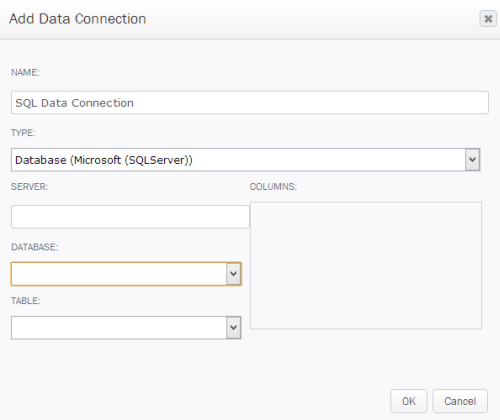
- On the ribbon, click the SolutionTab, and then click Add Data Connection.
- Under Name, type a descriptive name for the connection. (If you don’t specify a name, the name will be based upon the table selected from the data source.)
- Under Type, click the drop arrow and select the type of database–in this case, Database (SQLServer).
- In the Server Field, type the name of the server where the database resides.
- You will be prompted for login credentials. At the prompt, under Authentication Type, click the drop arrow and select the authentication type (SQL Server authentication or Windows authentication).
- Type the username and password, and then click OK.
- Once the connection is complete, under Database, click the drop arrow and select the database.
- Under Table, click the drop arrow and select the table that you want to access.
- Under Columns, check the boxes for the column(s) you want to access.
- Click OK.
Note: When using Windows Authentication, the SharePoint Application Pool Identity must have read permissions for the database being accessed by the data connection.
