Attribute Security Filter Management
For more information on attribute security filters, see EnterWorks 10 Basics.
A repository’s attribute security filters are managed in at the profile level – all repositories based on a profile will have access to all the profile’s attribute security filters.
To manage attribute security filters:
- Open the repository’s Repository Dashboard, (see Repository Dashboard).
-
Scroll down the Repository Dashboard to the Attribute Security Filter pane.
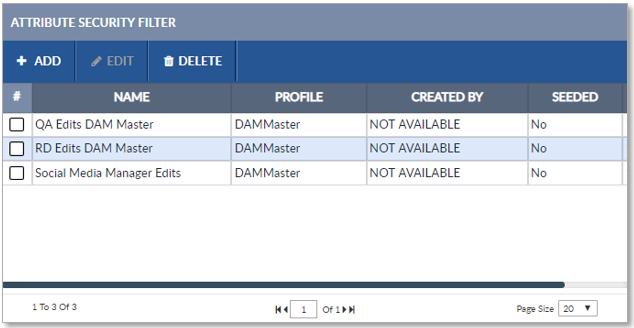
Attribute Security Filter Pane
- To delete an attribute security filter, select it and click the Delete button on the Attribute Security Filter pane’s Activity Bar.
- To add an attribute security filter:
- Click the Add button on the Attribute Security Filter pane’s Activity Bar. The new filter will be opened in a Manage Security Filter tab.
- Edit the new attribute security filter as described in Edit an Attribute Security Filter.
Edit an Attribute Security Filter
To edit a repository’s attribute security filter:
- Open the repository’s Repository Dashboard, (see Repository Dashboard).
- Scroll down the Repository Dashboard to the Attribute Security Filter pane.
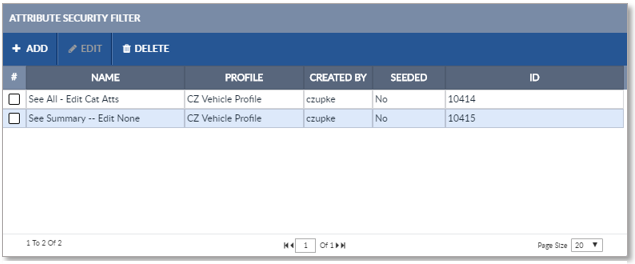
Attribute Security Filter Pane
-
Select the desired attribute security filter and click the Edit button on the Attribute Security Filter pane’s Activity Bar. The attribute security filter will be opened
in a Manage Security Filter tab, in the Details page.
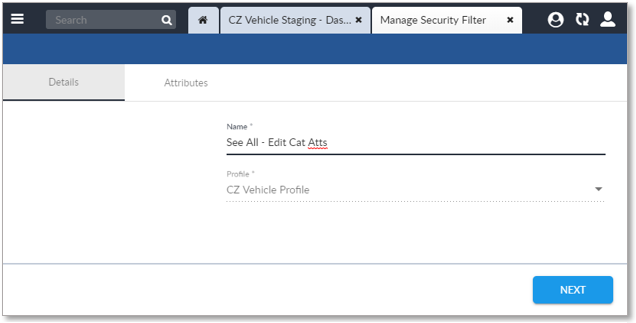
Attribute Security Filter Details
-
The Details page has two configuration fields:
- Name: (Required) The name of the attribute security filter. It is a good practice to make the name of the security filter indicate its function.
- Profile: (Not editable.) Since we are editing the security filter through a Repository Dashboard, the repository’s profile is already known.
Edit the name of the attribute security filter as desired, then click the Next button. The Attributes tab will open.
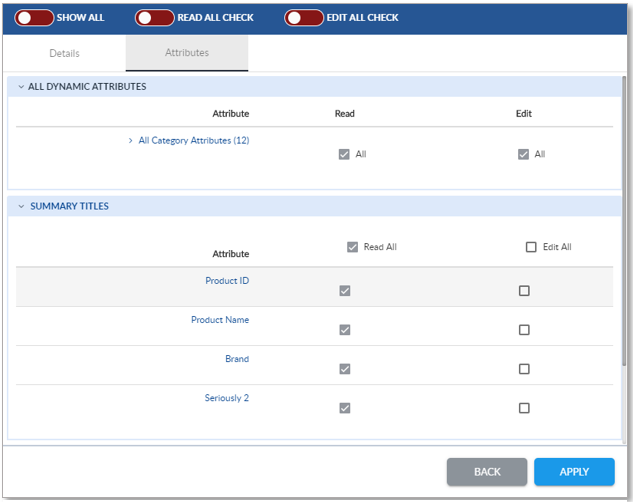
Attribute Security Filter Attributes
-
The repository’s attributes are displayed in their attribute tabs.
Expand the attribute tabs to display the security settings for the
attributes.
The Read column of checkboxes controls read access for the list of attributes; the Edit column controls edit access.
- Check an attribute’s checkbox to grant read or write access; uncheck it to remove access.
-
There are three toggles in the Attributes’ page’s Activity Bar:
- Show All: Toggle this to On (green) to expand all attribute tabs and show all attributes. Toggle this to Off (red) to collapse all tabs and hide all attributes.
- Read All Check: Toggle this to On (green) to enable read access on all attributes, whether they are currently displayed or not. Toggle this to Off (red) to remove read access on all attributes, whether they are currently displayed or not.
- Edit All Check: Toggle this to On (green) to enable edit access on all attributes, whether they are currently displayed or not. Toggle this to Off (red) to remove edit access on all attributes, whether they are currently displayed or not.
- If you have selected a profile that includes an attribute with a data type of code set, if the definition of the code set is set to Include Owners, an additional column titled Owner Edit will appear. A check in this column means that only the user defined as the owner of the code value will have edit permission to item data containing that value.
- To save your changes, click the Apply button.
- When you are finished editing the filter, close the Manage Security Filter tab.
The attribute security filter is now ready to be used for setting user group access to a repository’s attributes. (See Repository Security Management.)

Copyright 2007, 2023 Precisely