
Setting up TLS for the Server-IBM i Agent Connection
The use of TLS encryption is optional.
These steps assume creating a separate key database for the certificates and keys. If you want to use an existing key database, consult IBM’s documentation for creating host and client certificates and keys using an existing database.
Part 1: Prerequisites and Logging in
To create and manage certificates, the IBM i LPAR must have these installed:
- Digital Certificate Manager
- IBM HTTP Server for i
Follow these steps:
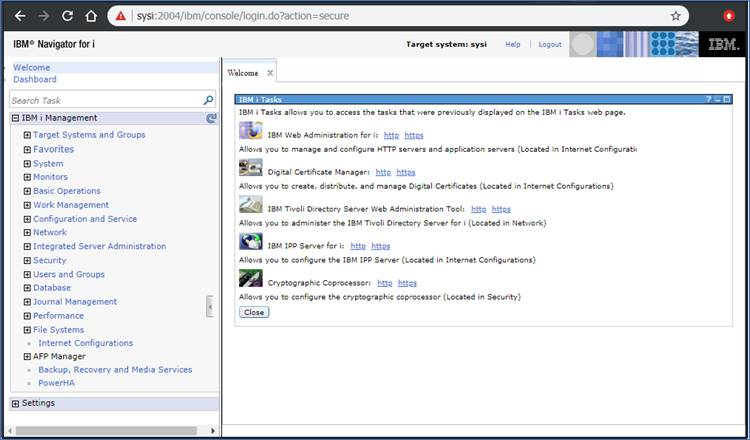
- From a web browser, load the IBM Navigator for i page of the IBM i LPAR.
- Log in using an IBM i user profile that has *ALLOBJ and *SECADM authority.
- Verify that the HTTP Administration server is running by selecting System -> Network -> Servers -> TCP/IP, then right-click HTTP Administration to start the server if it is not already running.
- Return to the Welcome page and click IBM i Tasks Page.
-
Select Digital Certificate Manager from the products listed.
Part 2: Creating the Certificate Store
-
Select *SYSTEM to create the SYSTEM certificate store. (If the *SYSTEM store has already been created on this system, it will not appear on this list.)
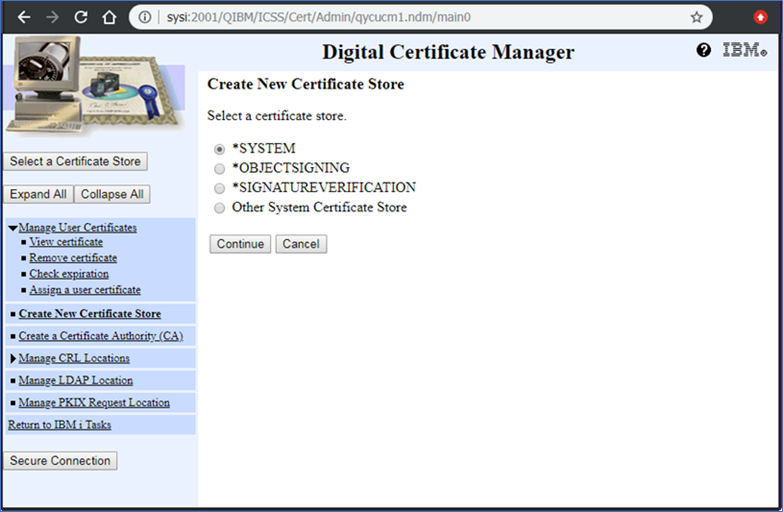
- Select No to create a certificate in the store.
- Enter a password for the store. This password will be used in Part 4: Creating the Certificate Authority.
- After the store has been created, refresh the browser window then click Select a Certificate Store to work with the *SYSTEM store.
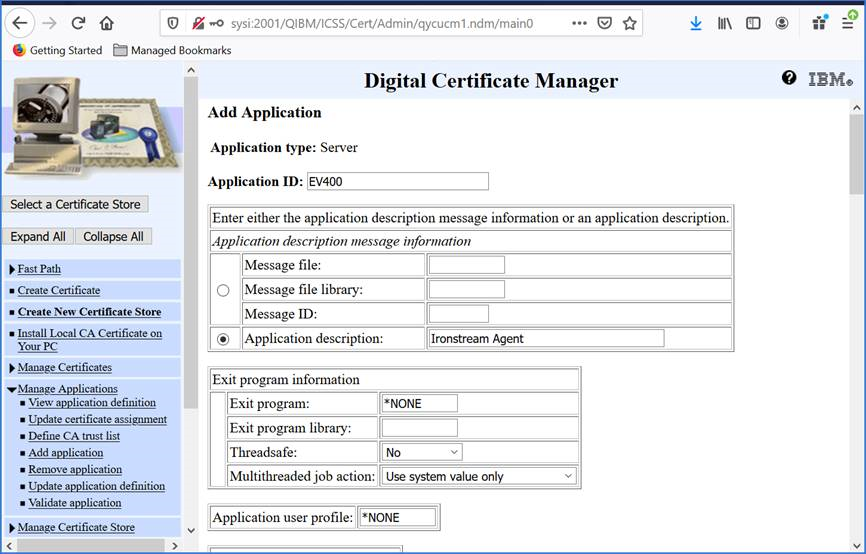
Part 3: Creating the Application
- From the Digital Certificate Manager menu, select Manage Applications -> Add application.
- Select Server application.
- Fill in the Application ID as EV400 and fill in the Application Description. Use the defaults for all other fields.
-
At the bottom of the page, click Add.
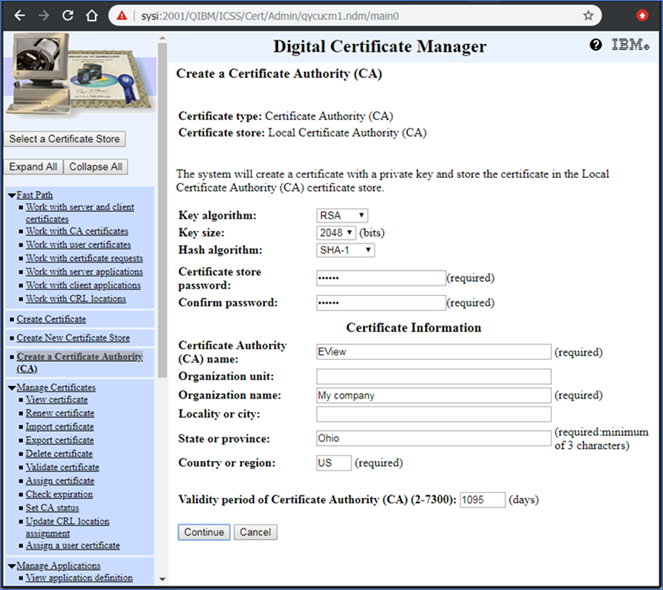
Part 4: Creating the Certificate Authority
- On the left pane of the Digital Certificate Manager, select Create a Certificate Authority (CA).
-
Fill in the fields as required, then click Continue.
- Click the Install Certificate link to download the certificate locally. This downloaded file will be used in Part 6.
-
Click Continue. On the next Policy Data page, click Yes to authorize the CA to issue certificates to users.

-
Select the applications to trust this Certificate Authority and click Continue.

- On the next page, click Cancel to finish the CA creation (without creating the *OBJECTSIGNING store).
Part 5: Creating the Certificate
- From the main Digital Certificate Manager page, click Select a Certificate Store and select the *SYSTEM CA to set up a certificate.
- Select Create Certificate from the left menu list.
- On the Create Certificate page, select Server or client certificate.
- On the Select Certificate Authority page, select Local certificate Authority (CA).
-
On the Create Certificate page, fill in the fields for the certificate. The Common name field must contain the fully qualified name of the IBM i LPAR. Then click Continue.
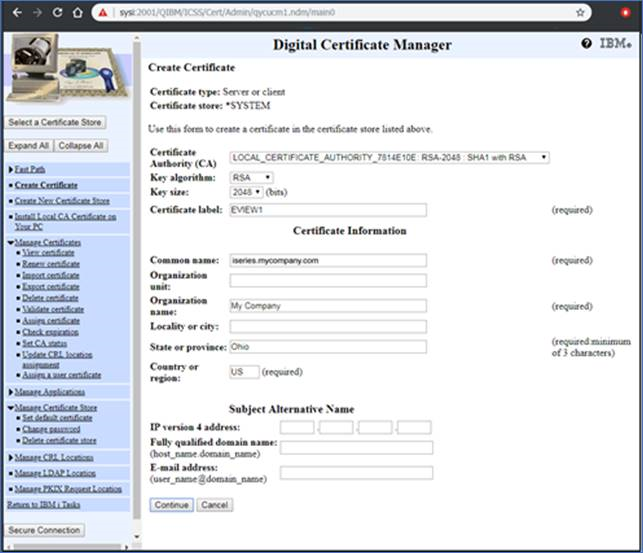
- Select all of the applications to use this certificate (including the EV400 application defined in Part 3 above) and click Replace.
Part 6: Set TLS Parameters in the Configuration Tool
-
From a command prompt, use the openssl command to convert the file downloaded in Part 4 to a PEM encoded certificate.
openssl x509 -in [downloaded file] -inform DER -out [converted name]
For example:
openssl x509 -in LOCAL_CERTIFICATE_AUTHORITY_7814E10E.CACRT -inform DER -out ca.pem
- Use the Configuration Tool to check the TLS checkbox and enter the location of the PEM file to enable TLS communication for the defined IBM i LPAR.
- Click the Distribute button to distribute the configuration to the Ironstream Agent for IBM i.
- Restart the EVSBS subsystem on the IBM i LPAR and the Hub service on the Windows/Linux system to establish the connection using TLS.