Applies to:
- Winshuttle Foundation
5-1. Add approval and revision workflow loop
Back to
Steps in this phase
In this step we will add an Approval loop to the workflow.
On this page
Prerequisite: Use the solution(s) you have created in in the previous phases of the tutorial.
Add an Approval
- In Composer, click the Workflow tab.
- On the ribbon, click Loop Block.

- In the workflow Canvas area, click and draw to draw the loop. (This will open the New Loop Wizard.)
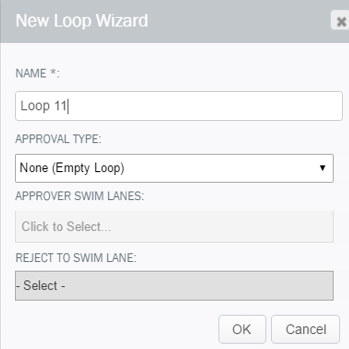
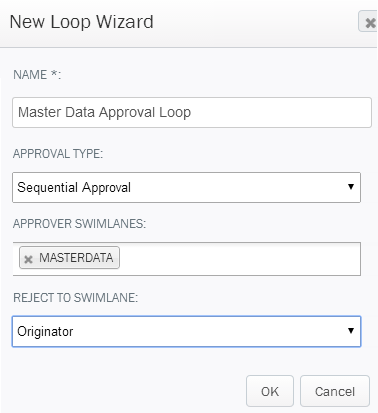
- In the New Loop Wizard, enter the following information:
- Name: The name for the Loop Block. Enter Master Data Approval Loop.
- Approval Type: Click the arrow, and then select Sequential Approval from the menu.
- Approver Swim Lanes: Click the arrow, and then select the Masterdata Swim Lane from the menu. Note: You can add multiple approver swimlanes.
- Reject to Swim Lane: Click the arrow, and then select the Originator Swim Lane from the menu.
- Click OK. You should see a tab in the workflow Canvas named Master Data Approval Loop.

Create a view for form re-submission
For the last part of this phase, features will be added to enable the originator to cancel a rejected request.
To do this, a new view called Resubmit will be added to the form. Then a group and checkbox will be added to the view so the form can be canceled by the originator if the form is not approved.
(To save some effort we'll simply duplicate the Originator View, rename the duplicated view to Resubmit, and then make the necessary additions to the Resubmit view.)
- In Composer, click the Form tab.
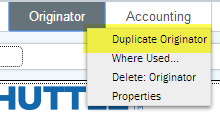
- In the Canvas area, on the view tab bar, right-click the Originator view, and then click Duplicate Orignator.
- Click the newly added tab to select it.
- In the Properties pane, on the Properties tab, type Resubmit for both the name and label of the new view.
Tip: Change the Label first because the Name will be updated automatically with the appropriate underscore ( _ ) characters. This ensures there are no spaces in the technical name.

Add a cancellation check box
In the last part, a cancellation checkbox and some formatting applied (for improved usability) to the Resubmit view created in the previous section.
- Make sure you are in the Resubmit view.
- On the ribbon, click New Group, and then click No, this View Only.
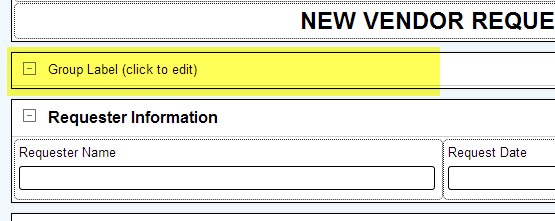
- The new added group appears at the bottom of the form. Scroll to the bottom of the form, right-click the new group, and then click Move Up. Repeat this until the new group is located just above the Requester Information group, as shown below:
- Click the new group added in the previous step. In the Properties pane, under General Settings, type Cancel Request in the Label. (The Name will automatically update). Then set the following properties under General Settings:
- Read Only: Set to False.
- Show Labels: Set to True.
- Columns: Set to 1.
- Show Header: Set to True.
- Collapsible: Set to Non-collapsible.
- In the Properties pane, click Elements.
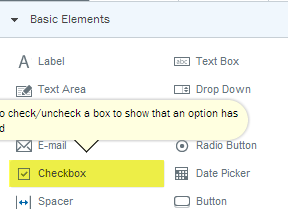
- Make sure the Cancel Request group is selected, and then click Checkbox.
- In the form Canvas, click the newly added checkbox.
- In the Properties pane for the checkbox, under General Settings, set the properties for the checkbox as follows:
Tip: Change the Label first, and the Name field will be updated automatically with the appropriate underscore ( _ ) characters added.

- Name: Enter Do_you_want_to_cancel_this_request?
- Label: Enter Do you want to cancel this request?
- Column Span: 1
- Click the checkbox. Under General Settings, set the following properties:
- Required: False
- Read Only: False
- To make the cancellation text more noticeable, we will increase the size of the text. Click the text to select it.
- On the ribbon, click the Grow Label Size icon 3 times.

The end result should look something like this:

- Save your work.
- Click on the Workflow Tab, and then select the Master Data Approval Loop.
-
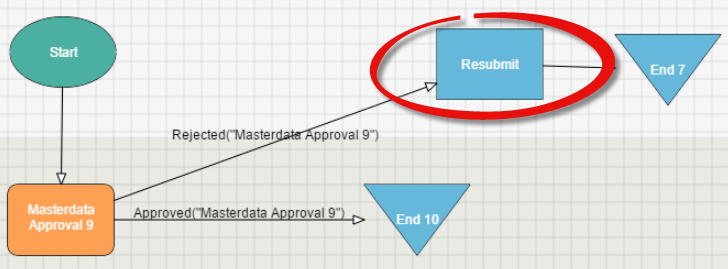
Click the Activity node that was automatically placed in the Originator swimlane. Name the Activity Resubmit.
-
Scroll down the properties. Under the Form heading, assign the newly created view to the Resubmit activity.
-
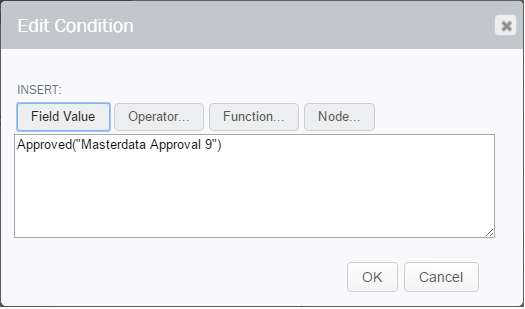
Click anywhere on the Master Data Approval Loop canvas, and then click [...] to open the Condition for the loop.

- Notice that Composer automatically creates a condition for the loop to end based on selections made in previous steps, i.e. the loop will end when the Master Data approval task is approved.
-
Add another condition that cancels the request and process if the Originator checks a box to cancel the request. To do this, click in the box, and then choose the ‘Or’ Operator.

-
Choose the field named Do_you_want_to_cancel_this_request_form. Add the Equal operator and set the type to true.

- Save, deploy and test the solution.
Tip: You can change the name and label at the same time by clicking Group Label (click to Edit) in the group name.
