Applies to:
- Winshuttle Foundation
Lookup
With a Lookup element you can create and customize a search against a data source (SQL Server, for example). In addition:
- You can drag and drop a Lookup element onto a cell in a Repeating Table to bind the lookup to the table cell.
- You can drag and drop a Lookup element onto a Repeating Group to bind the lookup to that group.
Lookup element properties
Property |
Description |
|
Allow Multiple Selections |
Allows you to select multiple listings from the returned query results when the pop-up option is selected. |
|
Append To Repeating Group |
Appends results to an existing repeating group. |
|
Auto Run At End |
Query runs when the form is submitted. |
|
Auto Run At Start |
Query runs when the form starts. |
|
Auto Wildcard End |
Automatically appends a SQL wildcard character to the end of the where clause. |
|
Auto Wildcard Start |
Automatically appends a SQL wildcard character to the beginning of the where clause. |
|
Autorun Lockouts |
When using multiple Ws.Lookup elements that run when a field values change, circular references can occur if one Lookup element is attempting to update a field that is being used by another Lookup element (i.e. causing an infinite loop). The Autorun Lockout property can be set to a comma-separated list of field names that are referenced by other Lookup elements. This will enable the Lookup element to run and it will not update the fields in the comma-separated list. |
| Clear Fields When Empty Return | Checking this box will cause form fields to be cleared if the query/lookup element does not find any results (data/rows) to display. |
|
Data Source |
Name of the data source or ODBC connection string. |
|
Display Columns |
Comma-separated list of columns to display in the pop-up selection window. If a Web service data source is configured, this value also serves to name the columns of data returned from the Web service. |
|
Height |
The height of the popup window. |
|
Image URL |
The URL to an image to use when displaying the Lookup element button in the form. |
|
Interactive |
How the query data is shown.
Note: The properties "Auto Run At Start”, "Auto Run At End" and "Run When Field Changes” are not applicable to the "Interactive" option. |
|
Minimum Search Key Size |
Minimum character size for the query term. |
|
Name |
A descriptive name for the element. |
|
Ordinal |
The order to use when running this Ws.Lookup element. |
|
Raw "Where" Clause |
Allows you to specify a custom where clause for a SQL statement. If you are using Search Column, Search Operator, and Search Key Field XPath, it will result in a where clause that includes only a single condition. If you want more conditions, you must specify a custom where clause. |
|
Run Query Only |
Runs only the query portion of a .Lookup element when a form field value is changed, skipping the step where another form field’s value is set. The default value is off. |
|
Run When Field Changes |
Reruns the lookup query when a specific field is changed. |
|
Search Column |
Name of the database column that is being queried. |
|
Search Key Field XPath |
InfoPath field containing the value to use in the constructed query. |
|
Search Operator |
Operator to use in the query (valid values are <, >, =, <=, >=, like). |
|
Set Fields |
Comma-separated list of query return values and fields to set in the form. The format is <display column name>=<field name>,<display column name>=<field name>,... . |
|
Table |
Name of the table if the data source is an ODBC connection string. |
|
Table Title |
The title to give the table within the pop-up window. |
|
Width |
The width of the pop-up window. |
|
Window Title |
The title to give the pop-up window. |
The following procedures show you how to map fields from an external data source--for example, a SharePoint List--to populate a drop-down list in a form. This can be useful for forms where you want the form to look up data (such as an approved vendor list for a purchase order) to populate a drop-down box on a form.
Adding and configuring a Lookup element
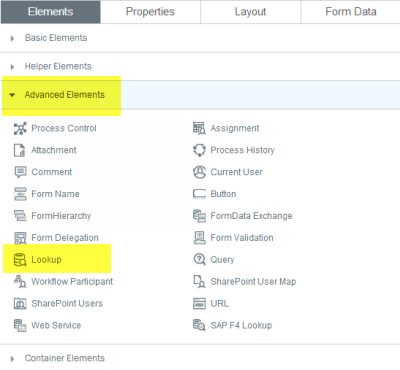
- In the Properties pane, click Elements.
- Click Advanced Elements.
- Click Lookup element.

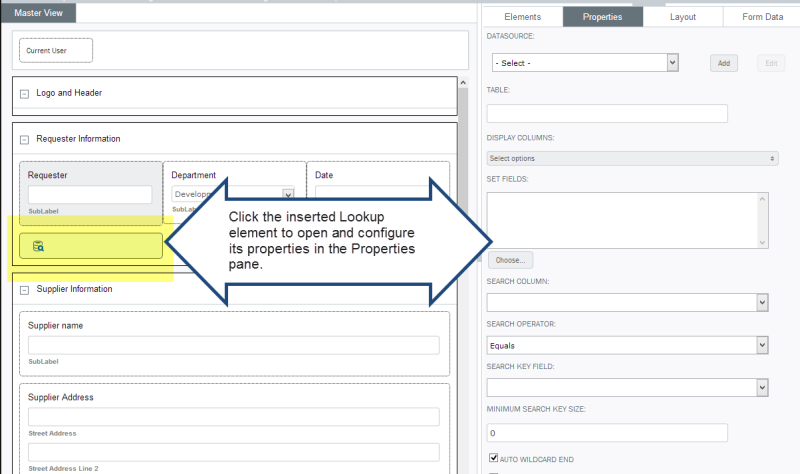
Tip: Place a Lookup element next to the element that will be associated with the lookup. (For example, place a Company Lookup next to the Company field.)
- In the canvas, click the inserted Lookup element to open the Properties for it in the Properties pane.

Connecting a Lookup element to a data source
Back to top- Click the Lookup element you want to connect to a data source.
- In the Properties pane, on the Properties tab, under Data Source, click the drop arrow.
- Select the data source from the drop-down menu.
- Under Display Column, click the drop arrow.
- Select the columns you want the Lookup element to access. The selection(s) will be displayed as the options in your form's drop- menu.
- Under Set Fields, click Choose.
- In the Set Fields dialog box, under Field, open the drop-down menu.
- In the drop-down menu, select the field that you want to assign to the column.
- Under Column, open the drop-down menu, and then select the column you want to assign to the field.
- Click Add.
- Repeat steps 6-10 for each field/column you need to map.
- Click OK.
SharePoint data connection sorting: If connecting to a SharePoint data connection, the Lookup will respect Composer sorting fields, if defined, and fall back on SharePoint list settings or the row ID as defined in the SharePoint data connection behavior.
Connecting a Lookup element to a form field
Back to top- In the canvas, click the Lookup element.
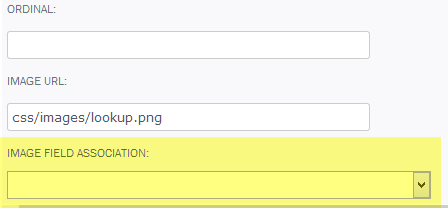
- In the Properties pane, scroll down until you see Image Field Association.

- Under Image Field Association, click the drop arrow to view a list of fields in the form.
- Select the form field to which you want to attach the lookup field.
