Record Validation
For a detailed description of the record validation process or an overview of the terms relating to record validation, see EnterWorks 10 Basics.
Set Record Validation Level
To set the required level of validation for one or more records, first open the repository. Open the Feature Sidebar, select the desired folder, and select the desired repository. The repository will be opened in a Repository View. For more detailed information on repositories, see the Repositories section in this document.
|
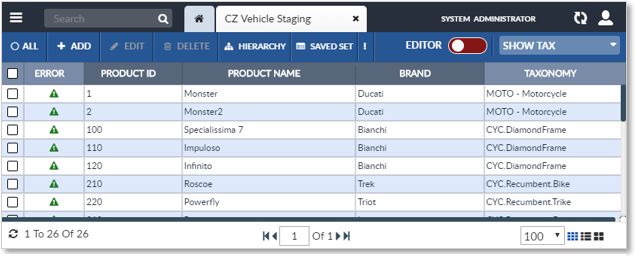
Repository View: Grid View |
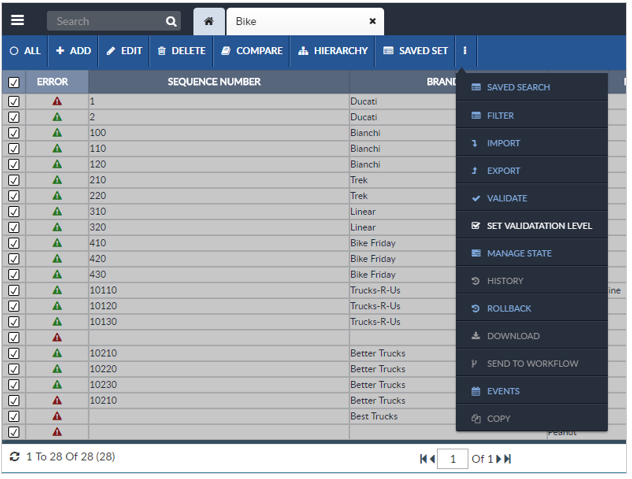
Select the desired record or records in the Repository View. Open the More Actions
dropdown by clicking the ![]() on the Repository View’s Activity Bar. Select the Set Validation Level option.
on the Repository View’s Activity Bar. Select the Set Validation Level option.
|
More Actions: Set Record Validation Level |
The Set Validation Level window will appear. The title of the window will indicate how many records will be affected by the change in required validation level.
|
Set Record Validation Level |
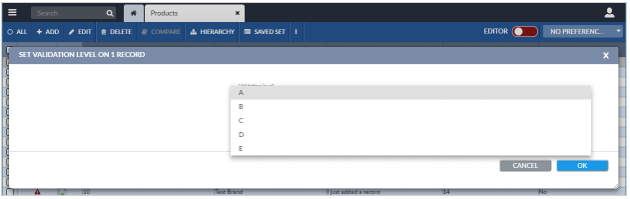
Select the desired required validation level.
Select Okay to save the new validation level. Click Cancel to exit without saving any change to the validation level.
Setting an Export’s Validation Level
When defining a Syndication Template to use for an export or syndication, the default validation level is set to “A”. This validation level can be changed for the template during setup or modification.
For detailed information about setting a the validation level for a Syndication Template to use for an export or syndication, see the Exporting Records section of this document.
Validating Selected Records
To validate one or more records, first open the repository. Open the Feature Sidebar, select the desired folder, and select the desired repository. The repository will be opened in a Repository View. For more detailed information on repositories, see the Repositories section in this document.
|
Repository View: Grid View |
Select the desired record or records in the Repository View. The user may use a Saved Set or a Search
to find the desired records. Open the More Actions
dropdown by clicking the ![]() on the Repository View’s Activity Bar. Select the Validate option.
on the Repository View’s Activity Bar. Select the Validate option.
|
More Actions: Validate Records |

A Confirmation window will appear that indicates the number of records being sent for validation.
Select Yes to save run validation on the records. Click No to exit without validating the records.
Validating a Repository or a Saved Set
All the records in a repository can also be validated as a group, as can the records in a Saved Set. This is especially useful after creating a Saved Set from an import and then validating the imported records.
To validate the records in a repository or a Saved Set individually, select the records and proceed as described in Validating Selected Records.
To validate the records in a repository or a Saved Set as a group, do not select the records and proceed as follows.
Open the desired repository by opening the Feature Sidebar, selecting the desired folder, and selecting the desired repository. The repository will be opened in a Repository View. For more detailed information on repositories, see the Repositories section in this document.
|
Repository View: Grid View |
To validate a Saved Set of records, click the Saved Set button in the Activity Bar. TheSaved Set Sidebar will appear in the Repository View. It displays a list of the Saved Sets for the repository. If there are more Saved Sets than will fit in the window, use the vertical scroll bar on the right side of the Saved Set Sidebar to scroll through the list. Select a Saved Set.
To validate the records in the entire repository or Saved Set as a group,
do not select the records. Open the More Actions dropdown
by clicking the ![]() on the Repository View’s Activity Bar.
Select the Validate option.
on the Repository View’s Activity Bar.
Select the Validate option.
|
More Actions: Validate Records |
A Validate window will appear.
|
Validate an Entire Repository or a Saved Set of Records |
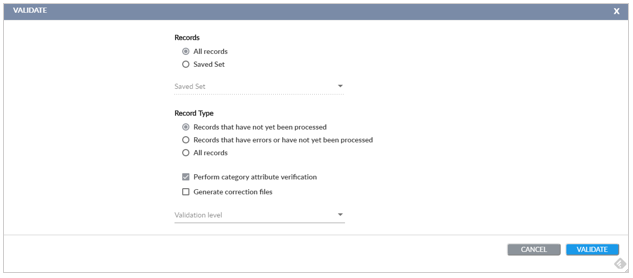
The set the options in the Validate window as desired:
- Records: Selects the records to validate.
- All records: Validate all the records in the repository.
- Saved Set: Select the desired Saved Set.
- Record Type: Select to validate records that have not been already validated, records that have not already been validated and records that have errors, or all the records.
- Perform Category Attribute validation: Select if the record’s Category Attribute values should be verified against the Taxonomy node’s Category Attributes. Note that when validation is performed, if a value is found in an attribute that is not a Category Attribute for that Taxonomy node (or no longer a Category Attribute for that Taxonomy node), the value will be removed. See Taxonomies and Hierarchies for more detailed information.
- Generate correction files: Select if a correction file should be generated for each attribute. This can be used for fixing the data in the correction file and then using the files to update the records.
- Validation Level dropdown: Select the desired required validation level to check the records against. The record validation status will be generated based on if the all validation rules for this validation level.
Select Validate to validate the selected records. Select Cancel to exit without validating the records.
To access any generated correction files, open a Job Monitor Widget in the Dashboard. See Job Monitor Widget for further details.

Copyright 2007, 2023 Precisely