
Creating a Fixed Field
- Click Field > Create Empty Field. (If the Fields list is empty, you cannot select Create Empty Field from the Field menu. Go to step 4.)
- If you defined or edited a field that has not been saved, the Field Information Has Changed window is displayed. Click Yes to save the field or No if you do not want to save the changes to the field.
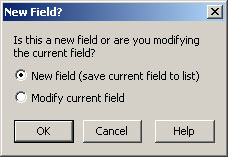
- If there is a field already selected in the Fields list, you will be asked whether you want to create a new field or modify the existing field. Make a selection and then click OK.
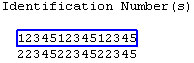
- Use the mouse to select the location. For example, if a set of identification numbers appears in the same location on each page, you could use the mouse to select the number.
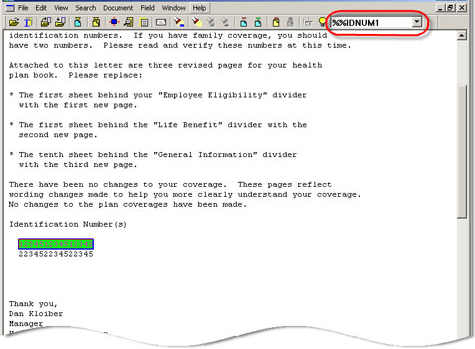
 Note: If you click on any alphanumeric string that is delimited by a blank (or that is delimited by a hex value that is less than 20), such as a word or ZIP Code™, Visual Engineer Plus automatically selects and outlines the string.
 - Click Field > Set Field Location. The Field Reference dialog box is displayed. Note: If you are working with an AFP print stream and the print stream uses relative positioning to describe the text you selected, the Set Field Location option will be unavailable. In this case you must use a reference field for the text you selected. See Creating a Reference Field.
- Fill in the fields and click OK. For more information, see Editing Field Properties.
- The field is highlighted in green. If you do not have a control file open, select Field > Add Field To List to add the field to the Fields list. If you have a control file open the field is added automatically to the Fields list.
- Verify that the field was properly defined. To do this, generate a report of all values for the field. For more information, see Reporting Field Values.