Edit a Record
For details about adding a new record, see the Add a New Record section of this document.
|
Repository View Activity Bar Buttons |

EnterWorks has three ways for users to modify records: Inline Edit; the Detail Editor Sidebar; and the Detail Editor Tab.
- Inline Edit allows users to directly edit attribute values from the Repository View. See the Inline Editor section in this document for more details.
- The Detail Editor Sidebar opens the selected record in a small window on the right side of the Repository View. The Detail Editor Sidebar does not open a new tab; it allows the user to edit attribute values while still viewing the repository’s records in the Repository View. See the Detail Editor Sidebar section in this document for more details.
- The Detail Editor Tab opens the record in a new tab. It provides a full-screen view of the record’s attributes. The Detail Editor Tab can also be used to edit more than one record at once (Multi-Edit). See the Detail Editor Tab section in this document for more details.
Note that the values of any attributes that are calculated fields will be generated when the record is saved. They will overwrite any values entered by the user unless EnterWorks is configured otherwise.
Inline Editor
The Inline Editing capability allows users to edit visible record attribute values while in the Repository View.
To edit a record using the Inline Editor:
-
Open the desired repository in a Repository View, (see
Open a Repository in a Repository View).
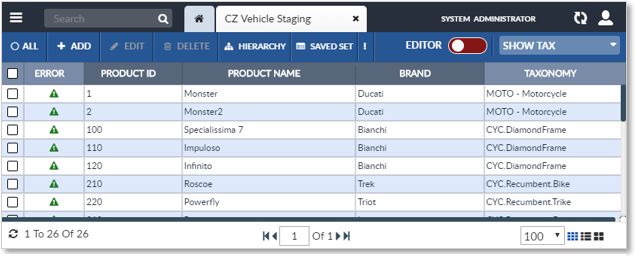
Repository View: Grid View
-
Clicking once on an attribute field will either allow the user to
directly edit that attribute’s value or it will open up a pop-up Edit window. (Double clicking on the field will open the
record in the Detail Editor Tab, (see
Detail Editor Tab).

Inline Editor Edit Window
- In the Edit window, modify the value of the attribute as desired.
- Click Apply to save the changes to the attribute’s value or click Cancel to exit without saving.
According to their permissions, some users may edit the record’s primary key using the Inline Editor.
According to their permissions, some users may add a Code Set to an attribute field or modify an existing Code Set.
Detail Editor Sidebar
The Detail Editor Sidebar allows user to select a record from a Repository View and open it in a sidebar display for editing. It does not open the record in a new tab; the user can still see the repository’s records in the Repository View. The Detail Editor Sidebar does not have Multi-Edit capability.
The Preference View that has been designated as the Favorite Detail Editor Tab Preference View defines how record data will be displayed in theDetail Editor Tab and theDetail Editor Sidebar. When a record is opened in the Detail Editor Sidebar, it is displayed according to the Favorite Detail Editor Tab Preference View. If no Preference View has been designated as the Favorite Detail Editor Tab Preference View, the record will be displayed as defined in the repository’s Default Preference View. If no Default Preference View has been selected, all record attributes will be shown.
Open a Record in the Detail Editor Sidebar
To edit a record in the Detail Editor Sidebar:
-
Open the desired repository in a Repository View, (see
Open a Repository in a Repository View ).
Repository View: Grid View
- Select the record to be edited.
- Turn on the Detail Editor Sidebar capability by
clicking the Editor toggle on the right end of the Repository View’s Activity Bar. It will display green.

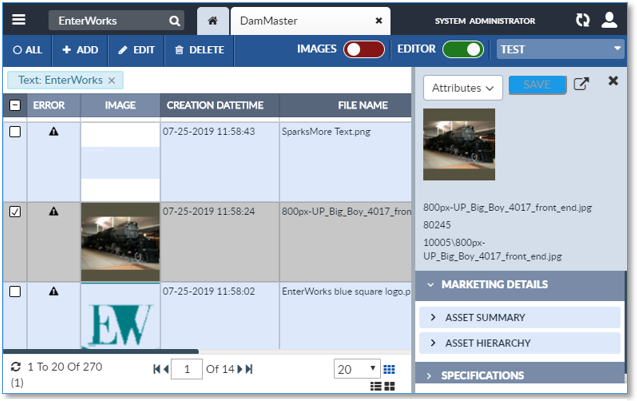
Select a Record, EnterWorks the Editor, the Record Opens in the Detail Sidebar.
- The Detail Editor Sidebar window will appear on the right of the Repository View. The selected record will appear in the Detail Editor Sidebar.
Edit a Record in the Detail Editor Sidebar
|
A Record Opened in the Detail Editor Sidebar |
(For a detailed labeled reference guide image, see Detail Editor Sidebar Reference Guide.)
Warning: Before making changes to a record in the Detail Editor Sidebar, make sure it is pointed to the correct record.
If more than one record is selected, the Detail Editor Sidebar will only act upon the last record selected.
If a record is unselected in the Repository View while it is still open in the Detail Editor Sidebar, the Detail Editor Sidebar will keep the record open and continue to allow it to be edited. If the user then selects another record, the Detail Editor Sidebar will switch to the new record. Any unsaved changes to the first record will be retained and displayed again if the record is reopened in the Detail Editor Sidebar – even if the Detail Editor Sidebar has been closed without saving the changes.
Warning : It is possible to edit a record in the Detail Editor Sidebar and the Detail Editor Tab simultaneously. This is not recommended as it could result in the editors exhibiting unpredictable behavior.
The Detail Editor Sidebar displays the record’s data in a column. The record’s summary attributes and validation status are displayed at the top of the column, followed by a list of the Attribute Tabs. The Attribute Tabs can be expanded to show the Attribute Groups they contain. The Attribute Groups can be expanded to show the attributes they contain and their values.
The Detail Editor Sidebar notes errors in the attribute values in red and warnings in yellow.
Note that records can be saved with errors. The level of each error and its effect on the record’s validation status is discussed in more detail in the Record Validation section of this document. When a record with errors or warnings is saved, a warning message appears at the bottom of the Detail Editor Sidebar.
The attribute list can be scrolled by using the scroll slider bar on the right of the Detail Editor Sidebar window. Alternatively, the user may select the Attribute dropdown list in the Detail Editor Sidebar’s Activity Bar and select an attribute. The Detail Editor Sidebar will scroll to display that attribute.
Preference Views may be selected while the Detail Editor Sidebar is active. Selecting the Attribute dropdown list allows the user to select a Preference View or perform a Basic Text Search.
|
Detail Editor Sidebar Attributes Dropdown List |

Attribute values may be edited by clicking their attribute field. Different attribute data types determine how each attribute will be edited. For instance, clicking a DATE field will allow the user to edit the text of the field or to select a date from a pop-up calendar.
A Multi-Language icon ![]() will appear at the far right of
attribute fields configured for Multi-Language capability. Clicking the Multi-Language icon
will appear at the far right of
attribute fields configured for Multi-Language capability. Clicking the Multi-Language icon ![]() will bring up a Multi-Language Editor window that will allow the user to
enter text to be displayed for each supported language. The list of
supported languages are determined during system configuration.
will bring up a Multi-Language Editor window that will allow the user to
enter text to be displayed for each supported language. The list of
supported languages are determined during system configuration.
Note that the values of any attributes that are calculated fields will be generated when the record is saved. They will overwrite any values entered by the user unless EnterWorks is configured otherwise.
To save your changes when finished editing the record, click the Save button on the Detail Editor Sidebar’s.
To close the Detail Editor Sidebar, click the Close icon ![]() on the Detail Editor Sidebar’s
upper right corner.
on the Detail Editor Sidebar’s
upper right corner.
Detail Editor Tab
The Detail Editor Tab allows users to select a record from a Repository View and open it in a full-screen display for editing.
The Preference View that has been designated as the Favorite Detail Editor Tab Preference View defines how record data will be displayed in the Detail Editor Tab and the Detail Editor Sidebar. When a record is opened in the Detail Editor Tab, it is displayed according to the Favorite Detail Editor Tab Preference View. If no Preference View has been designated as the Favorite Detail Editor Tab Preference View, the record will be displayed as defined in the repository’s Default Preference View. If no Default Preference View has been selected, all record attributes will be shown.
Open a Record in Detail Editor Tab
To open a record in the Detail Editor Tab:
- Open the desired repository in a Repository View, (see
Open a Repository in a Repository View).
Repository View: Grid View
- Double clicking on a record’s attribute field will open the record in
the Detail Editor Tab. (Clicking once on an attribute
field will activate the Inline Editor capability – see
Inline Editor.)
Alternatively, a user may select the record, then click the Edit button on the Repository View’s Activity Bar.

Detail Editor Tab
(For a detailed reference guide image, see Detail Editor Tab Reference Guide.)
Edit a Record in the Detail Editor Tab
To edit a record in the Detail Editor Tab, first open it in the Detail Editor Tab, (see Open a Record in Detail Editor Tab).
At the top of the Detail Editor Tab Sidebar is a Scroll Records controller.
|
Scroll Records |

The Scroll Records controller allows the user to scroll through the repository’s records without leaving the Detail Editor Tab. The records are displayed in the order of their sequence number (which should not be confused with the records’ primary key or item id). If the user switches to the Repository View tab, sorts the records into a different order, then reopens the Detail Editor Tab, the Scroll Records controller will use the new sort order.
Below the Scroll controllers, the Attributes List lists the record’s Attribute Tabs.
|
Attribute List |

Clicking an Attribute Tab’s name expands it to display the Attribute Groups it contains. It also causes the Edit Attribute pane to display the tab’s Attribute Groups, expanded. Clicking an Attribute Group’s name in the Attribute List will cause the Edit Attribute pane to scroll to the Attribute Group. The user may also scroll through the list of attributes by using the scroll slider on the right of the Edit Attribute pane.
|
Edit Attribute Pane |

The Attribute List notes any errors or warnings the record may have, by highlighting affected attributes in red. The Attribute Groups and Attribute Tabs display a count of their attribute values with errors (in red) and warnings (in yellow). Hovering over an affected attribute will cause its error or warning message to display.
The Edit Attributes pane displays error message in red and warning messages in yellow.
Note that records can be saved with errors. The level of each error and their effect on the record’s validation status is discussed in more detail in the Record Validation section of this document. When a record with errors or warnings is saved, a warning message appears at the bottom of the Detail Editor Tab.
The user can scroll through the Edit Attribute pane’s list of attributes by using the mouse’s scroll wheel or by using the pane’s vertical scroll slider on the right.
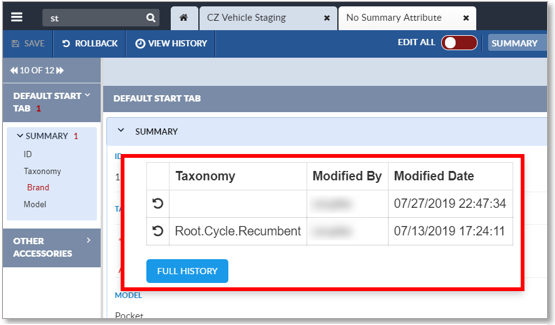
Hovering over an attribute’s label will cause a pop-up window to appear that displays the attribute’s history. Clicking theFull History button in the pop-up window, causes the Record History tab to open and display the attribute’s change history. (See Record Change History.)
|
History Pop-up |
Attribute values may be edited by clicking their attribute field. Different attribute data types determine how each attribute will be edited. For instance, clicking on a DATE field will allow the user to edit the text of the field or to select a date from a pop-up calendar.
A Multi-Language icon ![]() will appear at the far right of
attribute fields configured for Multi-Language capability. Clicking the Multi-Language icon
will appear at the far right of
attribute fields configured for Multi-Language capability. Clicking the Multi-Language icon ![]() will bring up a Multi-Language Editor window that will allow the user to
enter text to be displayed for each supported language. The list of
supported languages are determined during system configuration.
will bring up a Multi-Language Editor window that will allow the user to
enter text to be displayed for each supported language. The list of
supported languages are determined during system configuration.
An External Editor icon ![]() will appear at the far right of
some attribute fields. For more information on the External Editor, contact
EnterWorks.
will appear at the far right of
some attribute fields. For more information on the External Editor, contact
EnterWorks.
Clicking the Edit All toggle in the Detail Editor Tab’s Activity Bar opens all the attribute fields for editing.
Note that the values of any attributes that are calculated fields will be generated when the record is saved. They will overwrite any values entered by the user unless EnterWorks is configured otherwise.
Click the Save button on the left end of the Detail Editor Tab’s Activity Bar to save the changes to the record, then close the Detail Editor Tab’s tab. To exit the Detail Editor Tab without saving changes, close the Detail Editor Tab’s tab without clicking the Save button.
|
The Save Button |

Multi-Edit
If two or more records have an attribute whose value is the same, the value can be edited in the records at the same time. The Multi-Edit capability is available in the Detail Editor Tab, but not in the Detail Editor Sidebar or during Inline Editing.
To edit multiple records:
- Open the desired repository in a Repository View, (see
Open a Repository in a Repository View).
Repository View: Grid View
- Select the desired records. This can be done individually, or through the use of a Search, Hierarchy, or Saved Set.
- Click the Edit button on the Repository View’s Activity Bar to open the Detail Editor Tab.
|
Repository View Activity Bar Buttons |

The Detail Editor Tab will be opened in the Multi-Edit state. All attributes with identical values will be opened for editing. Other attributes can be edited; any changes made will be saved to all the edited records.
If an attribute value is changed while using Multi-Edit, it will be changed in all the records being multi-edited.
To clear an attribute value across all selected records, type anything into the attribute’s field then erase it. This will clear the attribute value in all the records.
To save any changes, click the Save button.
To close the Detail Editor Tab, click the Close icon ![]() on the Detail Editor Tab’s
tab.
on the Detail Editor Tab’s
tab.
Manage Link Relationships
To manage a record’s links to other records:
- Open the desired repository in a Repository View, (see
Open a Repository in a Repository View).
Repository View: Grid View
- Select the desired record and open it in the Detail Editor Tab by clicking the Edit button in the Repository View’s Activity Bar, or open it in the Detail Editor Sidebar by clicking the Editor toggle on the right end of the Repository View’s Activity Bar.
-
Scroll to find the active record’s attribute that defines the linked
relationships to be edited. Note that a record may have more than one
attribute that defines linked relationships. An attribute’s linked records
are listed in a Links Editor.

Links Editor
For the purpose of this document, this is record is now referred to as the “active record”.
(For a detailed labeled reference guide image, see Links Editor Reference Guide).
Each button on the Links Editor’s Activity Bar is described below. The set of functions available to perform on Linked Records is based on system configuration and on the functions that apply to the particular type of link relationship. The names of the buttons are configurable, so they may be named differently on different system.
|
Links Editor Activity Bar |

Hovering over a button reveals its name.
Select one or more records and then select:
- AddLink button to link the active record to an existing record in the linked repository.
- Add New button to create a new record in the linked repository, link it to the active record, and open it in the Detail Editor Tab.
- Copy button to create a new item record based on an existing linked item record.
- Delete button
to delete one or more linked item records.
WARNING: This button deletes both the link to the item record and the item record itself. Use the Remove Link button to remove only the link and keep the underlying child record.
- Edit button to open the linked record in the Detail Editor Tab.
- Open in a New Window to open the selected linked record in a Detail Editor Tab window. This only works if only one record is selected.
- Open Link Table in Window to open the list of linked records in a Repository View window.
- Open Link Table in Tab to open the list of linked records in a separate Repository View tab.
- RemoveLink button to remove one or more link relationships from the active record.
- Refresh button to reload the list of linked records displayed in the Links Editor.
- If the link relationships are to Digital Assets, anUpload icon
 will appear on the far right of the Links Editor. This allows the user to upload one or more
Digital Asset files to the target repository, create a metadata record in
DamMaster for each of the files, and link the metadata record(s) to the
active record.
will appear on the far right of the Links Editor. This allows the user to upload one or more
Digital Asset files to the target repository, create a metadata record in
DamMaster for each of the files, and link the metadata record(s) to the
active record.
The order in which linked records are displayed can be changed by clicking the column headers to sort on column values.
The List View controls in the bottom right of the Links Editor allow the user to view the linked records in the Grid View or the Card View.
At the bottom of the Link Editor are Number of Pages, Page Selector, and Number of Records Per Page controls.
Add Linked Relationship
To add a link relationship to a record:
- Open the desired record in the Detail Editor Tab, (see Open a Record in Detail Editor Tab).
-
Scroll to find the active record’s attribute that defines the linked
relationships to be edited. Note that a record may have more than one
attribute that defines linked relationships. An attribute’s linked records
are listed in a Links Editor.

Detail Editor Tab Linked Records
- Click the Add Link button in the Link Editor’s Activity Bar. The linked repository will be
brought up in a Repository View. A green Add Link button will appear in the Repository View’s Activity Bar.

Add Linked Record
- If you are adding a link to an existing Digital Asset, the slider bar just below the Repository View’s Activity Bar will increase or decrease the size of the image in the viewscreen. This does not actually change the image; it only displays the image larger or smaller.
- Select the record to be linked to the active record and click the Add Link button. The link will be added to the active record’s list of linked relationships.
For the purpose of this document, this record is now referred to as the “active record”.
Add New Linked Record
To create a new record and link it to an existing record:
- Open the desired record in the Detail Editor Tab, (see Open a Record in Detail Editor Tab).
-
Scroll to find the active record’s attribute that defines the linked
relationships to be edited. Note that a record may have more than one
attribute that defines linked relationships. An attribute’s linked records
are listed in a Links Editor.
 Detail Editor Tab Linked Records
- Click the Add New button on the Links Editor’s Activity Bar.
- A new record will be created in the linked repository, linked to the active record, and opened in a new Detail Editor Tab. Note that any calculated field values will be generated when the linked record has been saved.
For the purpose of this document, this record is now referred to as the “active record”.
Edit a Record’s Linked Record
Note that if the linked record is a Digital Asset record, the data being edited is actually the metadata for the Digital Asset, not the Digital Asset itself.
To edit a record’s linked record
- Open the desired record in the Detail Editor Tab, (see Open a Record in Detail Editor Tab).
- Scroll to find the active record’s attribute that defines the linked
relationships to be edited. Note that a record may have more than one
attribute that defines linked relationships. An attribute’s linked records
are listed in a Links Editor.
Detail Editor Tab Linked Records
- Select the linked record to be edited and click the Edit button on the Links Editor’s Activity Bar. Alternatively, double click any of the linked record’s attribute fields.
- The linked record will be opened in a new Detail Editor Tab. It may be edited and saved as described in the Detail Editor Tab section of this document.
For the purpose of this document, this is record is now referred to as the “active record”.
Remove Link Relationship
Removing a link relationship from a record will not delete the linked record. It will only disassociate the record from the linked record.
To disassociate one or more linked records from a record:
- Open the desired record in the Detail Editor Tab, (see Open a Record in Detail Editor Tab).
-
Scroll to find the active record’s attribute that defines the linked
relationships to be removed. Note that a record may have more than one
attribute that defines linked relationships. An attribute’s linked records
are listed in a Links Editor.
Detail Editor Tab Linked Records
- Select one or more linked records to be disassociated from the active record.
- Click the Remove Link button in the Links Editor’s Activity Bar. The links will be removed from the active record. The now unlinked records are not deleted from the system.
For the purpose of this document, this is record is now referred to as the “active record”.
Refresh Link
Links Editors
do not refresh automatically as their content changes. To refresh the
content of a Links Editor, select the Refresh ![]() button in the Links Editor’s Activity Bar. The contents of the Links Editor will be updated.
button in the Links Editor’s Activity Bar. The contents of the Links Editor will be updated.
Upload Digit Asset File and Add Link
By clicking the Upload icon ![]() on the far right of the Links Editor, a user can trigger EnterWorks to upload one or
more Digital Asset files to the target repository, create a metadata record
in DamMaster for each of the new files or update the metadata records for
existing files, and link the metadata record(s) to the active record.
on the far right of the Links Editor, a user can trigger EnterWorks to upload one or
more Digital Asset files to the target repository, create a metadata record
in DamMaster for each of the new files or update the metadata records for
existing files, and link the metadata record(s) to the active record.
For details on uploading a Digital Asset file and linking it to a record, see the Digital Asset Management section of this document.
Manage a Record’s Taxonomy Assignment
Records are assigned or reassigned to a Taxonomy node by editing the control attribute that is used to identify the Taxonomy node they are assigned to.
To edit a record’s Taxonomy assignment:
- Open the record’s repository in a Repository View.
- Open the record in an Editor, (see Edit a Record). The example below uses the Inline Editor.
-
Click the record’s Taxonomy Control Attribute to edit it.

Click the Record's Taxonomy Control Attribute
- The Edit Taxonomy Assignment window will appear.

Edit Taxonomy Assignment Window
-
Select the Taxonomy Node the record is to be assigned
to. The new Taxonomy node value will appear in the New Value field.

Select New Taxonomy Assignment
- Click the Apply button to save the new assignment and exit the window, or click Cancel to exit without saving the new assignment.

Copyright 2007, 2023 Precisely