Job Monitor
View the Job Monitor
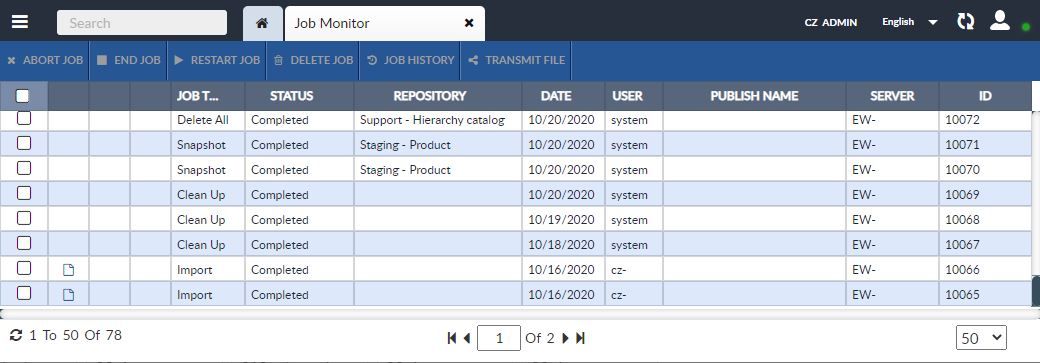
The Job Monitor allows the user to view and manage their jobs. The Job Monitor can be accessed two ways: as a widget or as a report tab. Both operate the same way.
To open the Job Monitor tab, open the Feature Sidebar, select the Systems folder, then select Job Monitor.

The Job Monitor’s rows and columns can be sorted, filtered, and rearranged in the same manner as repositories.
Manage Jobs
To manage a job through the Job Monitor, first open it in a tab or widget. The current and past jobs the user is permitted to see and manage will be displayed.
To act upon a job, select it and click one of the buttons on the Job Monitor’s Activity Bar.
-
Abort Job: Stops the job – gives the job the opportunity to see the abort request and end cleanly.
-
End Job: Stops the job – stops the job immediately, no matter what it was doing. It is recommended the user only uses End Job if the job has not responded to Abort Job.
-
Restart Job: Re-submits the job; runs it again.
-
Delete Job: Deletes the job from the Job Monitor display.
-
Transmit File: Some jobs transmit files to another process. A user can trigger the job to retransmit the file by clicking the Transmit File button on the Job Monitor’s Activity Bar.
Job History
To access the history of a job through the Job Monitor, first open a Job Monitor tab or widget.

Select a job, then click the Job History button on the Job Monitor’s Activity Bar. The Job History window will appear.
The Job History window lists the job’s completion status, error status, and other details about the job. It may also contain links to any Job Status Files that were produced by the job’s execution: the Log File, the Output File, and the Error File.

Access Job Status Files
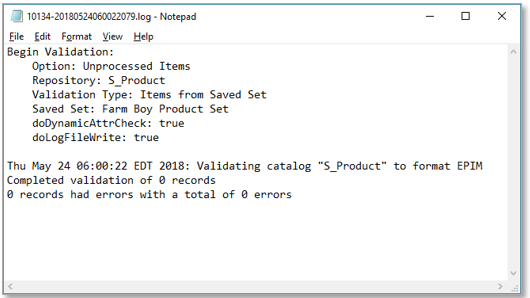
When a job runs, it may produce one or more Job Status Files, including a Log File, a Download File, and an Error File. These files can be downloaded via the Job Monitor.

Both the Job Monitor and the Job History windows have links to the Job Status Files.
To access a job’s Job Status Files through the Job Monitor, first open it in tab or widget.

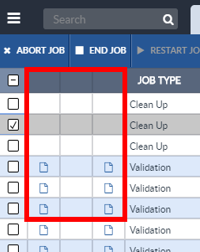
The three untitled columns on the left side of the Job Monitor hold links to any Job Status Files produced.

From left to right, the types of files in the columns are:
-
Log File
-
Download File
-
Error File
If a Job Status File has been produced for a job, an icon will appear in the record’s indicated column. Hovering over the icon will bring up an information window that indicates what type of Job Status File it is.
Job Status Files can also be accessed from the Job History window. To do so, select the job and click the Job History button on the Job Monitor’s Activity Bar. Links to any generated Job Status Files appear on the left of the Job History window, as dark icons. The icons for Job Status Files that were not generated are grayed-out.
To download a Job Status File, click its icon.

