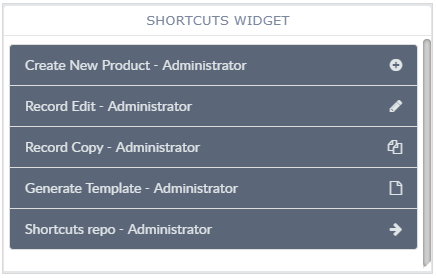
Shortcuts Widget
The Shortcuts widget allows system administrators to create quick links to certain functions users can access from the Dashboard. Links can be available globally or only available to specific user groups. You may need to scroll down or increase the height of the widget in order to see all the shortcuts.

Configuring the Shortcuts Widget
To configure a Shortcuts widget:
-
Configure a new blank widget. For more information about adding and configuring new widgets, see Add a Widget.
-
Select the Settings icon
 in the upper right of the new widget’s Activity Bar. Note that a widget’s
Activity Bar will not be displayed unless the cursor is hovering over the top of the
widget. A Configuration window will appear.
 - Select Shortcuts from the Type dropdown list on the far right of the Widget Configuration window. The Shortcuts widget configuration options will appear.
- The configuration options that will appear in the
Configuration window will depend on the permissions of the
user. If the user has permissions sufficient to edit the
Shortcuts widget, a number of configuration options will
appear. For information about customizing the Shortcuts widget as
an administrator, see ShortCuts Widget Administration . Most users will only see
one configuration option, Title.
-
Title: The title of the widget. It is helpful if the title of a widget reflects the widget’s type, for example "Shortcuts".
-
Widget Group: Selecting a Widget Group limits the display of shortcuts to only those within that Widget Group.
-
Empty: If the field is left empty, all widget groups will be displayed.
-
Reports
-
Searches
-
Product Quick Links
-
Supplier Quick Links
-
Member Quick Links
-
Images
-
-
-
Click Apply to save the changes to the widget and close the Configuration window. Click Cancel to close the Configuration window without saving the changes.
