 Home
Home Product Help
 Support
 Print
Print Feedback
Map the object fields for the update
When you click Next, Studio moves to the Map tab, which includes:
- Mapper: The Mapper contains the fields you can select and the Value column.
- Data File Preview: The Data File Preview displays a preview of the Excel worksheet where the fields selected from Mapper are mapped.
Any required fields, such as Log Column, are automatically selected.
You can use column-based mapping to move multiple records, or you can use cell-based mapping to create a form-like experience. For more information, see Use cell-based mapping.
Note: To map the object fields to an existing Excel worksheet, open the Excel file by clicking Open Data File on the ribbon.
Map the fields
- In the Mapper, select the check boxes for the fields you want to include in your script.
To quickly find a field, type it in the Search box. After you select the fields you want, return to the full Mapper by deleting the text in the Search box.
Custom fields are listed in their own section of the Mapper.
Tip: To select all the fields in a group, select the group-level check box.
- To ensure that a field contains data, check the box in the Mandatory column.
- Map the fields to the Excel worksheet by doing one of the following:
- On the ribbon, click Auto Map.
- Type the Excel column name that corresponds to each field in the Value column in the Mapper.
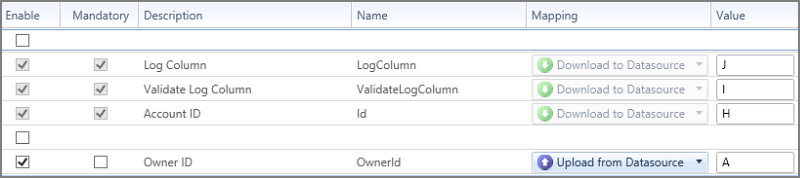
Studio for Salesforce selects the appropriate mapping direction. To change the mapping direction, click the arrow, and then choose the direction that you want.
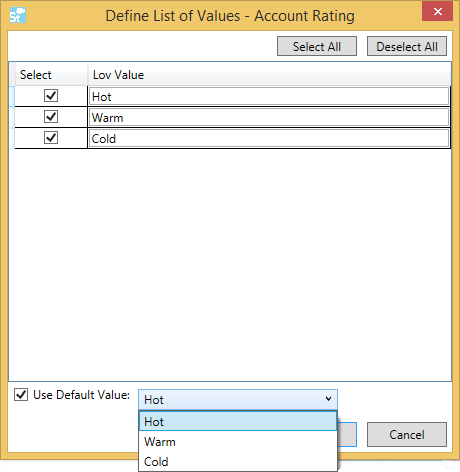
- If the field has a picklist, you can choose which values will be available in the list. In the Mapper, click the field's List of Values column and clear the check boxes for the values that you do not want to include.
- To provide a default value if the cell in the Excel spreadsheet is empty, check the Use Default Value box, and then type a value.

If the field has a picklist, choose a default value from the list.
- Click the Run tab.
Studio for Salesforce will prompt you to save the data file.
Other mapping commands
- Select All: To automatically select all the fields that are displayed in the Mapper, click Select All.
- Refresh Object: To reload the fields that are displayed in the Mapper whenever any changes are made to the Salesforce Customer Site content, click Refresh.
- Filter Fields: To control which fields are visible in the Mapper, click Filter Fields, and then click the option that you want.
- Add Sheet: To add new data to the data file and use the same script, click Add Sheet. After you click the Run tab, click Write Headers and then enter the data you want to upload.
- Columns: To add columns to the Mapper, click Columns and then click the column name. For example, if you want to see the xsd data type, click Columns, and then click SOAP Type.
You can also specify a custom list of allowed values for a field. For more information, see Create a custom list of values.
 Trademarks