 Home
Home Product Help
 Support
 Print
Print Feedback
Map the object fields for the upsert
You can use column-based mapping to move multiple records, or you can use cell-based mapping to create a form-like experience. For more information, see Use cell-based mapping.
Note: To map the object fields to an existing Excel worksheet, open the Excel file by clicking Open Data File on the ribbon.
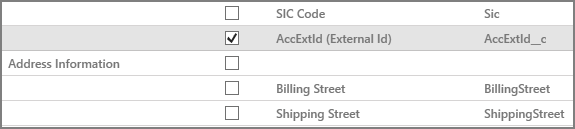
- On the Map tab, select the fields that you want to map to the Excel data file. If you are using an external ID field, be sure to select it. In the example below, AccExtId is the external ID field.
- To ensure that a field contains data, check the box in the Mandatory column.
- Map the fields to the Excel worksheet by doing one of the following:
- On the ribbon, click Auto Map.
- Type the Excel column name that corresponds to each field in the Value column in the Mapper.
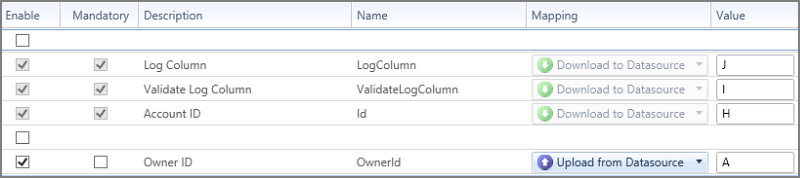
Custom fields are listed in their own section of the Mapper.
Studio for Salesforce selects the appropriate mapping direction. To change the mapping direction, click the arrow, and then choose the direction that you want.
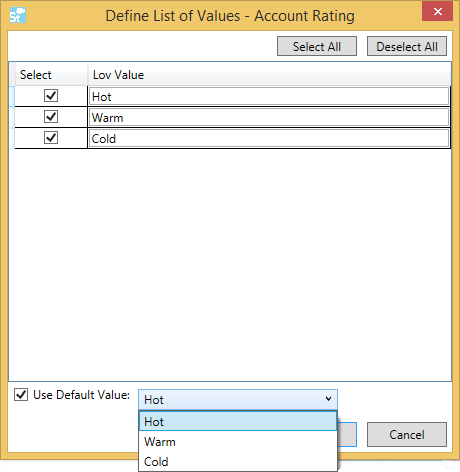
- If the field has a picklist, you can choose which values will be available in the list. In the Mapper, click the field's List of Values column and clear the check boxes for the values that you do not want to include.
- To provide a default value if the cell in the Excel spreadsheet is empty, check the Use Default Value box, and then type a value.

If the field has a picklist, choose a default value from the list.
- Click the Run tab.
Studio for Salesforce will prompt you to save the data file.
 Trademarks