 Home
Home Help Center
 Support
 Print
Print Feedback
Associating a SharePoint site with a workflow
Working with Designer Legacy files
Associating your workflow with SharePoint allows you to access lists and group memberships from within a SharePoint site. You must associate your workflow with SharePoint before you can publish the workflow and use it.

- In the Publishing area of the Properties pane, click in the SharePointSite property and type the URL for the SharePoint site you want to associate with this process.
Winshuttle Designer verifies your logon settings against the SharePoint site you have associated with this process. If the SharePoint site was accessed successfully, you can proceed with adding nodes to your workflow as described in the next section. If there is a permission error and you cannot access the specified SharePoint site, you must complete steps 2-7 below.
- From the Tools menu, click Options.
The Options dialog box appears.
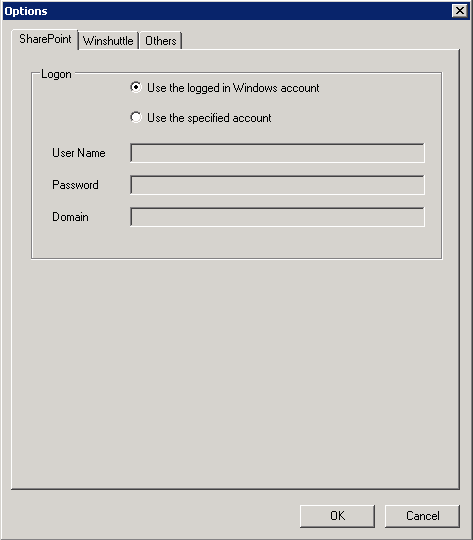
- Click the SharePoint tab.
- You can choose from following Logon options:
- Use the logged in Windows account
- Use the specified account
- Type User Name, Password and Domain to access Winshuttle SERVER and CENTRAL site.
- Enter your User Name, Password, and Domain (if applicable) for the SharePoint site, you are associating with this process.
NOTE: If this workflow is for routing a form, you must first publish the form before you can select the appropriate SharePoint list. (See Creating and Publishing Solutions.)
- On the Others tab, enter the TCP Communication Port as a Custom Control. In the Properties pane, click the SharePoint List property and select the SharePoint list that is relevant for this workflow. Click OK.
- On the Tools menu, click Refresh Site Info.
 Trademarks