 Home
Home Help Center
 Support
 Print
Print Feedback
Creating Name Templates (Designer 10.5 and earlier)
Name Templates allow you to create a naming scheme for your documents or forms, and to automatically generate a unique name each time a document is checked in or a form is started. This section describes how to create a name template, and then link the template to a document or form.
On this page
- Specifying a unique identifier
- Configuring the FormName control for a name template
- Adding more information to the form
- Linking a name template to a document
- Linking a name template to a form
Specifying a unique identifier
To specify a unique identifier to be used in your Name Template, do the following:
- In Designer, open the Document Workflow or Form Workflow site for which you want to create a Name Template.
- On the Tools menu, click Name Template to open the Name Template dialog box.
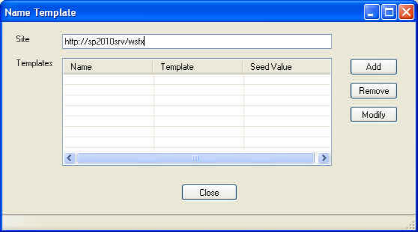
- Click Add.
The New Name Template dialog box appears. - In the Name field, type a name for your name template, and then click OK.
Your new template is added to the Name Template dialog box.
- With your new Name Template highlighted in the Templates list, click Modify.
The Edit Name Template dialog box appears.
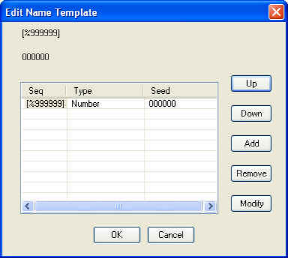
- Click Add.
A new line is added for the default six-digit component.
- Select the first entry (the name template that you just created) from the list, and then click Modify.
The Modify Name Component dialog box appears.
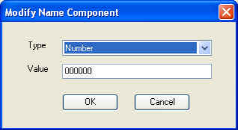
- From the Type drop-down list, select one of the following options:
- Alphabetic—select this option to include a running alphabetic identifier in your Name Template. For example, you could have a sequence of unique alphabetic identifiers such as AAA, AAB, ..., AAZ, ABA, etc.
- Constant—select this option to include a constant value in your Name Template that will not change and will be included in all generated names. For example, an HR department could include the constant TOR to create a Name Template to auto-generate names for Time Off Request forms.
- Month—select this option to include a two-digit indicator of the month in your Name Template. For example, all forms generated in May will have a unique name starting with 05.
- Number—select this option to include a running numeric value, starting with the value you enter in the Value text box in step 10. For example, if you select Number as the Type and enter 000 in the Value text box, the next name generated will be 001.
- Quarter—select this option to include a two-digit indicator of the quarter in your Name Template. For example, all forms generated in the third quarter will have a unique name starting with 03.
- Day—select this option to include a two-digit indicator of the day of the month in your Name Template. For example, all forms generated on January 14 will have a unique name starting with 14.
- Year—select this option to include the year in your Name Template. For example, all forms will have a unique name starting with 10.
- In the Value text box, type the value that you want your name scheme to begin with.
See the examples in step 9 for details.
- Click OK.
- Click OK on the Edit Name Template dialog box.
- The Name Template dialog box appears.
- Click Save.
- Click Done.
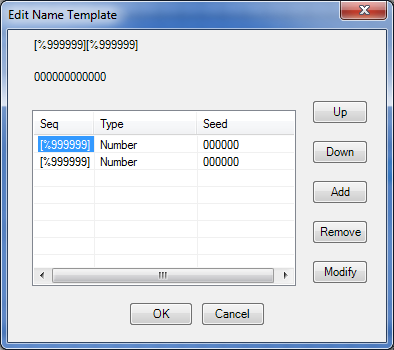
Example:
You will need one entry for anything you want to generate. In the following example, there are 2 entries. The 1st entry will be generating a letter of the alphabet beginning with the letter A. The 2nd entry will be a 6-digit number starting with 000001. The first form that is submitted will thus be assigned A000001.
- Click Add. A new entry is added:
- Because we want the letter to be first, we'll modify the first entry of my name template. Select the 1st entry, and then click Modify.
- Change the Type from Number to Alphabetic.
- Next to Value, type the letter A.
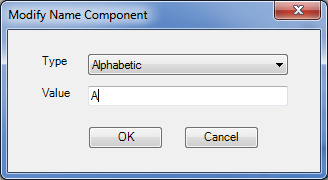
- Click OK twice, and then click Close.
Configuring the FormName control to use the newly created name template
- Add the ShareVis.FormName Control to your form.
- Right click on the control and go into its properties.
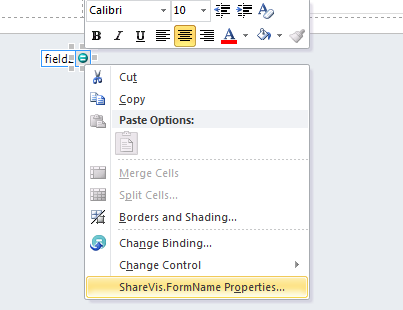
- In the Template Name & Fields property, enter the name of the template you just created
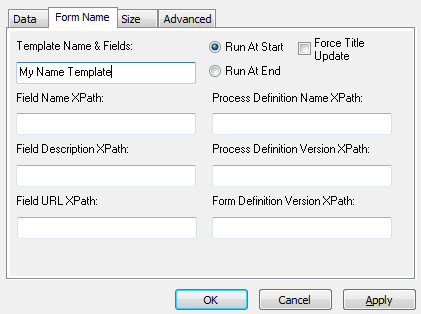
TIP: It is a good idea to select Run At End so the form name isn’t generated until the very end. This will prevent the form from taking up numbers and creating gaps in your generated form name.
- Click OK to publish your form and your workflow.
Adding more information to the form
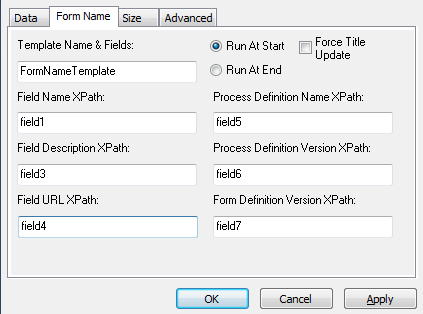
If you want more information to be populated in your form, the following information is also available:
- Form Name
- Form Description
- URL to Form
- Process Definition Name
- Process Definition Version
- Form Definition Version
Refer to the above table at the beginning of the document for further explanation on what each of these attributes provide. To use any of these attributes, you will need to create a text box within your form and provide the field name. See the following example:
Linking a name template to a document
To enable a Name Template to be applied to a specific document, you must link the Name Template to the document.
To link a Name Template to a document:
- In the document library, create a column that will contain the results of the name template generation.
- Set the default value of the column to the initial value of the name template.
For example, create a column named MyRevision with a SharePoint Type of Single Line of Text and default value of 0000.
- Create a name template in Designer, for example, MyNameTemplate that is a running four-digit number.
In your workflow where you would like to set the column value, add a plug-in and set it to the Set Column plug-in.
- Set the Name in the plug-in to the column name.
For example, [MyRevision].
- Use the $Revision function in the plug-in's value field to calculate the next value in the sequence using the name template and the value in the column.
For example, $Revision(MyNameTemplate: [MyRevision]). The plug-in configured in this way will set the column value in MyRevision to the next value in the sequence. In this example, it will set the MyRevision field to 0001 on the first run, 0002 the next time the workflow is run, etc.
Linking a name template to a form
To enable a Name Template to be applied to a specific form, you must link the Name Template to the form using the ShareVis.FormName custom control.
To link a Name Template to a form:
- Start InfoPath and open the form you want to link to a Name Template in Design Mode.
- Click at the bottom of the form. Add a Text Box control to the form and rename it formID
- Click Controls on the right side.
- Scroll to the Custom Controls area and click ShareVis.FormName.
The control is added to the form.
- Double-click the ShareVis.FormName icon on your form.
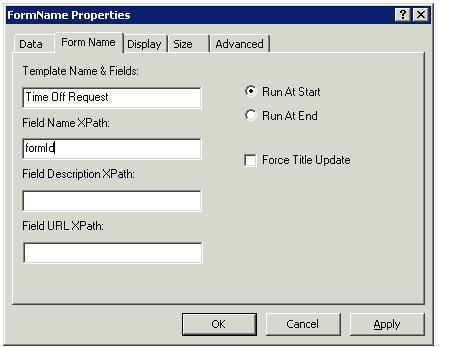
The FormName Properties dialog box appears.
- Click the Form Name tab.
- In the Template Name & Fields text box, type the name of the Name Template you created in the previous section.
- In the Field Name XPath text box, type formId.
This copies the new name generated by the name template into the fromid field each time a new form is started.
 Trademarks