Working with Winshuttle Designer form views
You can create multiple views for a workflow that are dependent upon who is viewing the workflow. For example, you might want to create separate views of a Purchase Request based upon device (one for iPhones, and one for a PC), based upon language, or based upon the type of user (Purchase requestor/Purchase approver, for example).
On this page
- Creating a new form view in Winshuttle Designer
- Setting the default form view
- Creating a View for form data in Microsoft InfoPath
- Deleting or Creating Views in a Workflow Solution (Solution Mode)
- Specifying a Form View in a Workflow
- Special Winshuttle Designer Form Views
- Rules for System View Selection
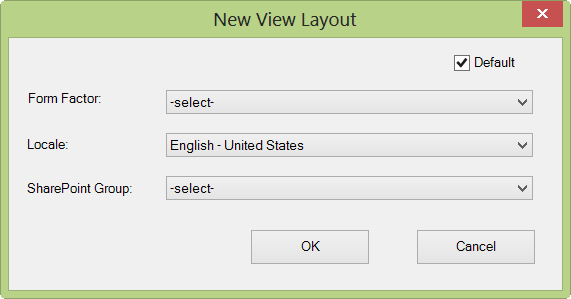
Each Layout can be assigned a combination of three attributes:
- Form Factor (device screen size)
- Language
- SharePoint Group (i.e. type of user)
When the form is run, the system evaluates the user based upon their characteristics, and then choose the , appropriate layout. The HTTP UserAgent will be used to determine the device type (i.e. PC, iPad, iPhone, etc.) and the SharePoint user settings and SharePoint group membership will determine the language and group. If there is no ‘best’ Layout, then the default layout will be used.
Creating a new form view in Winshuttle Designer
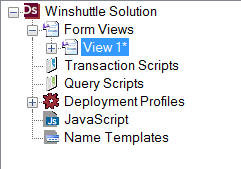
- In the Solution Tree Window, right-click Form Views, and then click New. This will automatically create a View called "View 1" (or "View 2" or "View 3" etc. depending on the current number of views).

- Right-click the View (View 1, for example), and then click New Layout.

- Select the Form Factor (Small, Medium, or Large), Language, and SharePoint groups to which this view will apply. For example, you might want this particular view to apply only to a SharePoint group that consists of Purchase Request Approvers.

Setting the default form view
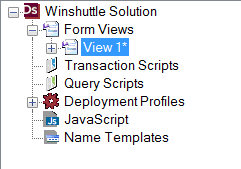
- In the Solution Tree Window, right-click the Form View you want to set as the default view.
- Click Set as Default.

Creating a View for form data in Microsoft InfoPath
In InfoPath, you can create different views of your form data as needed for your workflow. These views can be based on some or all of your original form data. Additional views can be used to show different information or different information layouts to different workflow participants. For example, you can create views with:
- Read-only fields
- Different layouts
- More or fewer fields
Creating a different view for form data when creating an .SVP workflow file:
- Open the form in Microsoft InfoPath.
To use elements from your default form view (such as fields or headers), select the desired elements, and then on the Edit menu click Copy.
- Click Views.
- In the Actions area, click Add a New View.
- In the Add View dialog box, in the New View Name text box, type a name for your form view.
For example, if you are creating a form view that is for management use only, you could name it ManagerView.
NOTE: It is a good idea to use names that contain only alphanumeric characters and underscores. Avoid using spaces and non-alphanumeric characters.
If you are copying elements from the default form view, place the cursor in the empty form and on the Edit menu click Paste.
- Modify the form view as desired.
- On the File menu, click Save.
- Your new form view appears in the list of views.
Repeat steps 2-8 to create as many form views as desired.
- Save and close your form, and then republish it.
All of the form views are copied to the Form Workflow site.
Deleting or Creating Views in a Workflow Solution (Solution Mode)
InfoPath views should be deleted or created only in Winshuttle Designer. If a view is created or deleted only in InfoPath, the change will not be reflected in the Winshuttle Designer Solution file.
To create a view in Designer:
- Create a Solution for Form Workflow
- In the right-hand tree view, click Formviews, and then click New.
- Launch Infopath.
- Verify that a new view is created in Infopath.
Specifying a Form View in a Workflow
To specify a particular form view, the view must be specified on a task node (either an Approval or Activity node, or Notification node, if IncludeItem is enabled) in your workflow. If you do not specify a different view, the default view will be used.
To specify a different form view:
- In Winshuttle Designer, open the workflow for which you want to specify a form view.
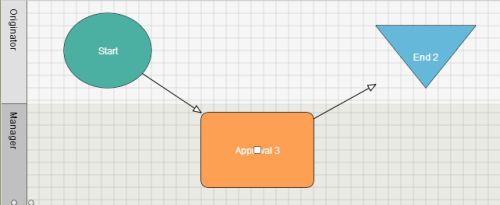
- Click the Approval, Activity, or Notification nodes for which you want to specify a form view.
- In the Form section of the Properties pane, click the FormView text box and choose a view from the drop-down list.
- Repeat steps 2 and 3 for each node within the workflow for which you want to specify a form view.
- Save and publish your workflow.
Special Winshuttle Designer Form Views
Views with the following four names have special meaning in Winshuttle Designer:
- ShareVisPreProcessView — this view displays the processOriginator.
- ShareVisResubmitView — this view displays when resubmitting a form.
- ShareVisProcessStatusView — this view displays for a person who has rights to see the form but does not have an outstanding assignment.
- ShareVisPostProcessView — this view displays after a process has finished.
NOTE: Correct upper and lower case spelling of the view name is required.
None of these form views is required to be included in your form. However, as a best practice, we recommend including at least the ShareVisPreProcessView and the ShareVisPostProcessView.
Rules for System View Selection
The following are the rules for how the system determines which form view to use:
- For the Originator, the ShareVisPreProcessView is used if it exists. If it does not exist, the default view is used.
- For workflow Participants, the view specified in their task’s property is used. If none is specified, the default view is used.
- For Originators who are resubmitting a rejected form, the ShareVisResubmitView is used if it exists. Otherwise, the SharevisPreProcessView is used if it exists. Otherwise, the default view is used.
- For non-workflow Participants who have access to the form while the process is running, the ShareVisProcessStatusView is used if it exists. Otherwise, the default view is used.
- For anyone who has access to the form after the process is complete, the DesignerPostProcessView is used if it exists. Otherwise, the default view is used.
In all of the above rules, you can also use SharePoint groups that contain users for even greater refinement. If a view name includes the name of a SharePoint group of which the user is a member, that view will be used.
For example, if a user is in the Managers group and there is a view named DesignerPreProcessView-Managers, then that view will be used. For those users not in the Managers group, the DesignerPreProcessView will be used.
 Home
Home Help Center
 Support
 Print
Print Feedback

 Back to top
 Trademarks