 Home
Home Help Center
 Support
 Print
Print Feedback
Copy Form
Back to
Related topics
Looking for Winshuttle Composer Plugins?
The Copy Form Plugin provides the ability to copy a specified Form View as a Read Only copy and place it in a File System Directory or a SharePoint Document Library/List. This Plugin will synchronize values in commonly named SharePoint Columns between the source and destination (If you have a column in both your Source and Destination that are the exact same name, the values will automatically be passed.) The copied file is in the *.MHT form.
Property | Description |
file | The full file system path in which you would like to place the copied file into. |
folder | The name of the SharePoint Document Library/List Folder to copy the form to. |
includworkflowdata | Yes/No setting to include or exclude the Process Data with the copied form. If set to true, use the ProcessControl control to view workflow data. |
list | The SharePoint Document Library/List Name to which the copied form will be delivered to. |
name | Name or Title to give the copied form when placed inside the new destination. You can use a form field or a SharePoint column for this value. NOTE: All forms are saved as .MHT files. The form name can be a static string or the value of one or more SharePoint fields. You can also include [$Process.Id] and/or [$Assignment.Id] data.
|
site | The link of the SharePoint Site that holds the SharePoint Document Library/List. (This is not the direct link to your SharePoint Document Library/List.) |
view | The name of the Form View in which you would like to copy. It is recommended that you create a specific for view for this so everything can be captured. If you have a Developers View or a WsPostProcessView, it is recommended you use that. |
Inserting and configuring the Copy Form Plugin
- Add a Plugin Node to the workflow.
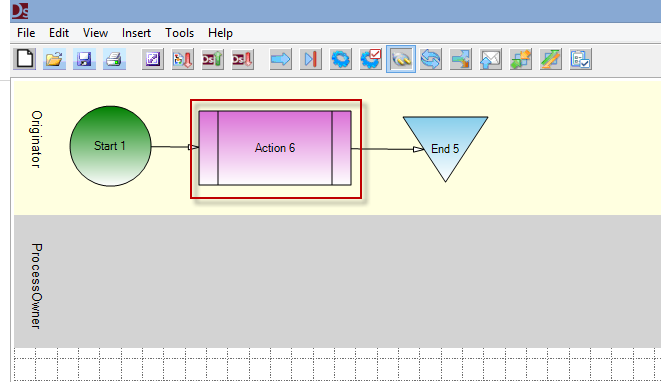
- Click the Plugin Node added in step 1 to select it.
- In the Properties Pane, configure the Property PlugInName to Copy Attachments
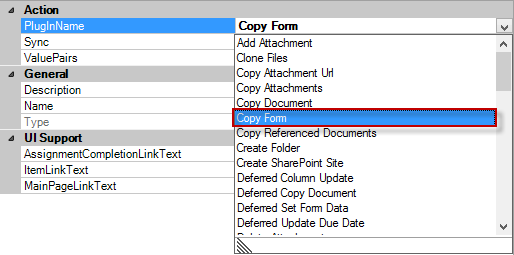
- In the Properties Pane, below PluginName property, select ValuePairs
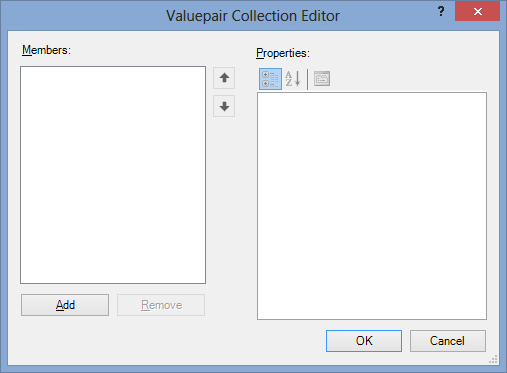
- Click Add to add a new argument.
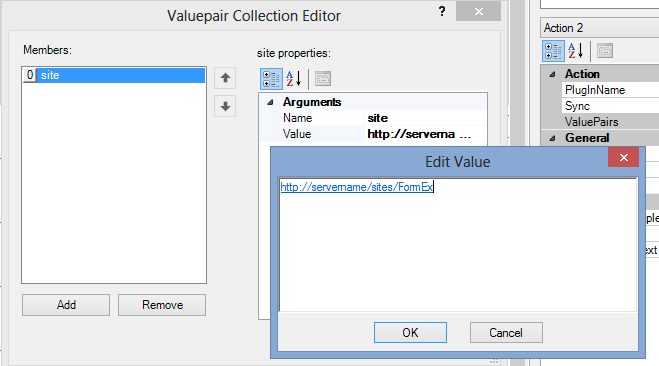
- Under site properties, under Arguments, click Name and then select site.
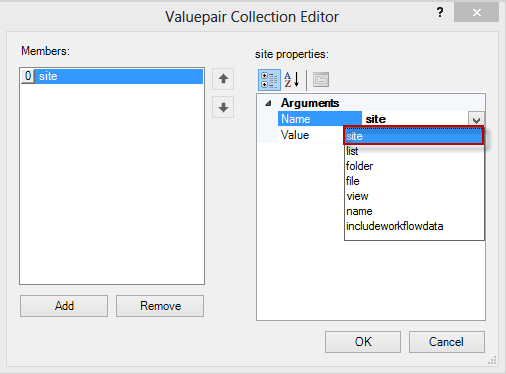
- In the Value field, insert the URL to your SharePoint Site where the SharePoint Document Library/List resides. (This is not the direct link to your SharePoint Document Library/List). Click OK.
- Click Add to select a new argument.
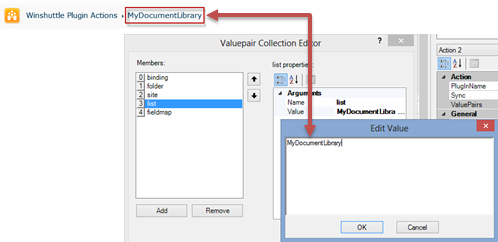
- In the list properties pane, under Arguments, click Name, and then select list.
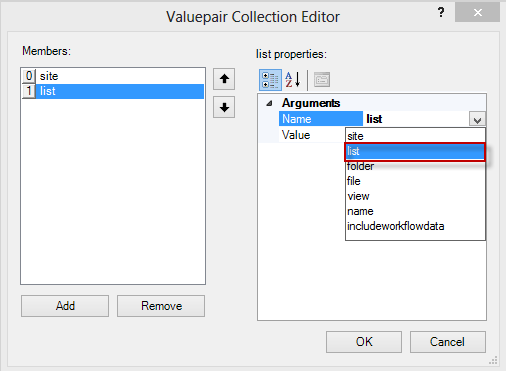
- Set the Value Property to the name of the Folder in your SharePoint Document Library or List. Click OK.
- Click Add to add a New Argument
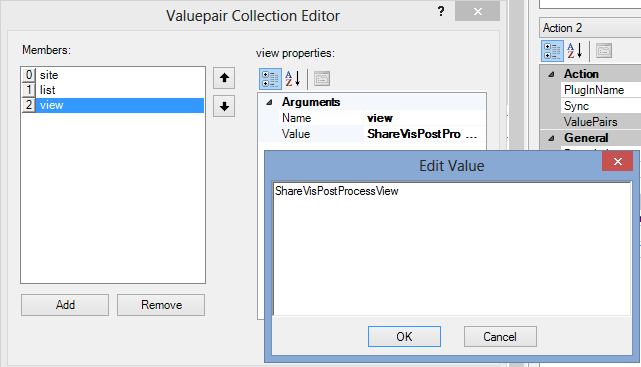
- Under view properties, under Arguments, click Name, and then select view.
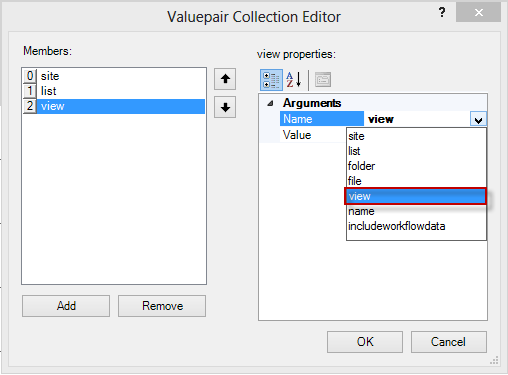
- In the Edit Value box, enter the Name of the Form View in which you would like to Copy.
- Click Add to add a new argument
- Under name properties, under Arguments, click Name, and then select name
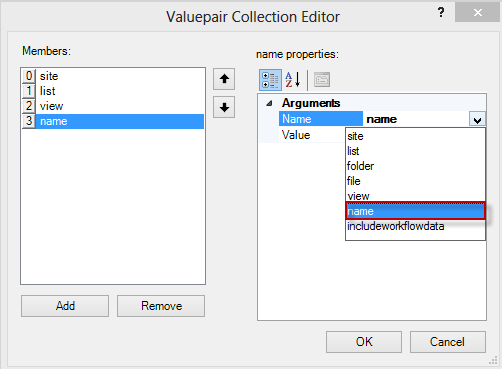
- In the Edit Value box, enter the name you would like to give the form. Note that a static value is not allowed. You may reference Promoted Fields (SharePoint Columns) in this argument.

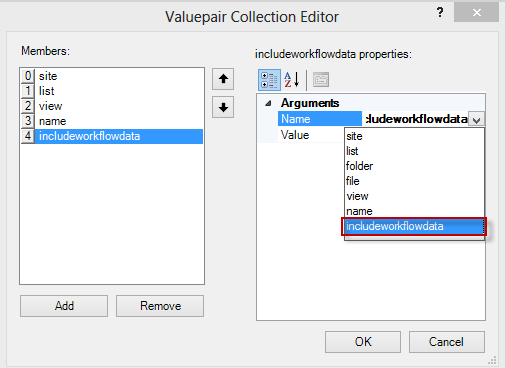
- Click Add to add a new argument
- Under includeworkflowdataproperties, under Arguments, click Name and then select includeworkflowdata from the Name Property
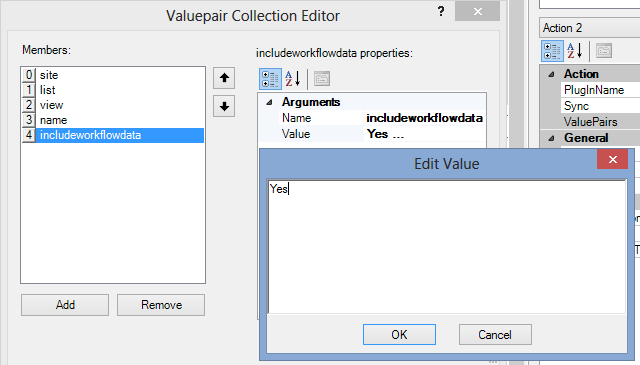
- In the Edit Value box, type Yes. Click OK.
- Publish the Solution to your FormEx Site.
 Trademarks