 Home
Home Help Center
 Support
 Print
Print Feedback
Send Email
Back to
Related topics
Looking for Winshuttle Composer Plugins?
With the Send Email Plugin, you can send an email at a specified point within a workflow. Properties for the plug-in are described in the following table.
Download an example (.wssln file)
Property | Description |
body | The body of the email message |
from | Email Address of the person in which you would like to be shown in the From Field. |
server | The name of the SMTP Server fetched from the Workflow configuration database that will be used to send the Email Message. Note:
|
subject | The Subject of the Email Message |
to | Email Address(es) to which the Email Message will be sent to. |
arguments | SharePoint Columns to use in the query |
connectionstring | Database Connection String for getting recipients. |
format | Possible values/formats are MHT and JPG |
query | Query to run to get recipients. |
senddelay | The number of days to wait before sending the Email Message. |
| includeitem | (True/False) Whether or not the form should be included as an attachment. (True=include attachment.) |
| formview | Which form view the recipient should receive in the email. (Only works if includeitem is set to 'true'. |
| includedatafile | How the recipients should receive the data file in the email: via link, attached file, or both a link and an attached file. |
Adding and configuring the Copy Form Plugin
- Insert a Plugin Node to your workflow, and then click it to select it.
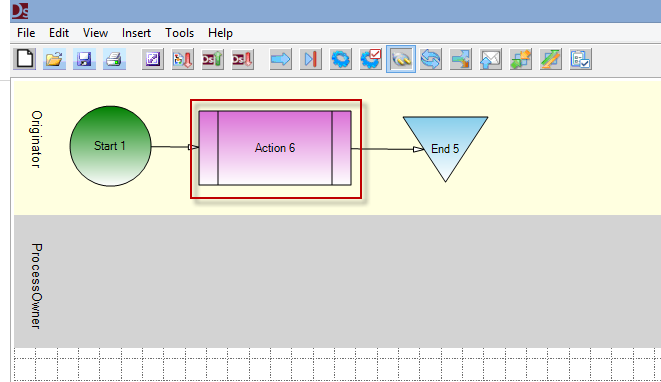
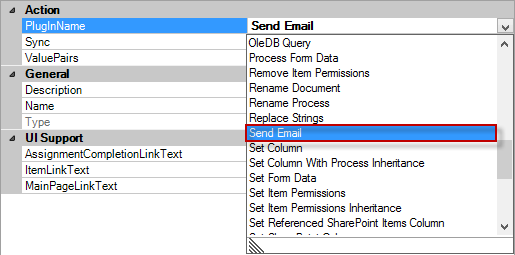
- In the Properties Pane, configure the Property PlugInName to Send Email
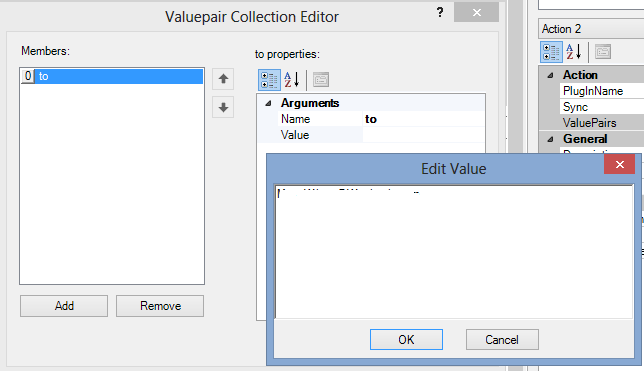
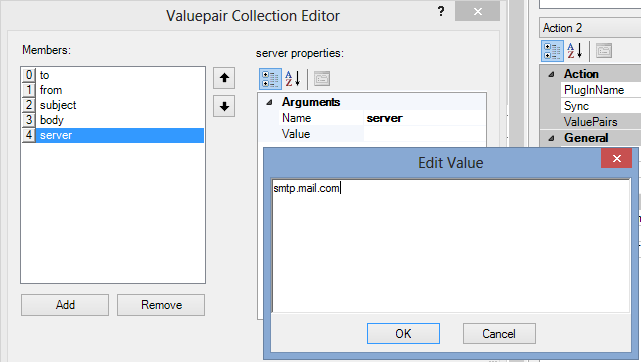
- To enter your arguments, in the Properties Pane, below PluginName, click the ValuePairs Property to open a new window.
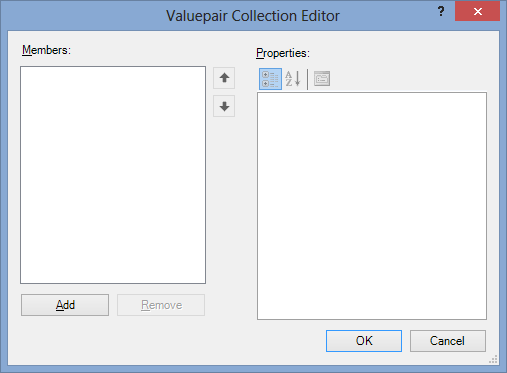
- Click Add to add a new argument.
- Select the Name property and select to from the drop down.
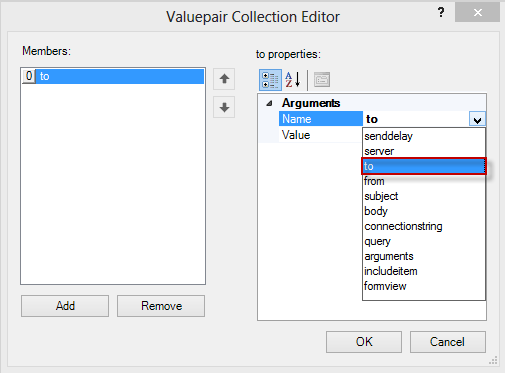
- In the Value field, enter the Email Address for the recipient.
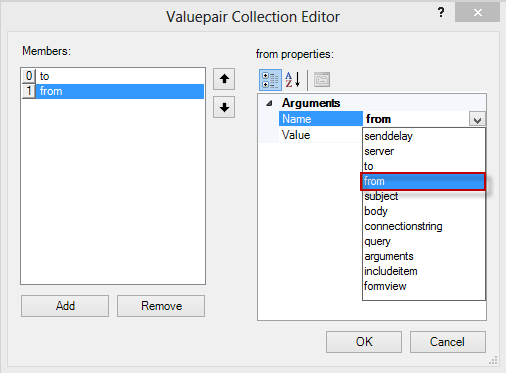
- Click Add to select a new argument.
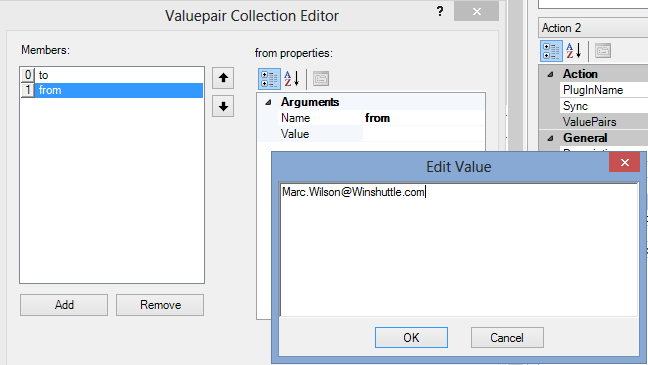
- Under the Name property, click From.
- Set the Value Property to the Email Address of the sender.
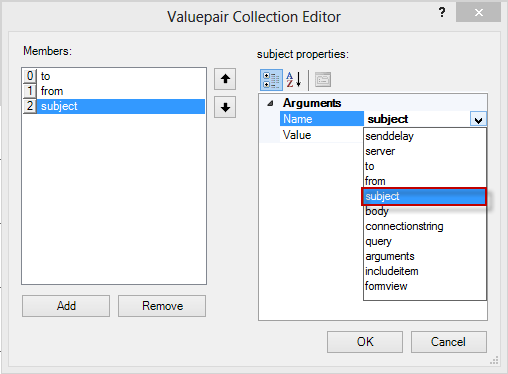
- Click Add to select a new argument.
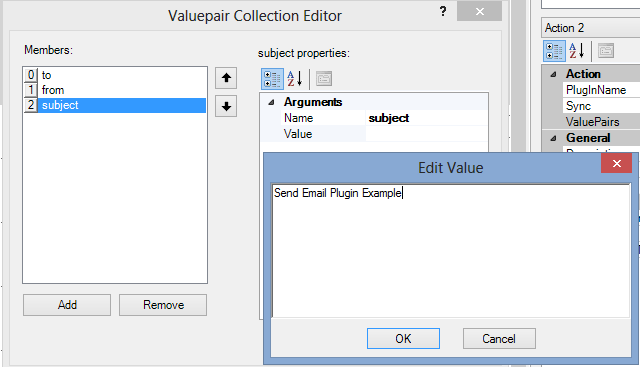
- For the Name property, select Subject.
- Set the Value property to the Subject of the Email Message.
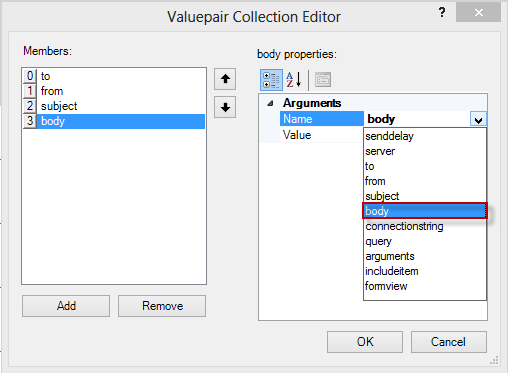
- Click Add to add a new argument.
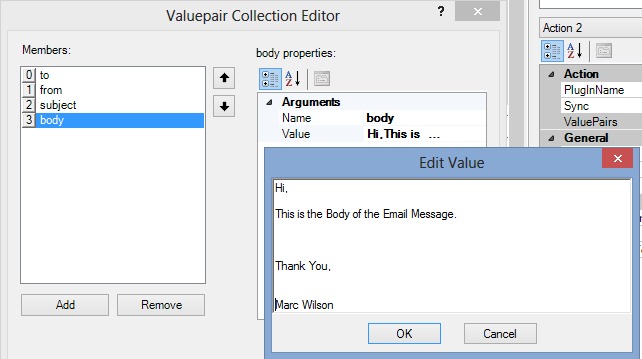
- For the Name property, select body.
- In the Value Property, enter the contents of the Email Message
- Click Add to add a New Argument
- For the Name property, select server.
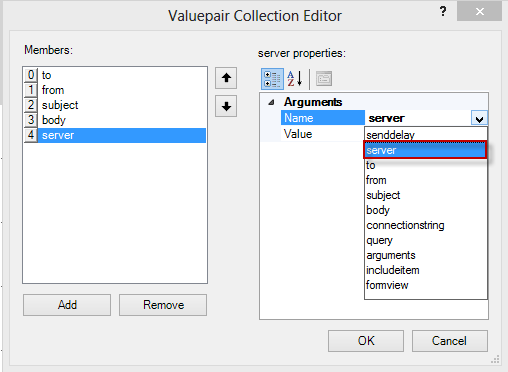
- In the Value property, enter the SMTP Server information that will be used to send the Email Message.
- Publish the Solution to your FormEx Site.
 Trademarks