 Home
Home Help Center
 Support
 Print
Print Feedback
Step 1: Add New Views
More information
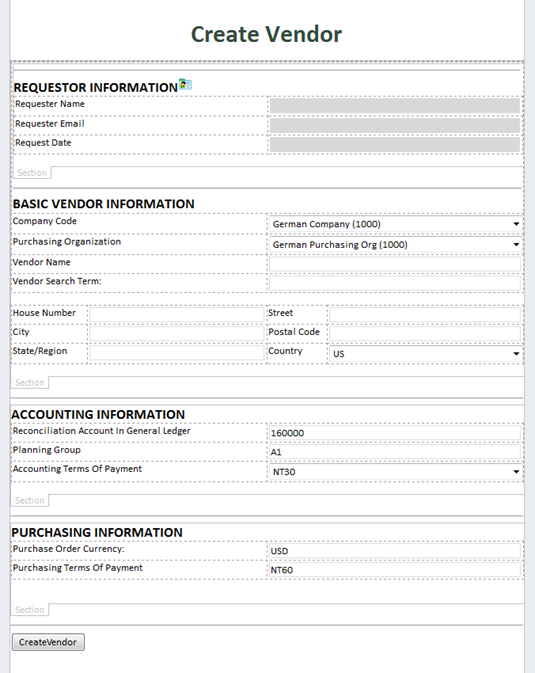
We'll begin by adding new form views to the workflow. The goal is to split up the form into the various views.
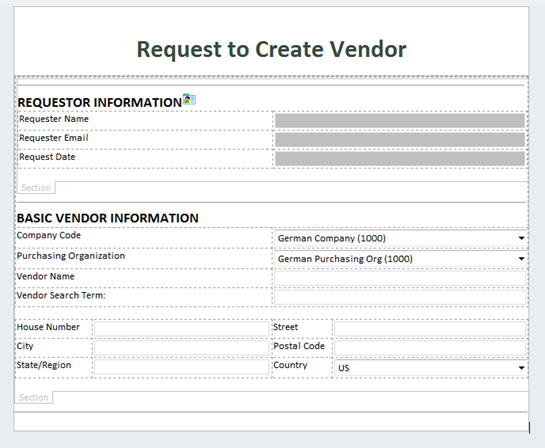
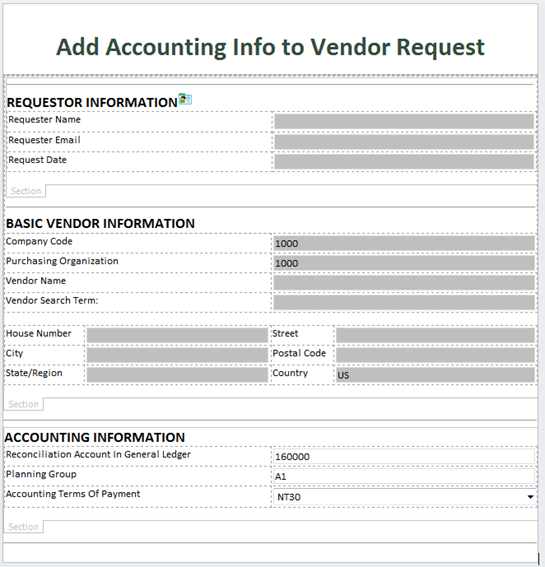
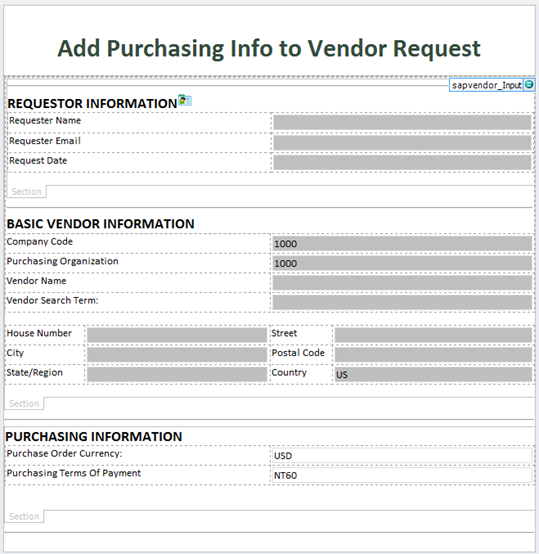
The Requester Information section and the Basic Vendor Information section will remain common between all the views. However, these sections will only be editable by the Originator.
For all other views, these sections will remain Read Only.
The Master Data view will have all the sections visible, including the button that allows the data to be posted to SAP.
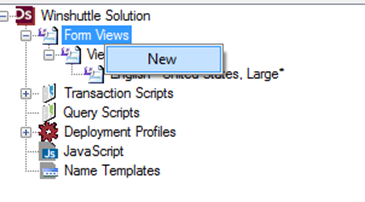
Adding views
In Designer, from the Solution Window, right click Form Views, and then click New to create a New Form View.
Note: You can set the Read Only property of a field by clicking the Property tab when a field is selected. You can also format a Read Only field to be gray to indicate that it is Read Only.
By moving the Sections of the InfoPath field around and marking fields as Read Only, we will have created 4 views. Scroll down to view the examples.
Request to create vendor view
Add accounting info to vendor request view
Add purchasing info to vendor request view
Create vendor form view
 Trademarks