 Home
Home Help Center
 Support
 Print
Print Feedback
Step 1: Enable validation
More information
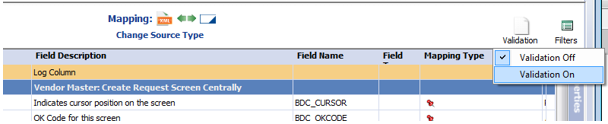
| In this step we will use Winshuttle Transaction to enable validation for a script. |
|
| Once this has been done, we re-import the script into Winshuttle Designer. Designer will prompt you to overwrite the script when it is re-imported. (Click Yes). |
|
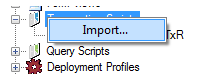
| Now in our InfoPath form, we have a new field called Validate. We set its default value to True.
|
|
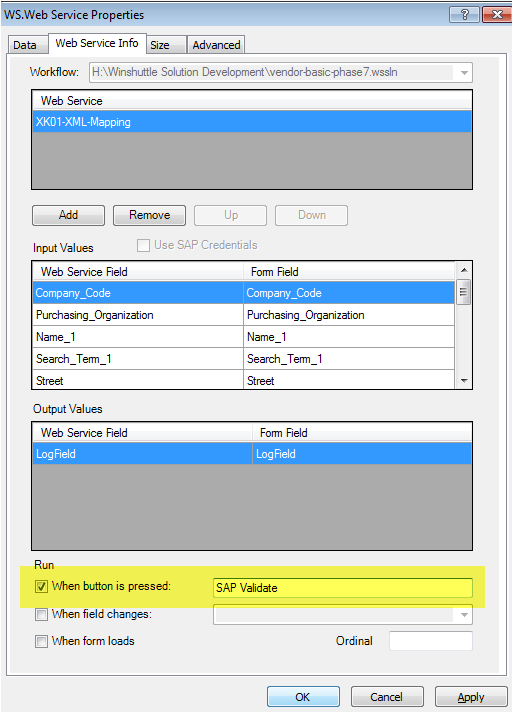
| Then we configure the properties for the Web Service (our script) and create an SAP Validate button for it.
|
|
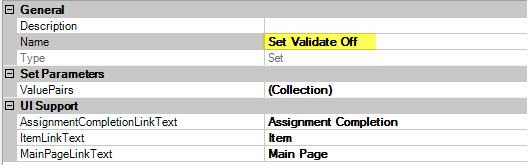
| In Designer, when we’re ready in the Master Data phase, we must set the Validate flag to OFF. turned off. |
|
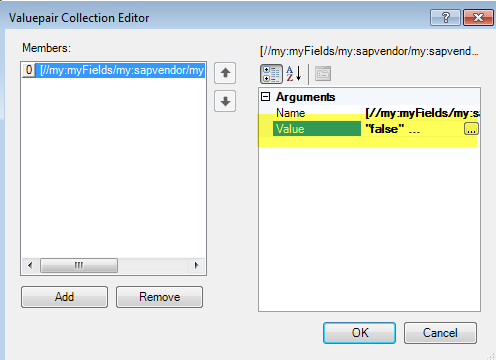
| Here, in the Valuepair Collection Editor, we're selecting the Validate Field as the argument, and then setting it to false. |
|
| In the workflow, we set the Value Setter Node (Set Validate Off) before the Master Data Approval Loop. This makes it so only someone in the Master Data Approval Loop can post the data. |
|

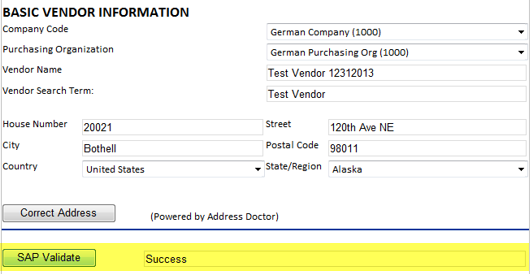
Our final results look like this when we test them.
 Trademarks