 Home
Home Help Center
 Support
 Print
Print Feedback
Configuring Winshuttle Designer for Solution Lifecycle Management mode
Back to
Related Topics
If you are using Winshuttle Designer 10.4 or later, you will need to configure it for Solution Lifecycle Management (SLM) Mode, and configure it to communicate with your SharePoint site. To do this, do the following:
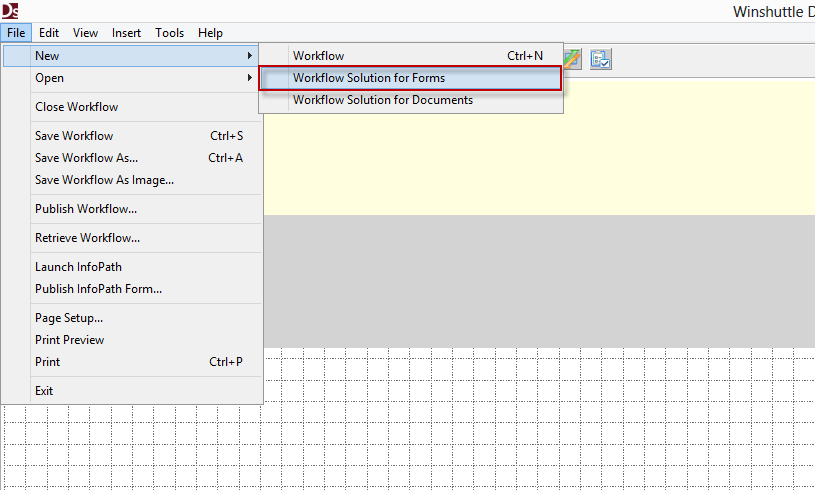
- Open Winshuttle Designer.
- Click on File, point to New, and then select Workflow Solution for Forms.
- In the Winshuttle Solution Tree Window, expand the Deployment Profiles Group.
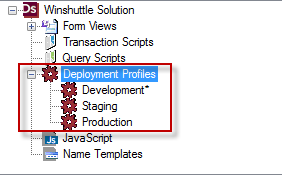
Tip: The Deployment Profiles include 3 default profiles (Development, Staging, and Production) that you can edit or delete. The Asterisk indicates the Active Profile. Profiles can edited or deleted. You can also create new profiles.
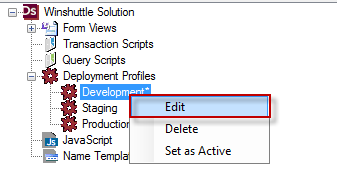
- Right click the profile you want to use, and then click Edit
- In the Value Column, replace the placeholder {{SPSite}}/ with the complete URL to your SharePoint Form Workflow Site.
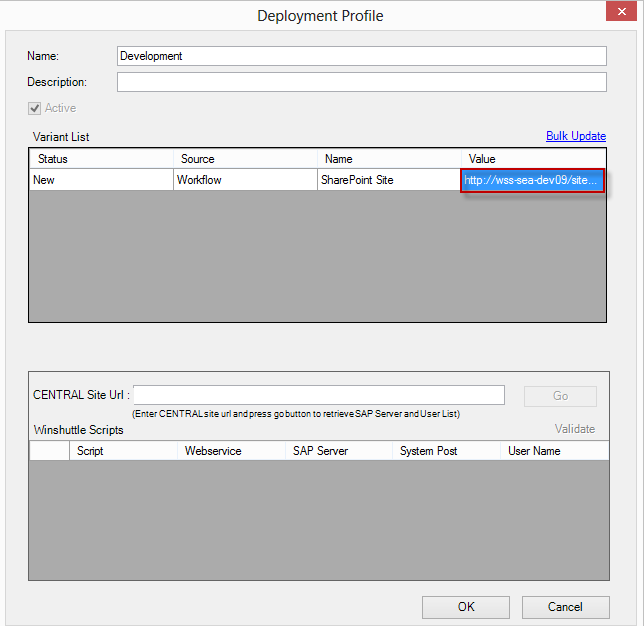
- In the CENTRAL Site Url field, insert the Full URL of your Winshuttle CENTRAL Site
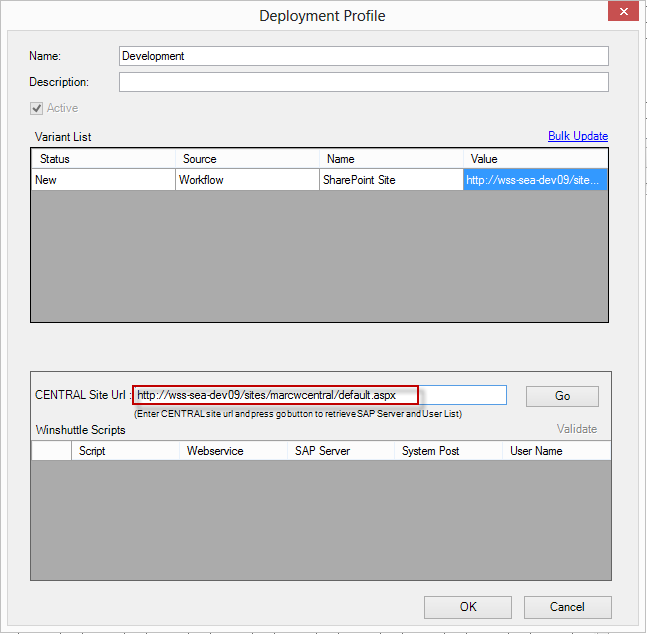
- Click Go to connect to your Winshuttle CENTRAL Site.
- Click OK to save your Deployment Profile settings.
- In the Properties Pane Window, under Publishing, locate the SharePointSite Property.
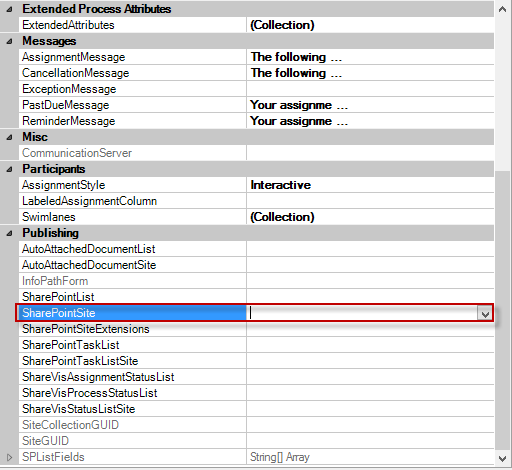
- Enter the complete URL to your SharePoint Form Workflow Site in the SharePointSite Property.
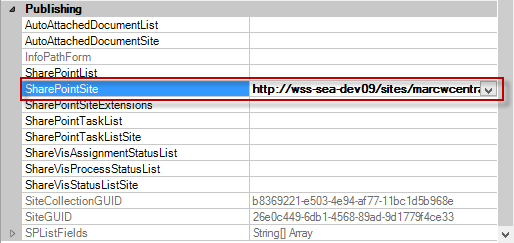
Designer is now configured to communicate and work with your SharePoint Form Workflow site.
Configuring for manually entered credentials
The following steps are only required if credentials need to be passed manually to your Winshuttle Central site -- for example, if you are working on a computer that is not connected to the domain, or if you are publishing solutions as a different user.
- On the Designer menu bar, click Tools, and then click Options.
- Click the Winshuttle tab.
- Ensure the correct credentials are being are being used to connect to the Winshuttle Central Site.
 Trademarks