 Home
Home Help Center
 Support
 Print
Print Feedback
Step 2: Add Vendor search selection
More information
In this step we'll be adding a search function to enable form users to search vendors prior to creating a request for a new vendor.
To do this:
- We'll first create the search function in Winshuttle Query.
- We'll import the Query Script into Winshuttle Designer and configure it.
- We'll add a checkbox to our InfoPath form to invoke the search, and configure some rules for it.
Creating the Query script
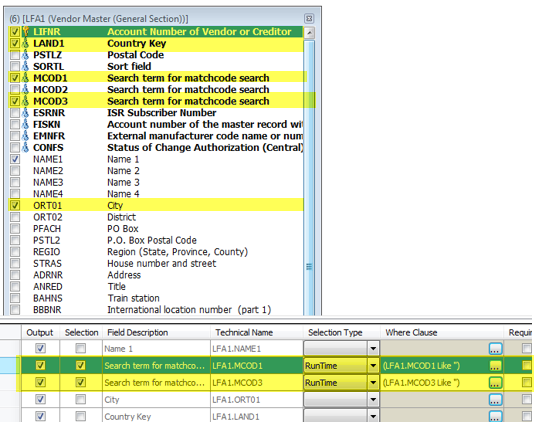
| First, we create the search function using Winshuttle Query. The screenshot at right shows the Output fields. Note that the Selection column checkbox is checked for match code fields.
|
|
|
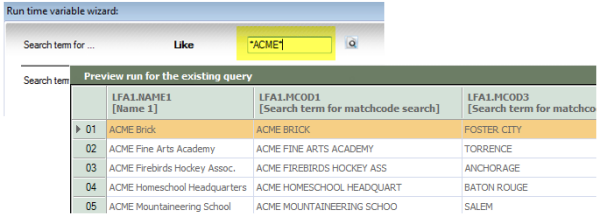
| After we've created the Query, run a test of it in Winshuttle Query. Here we search the term the 'Acme' and the query successfully returns results. |
|
|
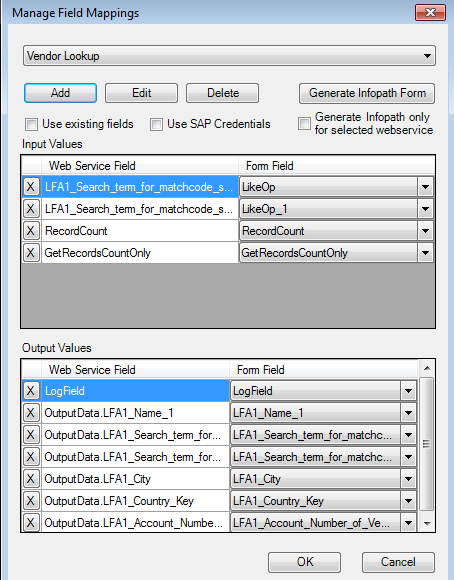
| With the test complete, now we'll map the fields to output to XML. We'll save the file and name it Vendor Lookup.qsq. |
|
|
Importing the vendor search script into Designer
| With our vendor search script ready, we are ready to import it (the Vendor Lookup.qsq file) into Winshuttle Designer. |
|
|
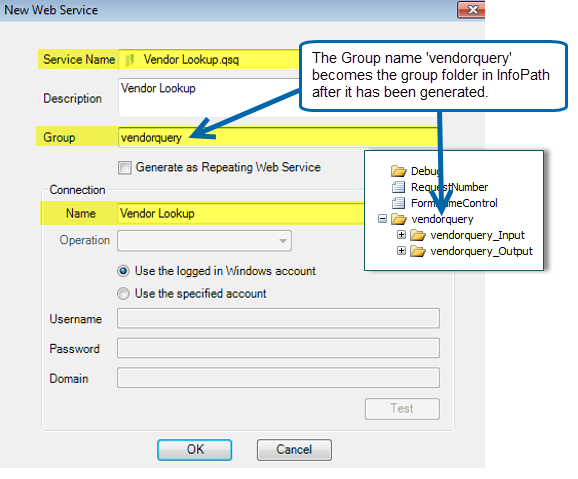
| With the script imported, we'll configure its properties, and then configure the field mappings. Here we're defining the Group (vendorquery), which will create a group folder named VendorQuery in InfoPath. Configure the service as shown at right, and then click OK. |
|
|
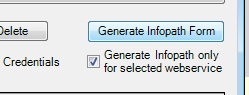
| Check the box next Generate Infopath only for selected webservice, and then click Generate InfoPath Form. |
|
|

Adding a search checkbox to the form
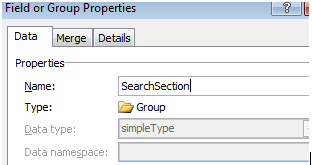
| Now all that's left to do is add the search function to our form. In InfoPath, add a new section your form called Search, and a new field called Search Flag.
|
|
|
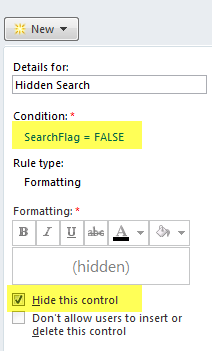
| In InfoPath, we'll also create a rule for the Search section to hide it if the checkbox is not checked. If the checkbox is checked, the search section will be visible to the user.
|
|
|
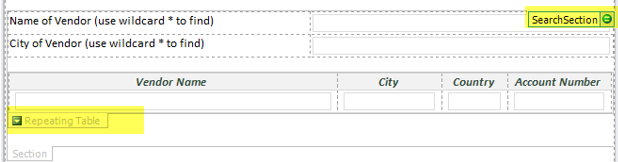
| We'll also add input fields (match code fields) to the form, and add a repeating table where the results from the search will be displayed. |
|
|
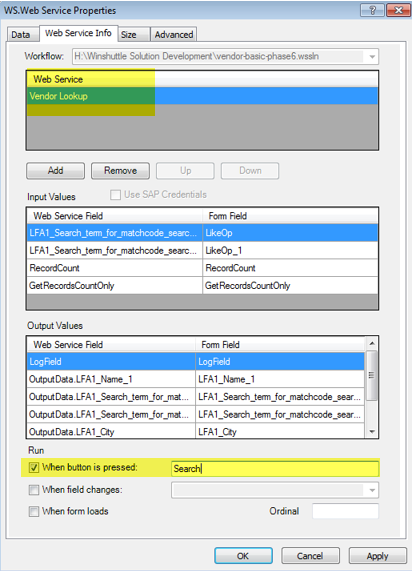
| Now we'll add another Web Service control, and configure it to activate our Query.
This also creates a button called 'Search' in the form.
|
|
|
Adding a rule to change lower case to upper case
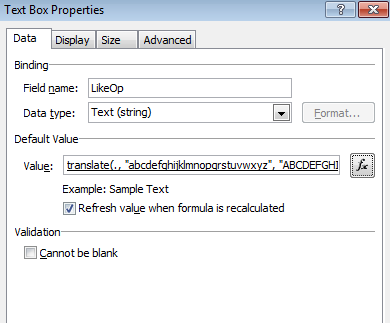
| The Vendor Name Search field must be upper case. To accommodate this, we will add a rule/formula to change the lower case values to upper case. First we'll create a rule/formula that changes lowercase characters to uppercase characters (shown in InfoPath at right). |
|
|
| Our text box properties to which the rule created above is applied. |
|
|

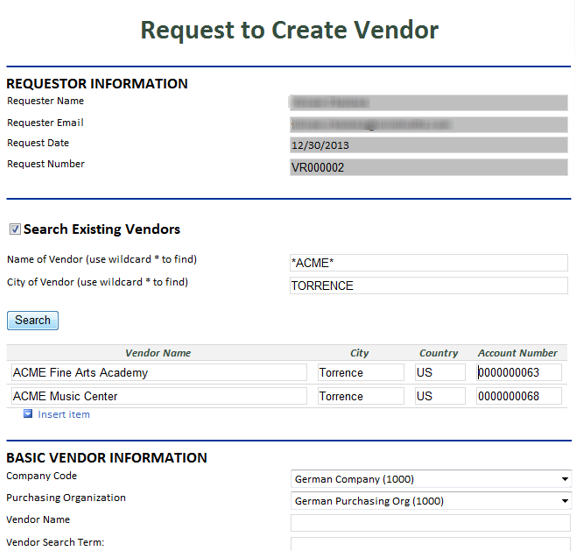
Our final form and test results should look something like this:
 Trademarks