 Home
Home Help Center
 Support
 Print
Print Feedback
Configuring Winshuttle Designer for Legacy Mode
Back to
Related Topics
If you are using Winshuttle Designer 10.3 or earlier, you will need to configure Designer for "Legacy Mode".
In the following procedure you will configure Winshuttle Designer for Legacy Mode so it can communicate with your SharePoint Workflow site. You will need to open Designer and a Web browser for this procedure.
- Open Winshuttle Designer.
- In the right-hand pane, under Publishing, next to SharePointSite, click in the empty field. <insert image
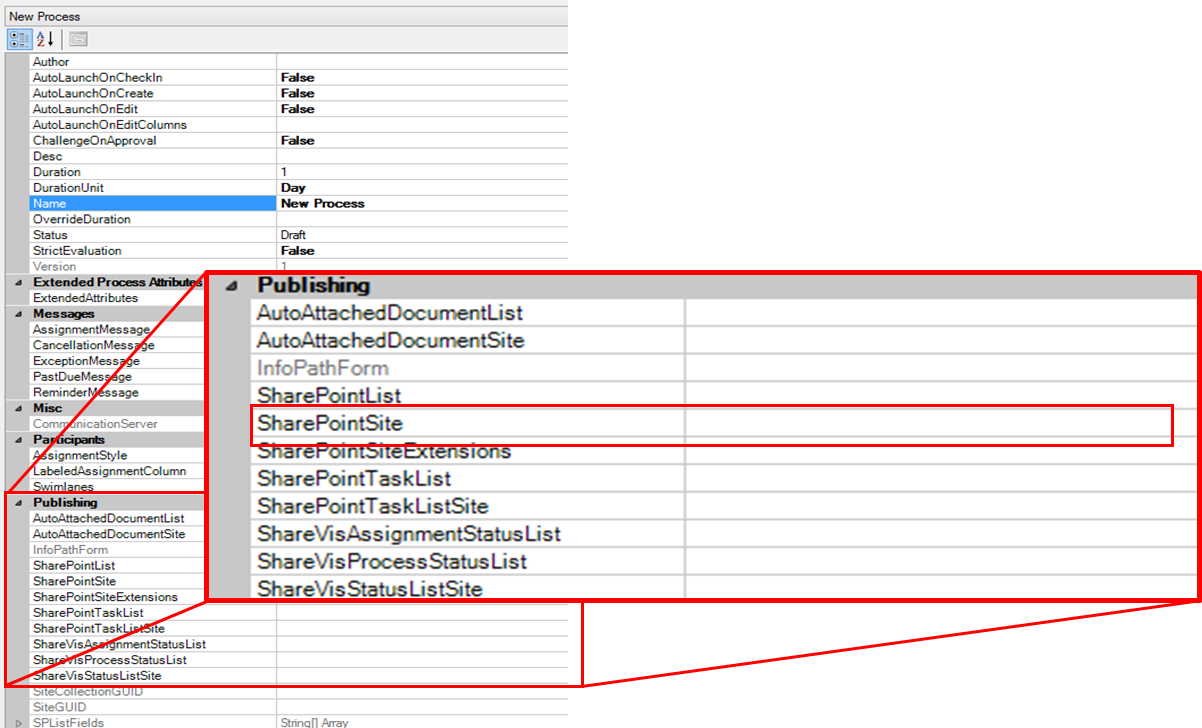
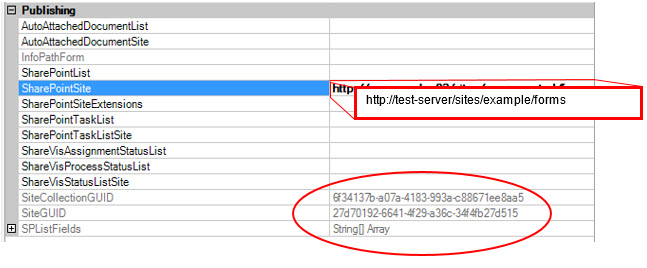
- In the SharePointSite field, type the URL of the target publishing site, and then press Enter. (Example: http://MyFormSite/Forms ). Wait for SiteCollectionGUID, SiteGUID, and SPListFields to populate with text (note: the text will be grayed out.)
- On the menu bar, click Tools, and then click Options.
- Click the WinShuttle tab.
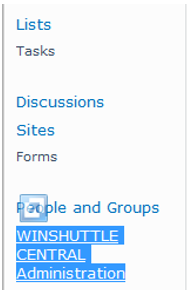
- Open a Web browser, and then navigate to your Winshuttle Central SharePoint site.
- At the bottom of the quicklaunch pane, click WINSHUTTLE CENTRAL Administration.
- Under SERVER, click TRANSACTION Services Configuration
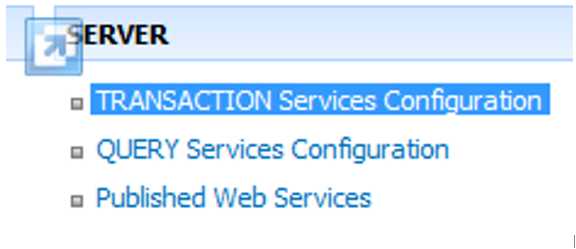
- Highlight the Winshuttle SERVER for TRANSACTION URL, but only up to /WinshuttleServer (for example: http://www.test-server:8080/WinshuttleServer ), and then press CTRL+C to copy the URL to the clipboard.
- Switch back to WinShuttle Designer (ALT+Tab). Click in the WinShuttle SERVER URL field, and then press CTRL+V to paste the URL copied in the previous step.
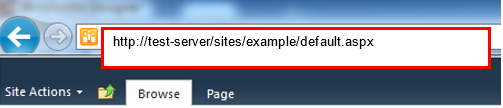
- Switch (ALT+Tab) to your Web browser where you have your CENTRAL SharePoint Site open. Click in the Web browser address field.
- Press CTRL+A to select the entire URL, and then CTRL+C to copy it to the clipboard
- Switch back (ALT+Tab) to WinShuttle Designer. Click in the CENTRAL site URL field, and then paste (CTRL+V) the URL into the field.
- Click Test Server Connection.
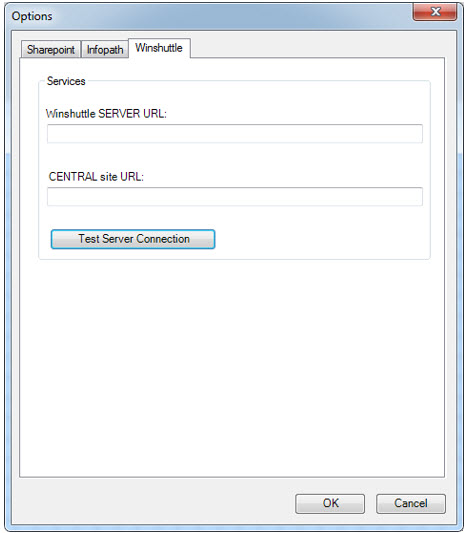
You should see a "Test Successful" message. If you encounter an error or the test doesn't successfully complete, try the procedure again, being extra careful when enter the URLs. If you continue to encounter problems, see Contacting Support for additional assistance.
 Trademarks