 Home
Home Help Center
 Support
 Print
Print Feedback
Step 3: Connect dropdown lists to SharePoint lists
More information
In this step we'll be using InfoPath and connecting the drop downs in the forms to the SharePoint Lists created in previous steps.
- In InfoPath, on the Ribbon, click Form, and then click Manage Data Connections.
- Click Add.
- Under Create a new connection to: select Receive Data.
- Select SharePoint library or list.
- Enter the path to your SharePoint site (for example, http://server/forms/lists), and then click Next.
- Under Select a list or library, select a SharePoint list and then click Next.
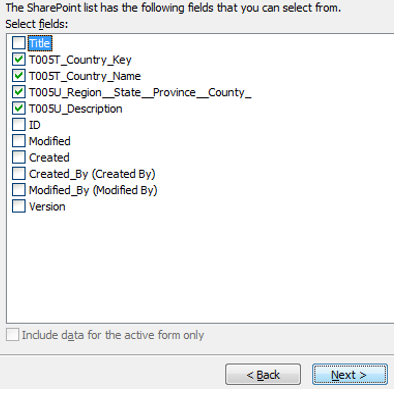
- Check the box for each field you wish to add (see below for our example), and then click Next.
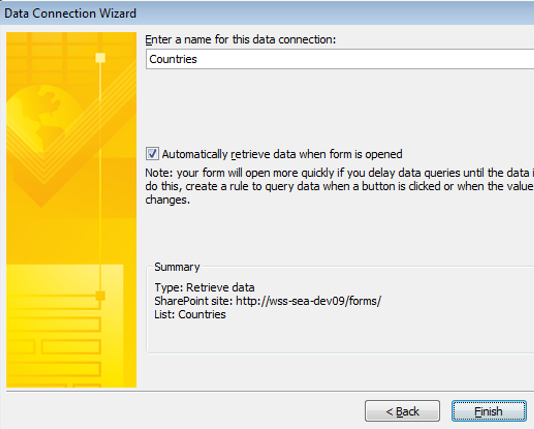
- Under Type a name for this data connection, type a name for the data connection.
- Check the box next to Automatically retrieve data when form is opened, and then click Finish.
Convert the list to a drop down
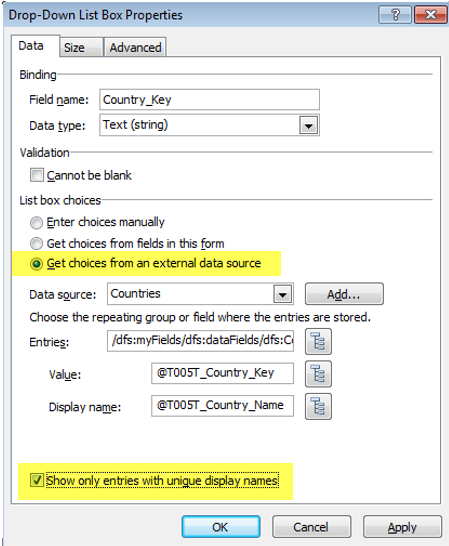
Now that we have established a data connection, we'll go to the field marked Country Key, and then convert it to a drop down list. We'll also filter the list to show only the state or regions that correspond to the selected country.
|
|
Create a regions filter
For this phase we will essentially repeat what was done for Countries and apply it to a new dropdown called Regions. Follow the same basic procedure outlined above for creating a data connection to a SharePoint list and then converting it to a dropdown. After creating the Region and State fields to drop down lists, we create a filter to show only the state or regions that correspond to a selected country.
|
|
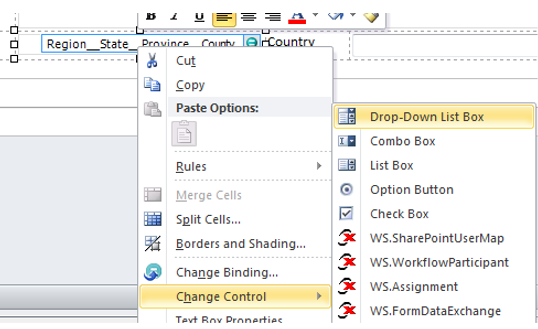
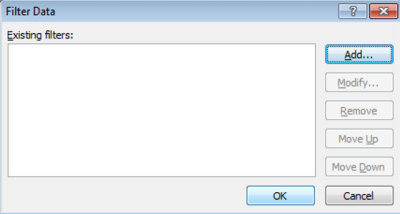
- In InfoPath, select the control that you want to filter.
- Under Control Tools, on the Properties tab, in the Properties group, click Control Properties.
- Next to the Entries box, click Select XPath

- Select the field or group that contains the desired values for the control, and then click Filter Data.
- Click Add.
NOTE: If you want to add a condition to an existing filter, click the filter that you want, and then click Modify.
- In the first box on the Specify Filter Conditions dialog box, click the name of the field (see example below) whose data you want to filter.
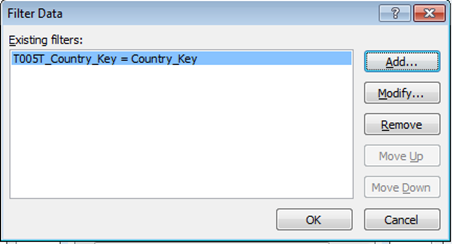
- In the second box, click the type of filter that you want to use.
- In the third box, click the type of condition that you want to apply to the filter, and then type the condition.
In the previous example, the contents of the control are filtered so that the contents of the Category field are equal to the contents of the category field in the data source.
- If you want to specify additional criteria for the filter, click And, and then specify the desired criteria.
If you do this a fourth box appears. Click a modifier, and then click and (if both conditions should be applied to the filter), or click or if (if either condition should be applied to the filter).
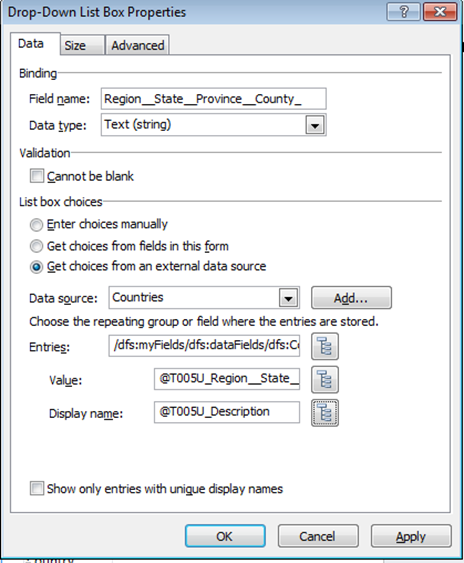
The properties for our example Drop down list are shown below.
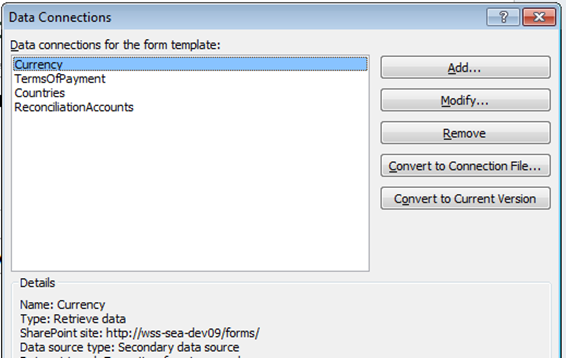
Adding a Terms of Payment data connection
In this final part, we've simply repeated the previous process and added additional connections for:
At this point we have created data connections and drop downs for every field.
|
|
 Trademarks