Step 1: Add an approval and revision loop
More information
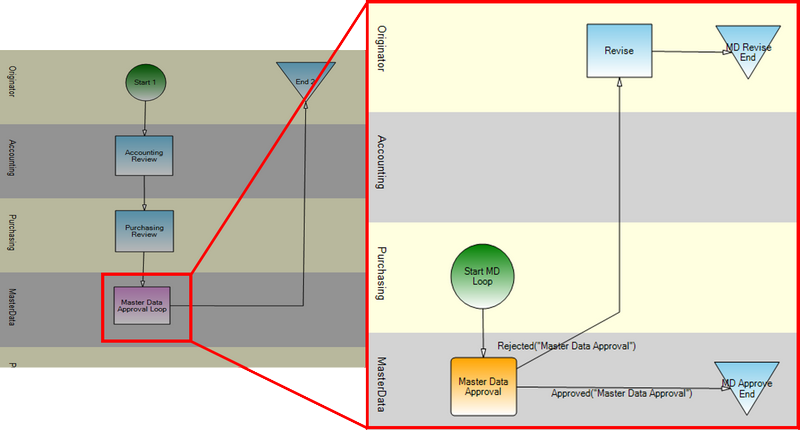
In this phase of development we will use Winshuttle Designer to add a Master Data Approval loop. The diagram below shows the loop.

To make the loop work, you must create conditions in case of cancelation or approval.
- Insert a Loop node into the workflow.
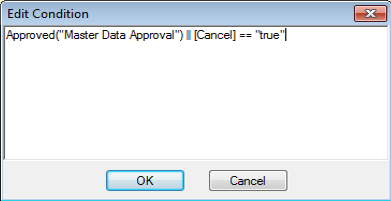
- Edit the condition for the Node as follows:
Approved("Master Data Approval") || [Cancel] == "true"

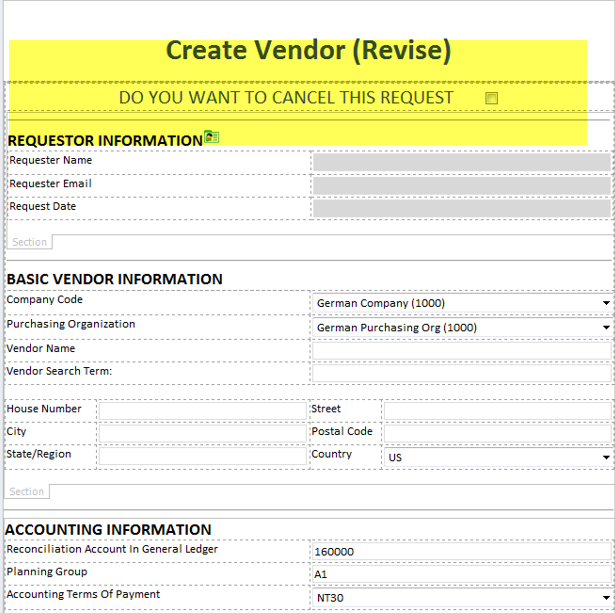
- We'll also add a check box to the form view to give the reviewer the option to cancel the request.

- In our form, we'll also promote the cancelation to a SharePoint List. (See Phase 4, Step 6: Promote form fields to SharePoint lists for more information.)
The final output at this stage will generate the following example:

For the last part of this step, we'll promote the cancelation form field to a SharePoint list.
Promoting fields to SharePoint
To promote InfoPath 2007/2010/2013 fields as SharePoint columns:
- From the Tools menu, select Form Options.
Note: If you are using InfoPath 2010/2013, click the File tab, and then click the Form Options icon.
- In the Category area, click Property Promotion.
- Click Add.
- Select the field that you want to export to a SharePoint column, and then click OK.
 Home
Home Help Center
 Support
 Print
Print Feedback
 Back to top
 Trademarks