 Home
Home Help Center
 Support
 Print
Print Feedback
You are here: Getting Started > Tutorials > Tutorial 2: Creating a form with SAP Web services > T2-5. Create the form in InfoPath
Tutorial 2–Step 5: Create your form in InfoPath
Tutorial 2: Creating a form with SAP Web services
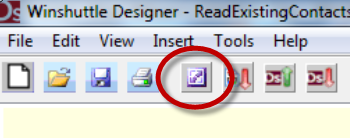
- On the Designer toolbar, click the Launch Infopath button.
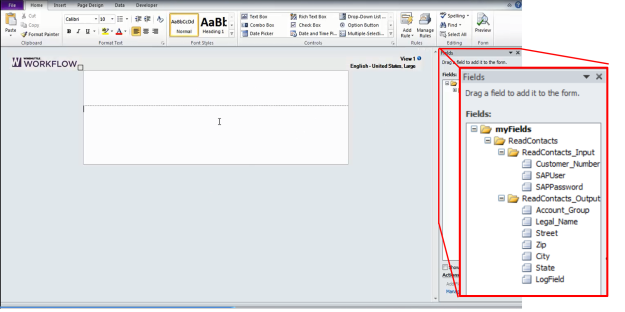
- InfoPath will launch with a blank form. Your fields will be displayed in the Fields pane. (You may need to expand the folders as shown in the example below).
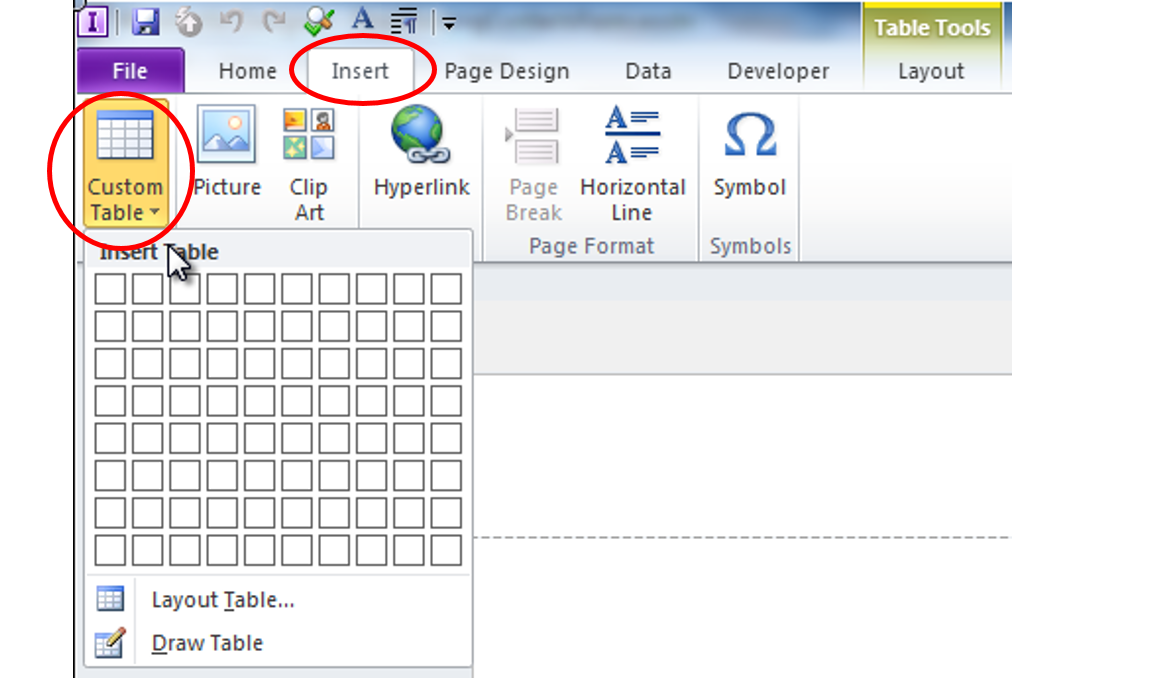
- On the InfoPath ribbon, click Insert, Custom Table, and insert a table appropriate to the size of the form you are creating and the number of fields you are using. (This is an optional step, but using a table is a convenient way to help organize your form.)
- Drag and drop the fields you want from the Fields pane into the blank InfoPath form. See the following example.
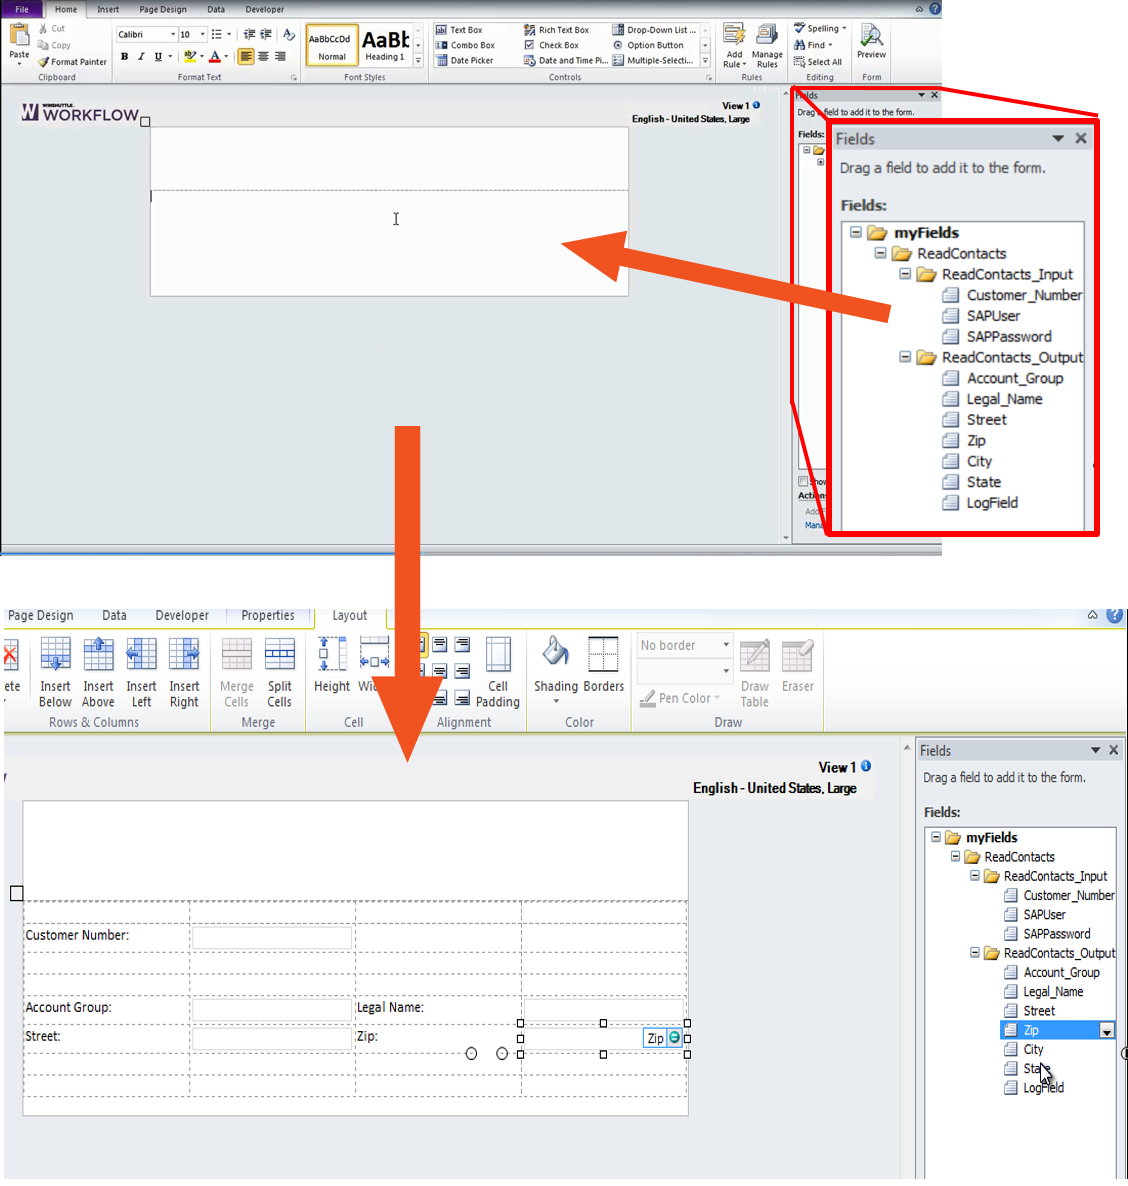
Note: Winshuttle recommends dragging the Logfield field into your form. The Logfield is a message from SAP that tells you whether or something you post is successful.
 Trademarks