 Home
Home Help Center
 Support
 Print
Print Feedback
Tutorial 1–Step 13: Configuring Autopost
Tutorial 1: Creating a Time Off Request Form
- Creating a form workflow site
- Creating the form solution
- Creating development profiles
- Creating the workflow
- Submitting solutions for approval
- Publishing the Solution
- Starting a new form and process
- Completing the task assignment
- Viewing task history
- Assigning unique form names
- Adding requester name and date
- Adding email notifications
- Configuring autopost
You can select to autopost data through Designer, instead of autoposting through the Winshuttle Central's built-in workflows.
On this page
Configuring your environment for autoposting
Before you can autopost data, the current Workflow admin site URL must be added to CENTRAL. A CENTRAL administrator may need to do this.
Configuring the Workflow Administration site for Winshuttle Central
- In CENTRAL, click Winshuttle CENTRAL Administration.
- Under Site, click Workflow Configurations.
- In the Workflow admin site URL box, add the URL. Click Save or click Update.
To autopost TRANSACTION data through Designer, the workflow for data files must be removed from CENTRAL. Workflows are required to be removed only once, and not every time autopost detail is changed. Ensure that you remove workflows only for data files. A CENTRAL administrator may need to do this.
Removing Winshuttle Central data file workflows
- In Winshuttle Central, click the data file library.
- Click Workflow Settings. Delete the workflow, if present.
- Click Library Settings and remove the workflow by doing the following:
- Under Content type, select the data file doc.
- Click Workflow Settings.
- To remove the workflow, click Remove workflow.
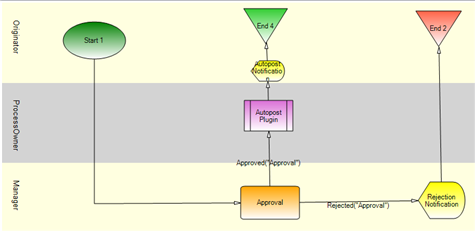
Configuring the Autopost plug-in
- In Designer, create your workflow.
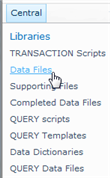
- In the right-hand Properties pane, under Publishing, click SharePointList. Click Data Files.
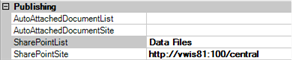
- Click SharePointSite and add the value of the URL for the SharePoint site.
- On the Designer toolbar, click the Plug-in button and drag to the appropriate swimlane.
- With the plug-in node selected, in the Properties pane, next to PlugInName, click the arrow, and then select Winshuttle Autopost.

- In the Properties pane, next to Sync, click the arrow, and then click False.
When Sync is set to false, the workflow pauses until the autopost job is complete.

- In the Properties pane, next to ValuePairs, click the […] button.
The Valuepair Collection Editor appears.
- Click Add.
- Under Arguments, click Name and then click the arrow. Select a parameter.
- Under Arguments, click Values, and then click the […] button.
The Edit Value dialog box appears.
- Enter the values you want and click OK.
- Repeat steps 8 - 11 for each value that you want to add.
Value Pair
Description
Values
centralsiteurl
The CENTRAL site URL
Type in the CENTRAL site URL. This must be http:// or https://.
istransaction
Specifies that TRANSACTION will be used to autopost.
True
validate
Use to validate or autopost data
True, if validating data; false, if autoposting data
- On the File menu, click Publish Workflow.
The workflow is added to your SharePoint site and is available for use.
How to use Autopost
- In TRANSACTION, create a data template and submit it to CENTRAL. It should appear in the data file library.
- With RUNNER for TRANSACTION, users can add data to a data file and submit it for posting to SAP through CENTRAL. With the correct configuration in Winshuttle Central, data should be posted automatically within 5 minutes.
 Trademarks