 Home
Home Help Center
 Support
 Print
Print Feedback
Tutorial 3–Step 10: Configure transitions and promote form fields
Tutorial 3: Building an advanced from and workflow
- Build a form in InfoPath
- Add and change swimlanes
- Create a starting workflow
- Publish the form
- Create an intermediate workflow
- Create Manager and HR form views
- Add functions for form logic
- Create an advanced workflow
- Create a SharePoint list and data connection
- Use transitions and promote fields
- Publish Transaction script as a Web service
- Add custom controls to InfoPath
- Configure custom controls in InfoPath
- Configure custom controls in InfoPath (advanced)
After completing this exercise, you will use workflow transitions and conditions to route documents based upon data entered into a form.
Transition properties
Transition properties allow you to define conditions that must be met before moving from one node to the next. For example, you can set conditions based on SharePoint column values such as Priority or Amount, or based on the current workflow state such as Approved or Rejected.
You can use the following operators:
| Relational Operators | Description | Logical Operators | Description |
== | Equal | && | And |
!= | Not | || | Or |
> | Greater | ! | Not |
>= | Greater than |
|
|
<= | Less than |
|
|
< | Less |
|
|
= | Assignment |
|
|
- Open the Time Off Request solution.
- Delete the Transition between the Start node and the Manager Approval node.
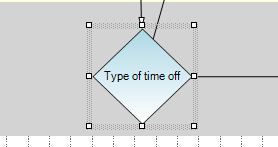
- Insert a Decision Node anywhere in the workflow.

- Rename the Decision Node to Type of Time Off.
- Make a Transition from the Start Node to the Decision Node.
- Insert a Notification Node in the Manager swimlane.
- Make a transition from Type of time off node to the Notification node.
- Make another transition from Type of time off node to the Manager Approval node.
- Select the transition between the Type of time off node and the Notification node.
- In the Properties pane, on the Condition property, click the […] button.
- Right-click in the whitespace, and then select fields.
Notice that your field from the form is now there. In addition, Since we have not promoted the field we would like to use yet, it is not available in the workflow.
- Navigate back to your Time Off Request form, and then go to the Form Options.
- From the Category list, select Property Promotion.
- Click Add…
- Select TypeOfTime, and then click OK.
- Click OK, and then navigate back to Winshuttle Designer and repeat step 11.
Notice that when you right-click and select Fields again, the TypeOfTime field still isn’t listed.
- In order to get the updated information from our InfoPath form, you need to publish the form one more time.
Don’t forget to close InfoPath before publishing.
- After you have published your form, navigate back to Winshuttle Designer, and then select the transition between Type of Time Off and the Notification node.
- In the Properties pane, select Condition.
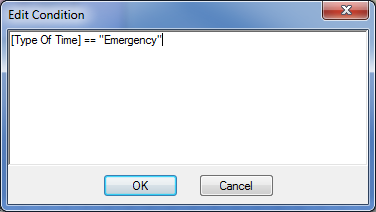
- In the Edit Condition dialog box, right-click in a blank space, and then select Fields. The TypeOfTime field now appears.
- Select TypeOfTime.
- To the right of [Type Of Time] insert the text == "Emergency" and then click OK.
- Select the transition between Type of Time Off and the Notification node.
- Click the Edit Condition button.
- In the Edit Condition box, right-click in a blank space, and then select Functions.
- Select Otherwise, and then click OK.
- Insert another End Node in the originator swimlane.
- Create one last transition from the Notification node
- Save your workflow, publish your form and workflow again, and then preview.
 Trademarks