You are here: Getting Started > Tutorials > Tutorial 3: Building advanced forms and workflows > T3-4. Publish a form/workflow
Tutorial 3–Step 4: Publish the form
Tutorial 3: Building an advanced from and workflow
- Build a form in InfoPath
- Add and change swimlanes
- Create a starting workflow
- Publish the form
- Create an intermediate workflow
- Create Manager and HR form views
- Add functions for form logic
- Create an advanced workflow
- Create a SharePoint list and data connection
- Use transitions and promote fields
- Publish Transaction script as a Web service
- Add custom controls to InfoPath
- Configure custom controls in InfoPath
- Configure custom controls in InfoPath (advanced)
In this exercise you will publish the form.
- Open the Time Off Request workflow created in Exercise 1.
- There are two different ways to publish a form:
- On the File Menu, click Publish Form.
- On the toolbar, click the Publish Form icon (see below).

NOTE: You must be closed out of InfoPath before publishing a form. You will get an error if InfoPath is still open.
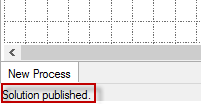
- Wait until status bar reads Solution Published.

- Your form is now published.
 Home
Home Help Center
 Support
 Print
Print Feedback
 Back to top
 Trademarks