 Home
Home Help Center
 Support
 Print
Print Feedback
You are here: Getting Started > Tutorials > Tutorial 3: Building advanced forms and workflows > T3-11. Publish a script as a Web service
Tutorial 3—Step 11: Publish Transaction script as a Web service
Tutorial 3: Building an advanced from and workflow
- Build a form in InfoPath
- Add and change swimlanes
- Create a starting workflow
- Publish the form
- Create an intermediate workflow
- Create Manager and HR form views
- Add functions for form logic
- Create an advanced workflow
- Create a SharePoint list and data connection
- Use transitions and promote fields
- Publish Transaction script as a Web service
- Add custom controls to InfoPath
- Configure custom controls in InfoPath
- Configure custom controls in InfoPath (advanced)
In this exercise you will publish a script as a Web service and integrate the Web service into a form.
- Open Winshuttle TRANSACTION.
- Choose a script to work with.
Select a simple script. In this example, we will be using a script that will download current data for a user to see.
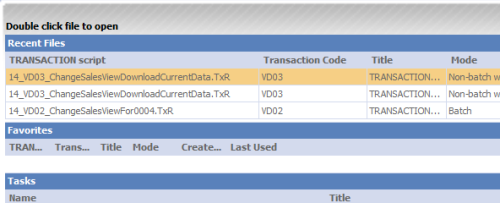
- Double-click the script selected in step 2.
- On the left side, under Map, click Update Mapping to convert the script to XML.
- Click Change Source Type and then select XML Forms from the drop menu.

- Click Save.

- Close Winshuttle Transaction.
- Open Winshuttle Designer.
- Click File, point to New, and then select Winshuttle Solution for Forms.
- Make sure your Development Deployment Profile is correctly configured (refer to Exercise 1 for instructions).
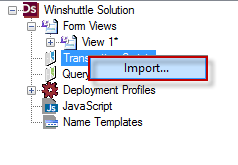
- In the Winshuttle Solution Tree Window, right-click Transaction Scripts and select Import.
- Select a Winshuttle TRANSACTION Script that you would like to work with.
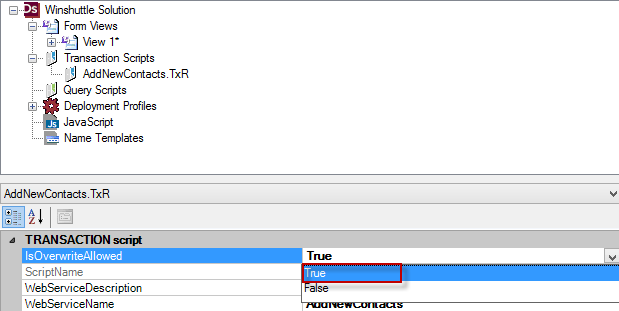
- Select the Winshuttle TRANSACTION Script added in the previous step. In the Properties Pane, under Transaction Script, set the IsOverwriteAllowed Property to True
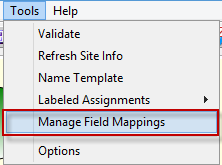
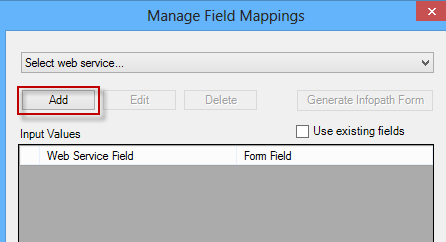
- On the toolbar, click Tools, and then Manage Field Mappings.
- Click Add.
- From the Script Name drop down list, select the Winshuttle Script you added to your solution.
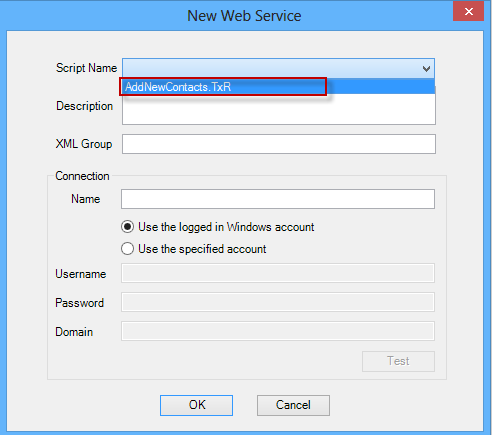
- In the XML Group Field, enter a name for the XML Group that will hold all of the XML Fields for this Script. (Spaces, numbers, and special characters are not allowed in the name.) Click OK.
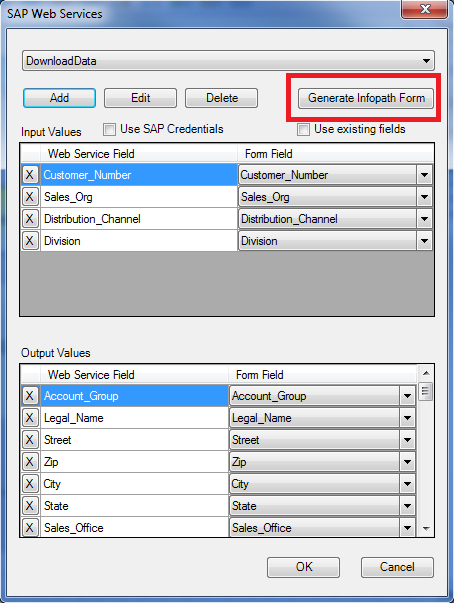
- Click Generate InfoPath Form, and then click OK.
- In Winshuttle Designer, click Save to save your changes.
- From the Winshuttle Designer toolbar, click Launch InfoPath.

In InfoPath, notice that the form is already made for us and all of the fields are already created in the Fields section.
- In the Fields section, expand your folder to show the Input Fields.
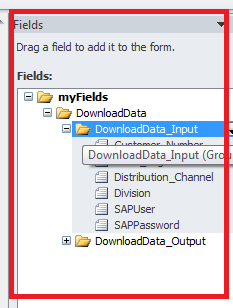
- Click and drag your Input folder into the form.
- On the form, delete the SAPUser and SAPPassword fields as well as the text. (They aren't needed for this exercise.)
- Return to the Fields section and then expand your output folder.
- Drag the output folder to the form below your last field.
NOTE: To improve readability, press Enter twice in between the last Input field and the first Output field.
- Save your form.
 Trademarks