Applies to:
Working with Winshuttle Foundation audits
Reports and audits

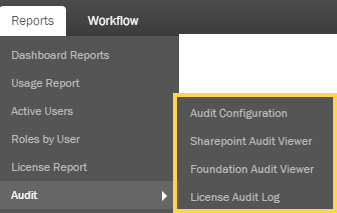
The Audit submenu enables you to change audit settings and view SharePoint and Winshuttle Foundation auditing information.
For example, you can:
- Change the types of actions that are audited, or clear the audit log.
- View an audit trail for SharePoint document check outs for a specific user.
- Review the Winshuttle Foundation System Usage level for a specific date period.
On this page
Audit Configuration
Back to top
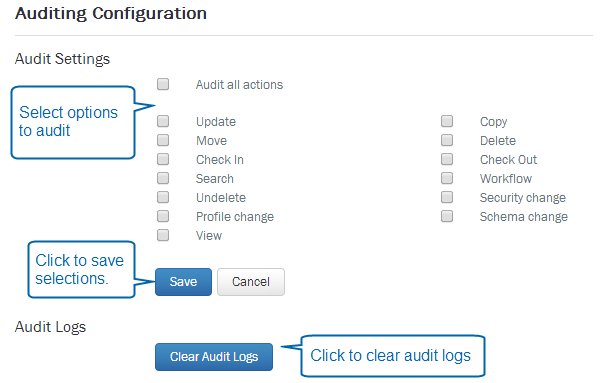
To change the Audit Configuration:
- On the Winshuttle Foundation Administration menu bar, click Audit, and then click Audit Configuration.
- Under Audit Settings, select the options you wish to audit.
- Click Save.
- If you wish to clear audit logs, click Clear Audit Logs.
SharePoint Audit Viewer
Back to top
- On the Winshuttle Administration home page menu bar, click Audit, and then click SharePoint Audit Viewer.
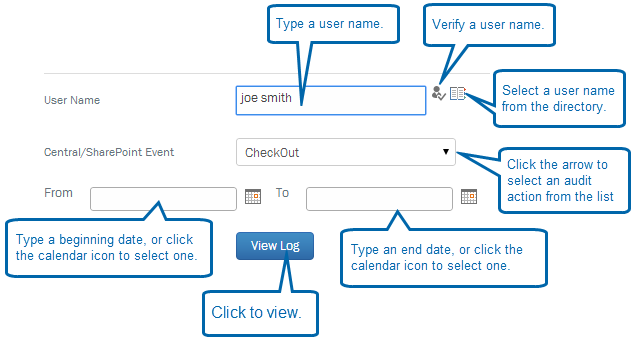
- On the SharePoint Audit Viewer screen:
- User Name: Type a User Name or click the Directory
 to select one. Click Check Names
  to verify the selection.
 - Central SharePoint Event: Click the arrow, and then select an action from the list (for example, Checout, Checkin, Copy, etc.)
- From/To: Type a date in each field, or click the Calendar
 to select a date.
- User Name: Type a User Name or click the Directory
- Click View Log.
Foundation Audit Viewer
Back to top- On the Winshuttle Foundation User Governance Administration menu bar, click Audit, and then click Foundation Audit Viewer.
- On the Foundation Audit Viewer screen:
- Action: Click the arrow, and then select an action (Query Policy, SAP Credentials, etc.)
- From/To: Type a date in each field, or click the Calendar
 to select a date.
- Click View.

License Audit Logs
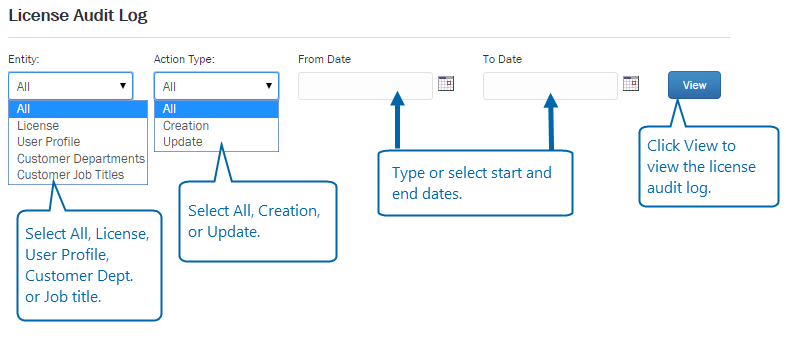
Back to topUse the License Audit Log to view logs for all licenses that have been created or updated, based upon the license, a user's profile, department, or job title.
- Under Entity, select an entity to be audited (All, license, user profile, department or job title).
- Under Actiontype, select Creation (for all creation entries), Update (for all update entires), or All.
- Under From Date, type or select the beginning date for the log period.
- Under To Date, type or select the end date for the log period.
- Click View.
