Applies to:
Working with documents: Overview
Document workflow topics
Use the document library to add, view, or change documents, view document details, view document history, and more.
On this page
- Sorting the document list
- Adding a document to the document library
- Modifying a document
- Viewing a document history
- Viewing document details
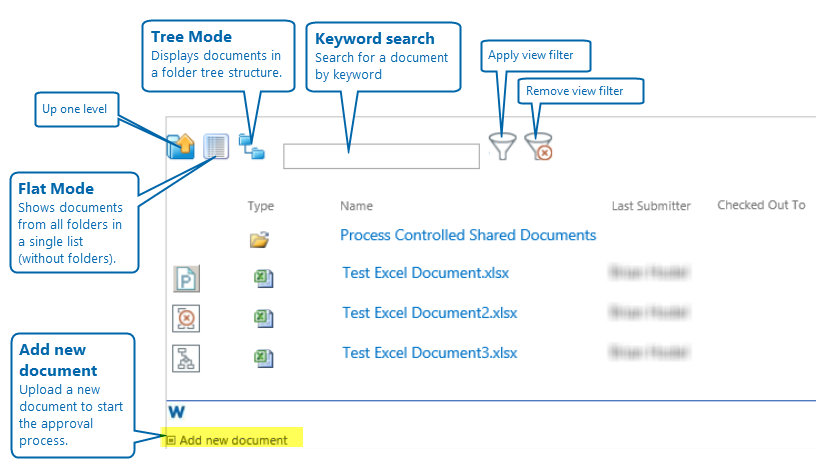
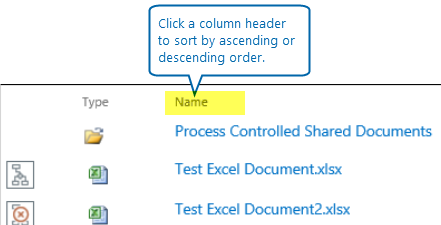
Sorting the document list
Back to top- Click a column header (Name, for example) to sort the list in ascending order.
- Click the column header again to sort in descending order.
Adding a document to a Winshuttle Workflow Document Library
Back to top|
System Administrators can add documents to a document library without going through an approval process. If you are not a System Administrator, you will need to go through an approval process to make your document accessible by others. This will depend on the processes that have been set up in your environment, and the workflows that have been published. |
|
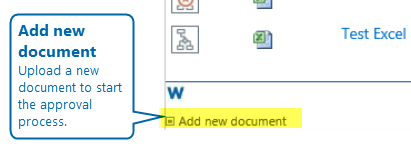
To add a document:
- Click Add new document.
- On the Upload Document page, next to Name, click Browse.
- Select the document that you want to add. The types and sizes of documents that you can add are based on your SharePoint settings.
- (Optional): Type comments in the Version Comments box.
- (Optional): Type a name for the document in the Name box.
Note: It is generally best to use names that contain only alphanumeric characters, underscores, and spaces.
- Click OK.
The selected document is added to the document library and now appears in the Winshuttle Explorer Web Part.
NOTE: Microsoft Office documents (Word, Excel, etc.) can have a variety of additional properties associated with them. To access these properties, in Windows Explorer, right-click the document, and then select Properties from the menu.
When you upload an Office document, SharePoint attempts to copy properties from the Office document to a similarly named SharePoint column. For example, if you have a Revision property in a Word document that you are uploading, and your SharePoint document library also contains a Revision column, SharePoint will automatically copy the Revision value from the document to the SharePoint column.
Modifying a document
Back to topOnly System Administrators can modify documents in a document library; if you are not a System Administrator, you will need to go through an approval process before changes that have been checked-in are visible to others. This is dependent upon the processes that have been set up in your environment, and the workflows that have been published.
To modify a document
- In the Winshuttle Explorer Web Part, click the document you want to modify and then select Check Out from the Winshuttle menu. This will lock the document for editing.
- On your local machine, make changes to the document as needed.
- In the Winshuttle Explorer Web Part, next to the document name, click the drop-arrow and then select Replace from the Winshuttle menu.
Note: The file being uploaded must have the same name as the checked out file.
- Next to the document name, click the drop-arrow and then select CheckIn from the Winshuttle menu.
- On the Winshuttle Check In page: Type comments (Optional) in the Comments box. If one or more workflows exist in this document library, you can select the workflow to be run. Continue with steps 5-7. Otherwise, click OK to complete check-in of your document.
- From the Process drop-down list, select the workflow to run.
A control for each swimlane in the selected workflow will appear.
- For each swimlane, specify the person or group to assign.
- Click OK.
The workflow begins. Anyone with a task assigned will now have a task in his or her Task List Web Part. Once the workflow completes successfully, the new version of the document is checked into the document library and becomes available for use by all users with access.
Viewing a document history
Back to topWinshuttle History gives you a detailed account of a document as it was being routed. It includes each revision, the participants in the process, and the assigned/completed date of their tasks.
To view a document workflow:
- In the Winshuttle Explorer Web Part, place your cursor over the document for which you want to view a workflow, click the drop-down arrow to the right of the document name, and select Winshuttle History from the Winshuttle menu.
The Winshuttle Process History page displays information about the document workflow similar to the following:
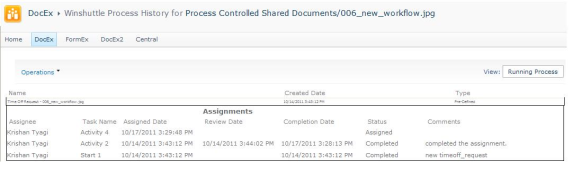
- Use the View menu to select the type of information you want to display.
NOTE: You can also view workflow History from the Winshuttle Task List and the Winshuttle Process List. These Web Parts are described later in this chapter.
Displaying the document library Detail View
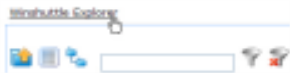
Back to topTo display the Document Library Detail View, click the Winshuttle Explorer link at the top of the Document workflow site as shown below:
The Document Library Detail View shows all of the documents in your document library, including the following information for each document:
- Type of document
- Document name
- Date the document was last modified
- Name of the last person to modify the document
- Name of the person to whom the document is currently checked out
- Approval status (Approved, Rejected, or Pending)