Activating and configuring a new Foundation installation
Completing Foundation 11.x installation
Use the following instructions if you are activating a new Winshuttle Foundation installation. Note that not all of these phases must be completed depending on your installation. Some settings can be added or changed later through Foundation Setup.
On this page
- Configure the Licensing Service
- Activate Winshuttle Foundation
- Assign the Foundation License
- Configure Winshuttle Workflow
- Enter Winshuttle SAP Integration Server Details
- Complete administrative setup
1. Configure the Licensing Service
Back to top
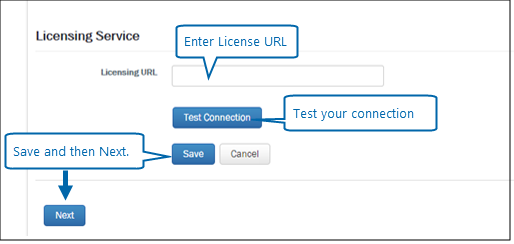
On the Welcome screen, under Information Needed screen:
- Next to Licensing URL, type the License Management System URL.
- Click Test Connection to verify connectivity.
- Click Save, and then click Next.
2. Activate Winshuttle Foundation
Back to top
If the SharePoint server and License Management Server are connected to the Internet, then use Online Activation; otherwise use the offline activation method.
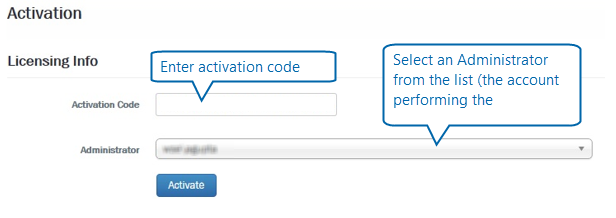
Online Activation
- Next to Activation Code, enter or paste your Winshuttle Foundation User Governance activation code.
- From the Administrator menu, select an Administrator account.
- Click Activate.
Offline Activation
If the installation being activated is offline, use the following activation instructions.
Note: The following process must be completed on a PC that is connected to the Internet.
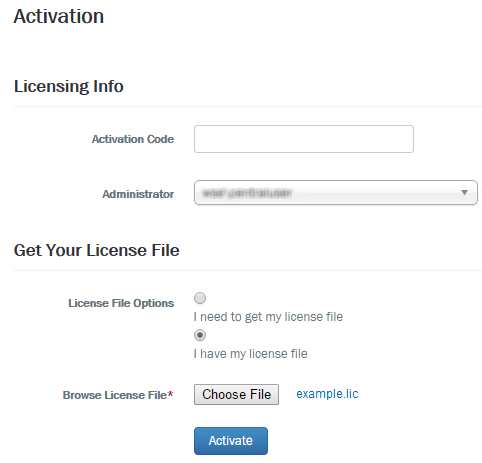
- Under Licensing Info, next to Activation Code, enter your Activation code.
- Select "I need to get my license file"
- Click Activate.
- Copy the URL displayed above the Activate button, paste it into a browser, and then open the page.
- Copy the encrypted activation code into the field on the Connect Licensing page.
- Click Download License File.
- Return to the Activation page. Under License File Options, select I have My license file.
- Click Choose File, and then to the .LIC file downloaded in Step 3.
- Click Activate.
3. Assign the Foundation License
Back to top
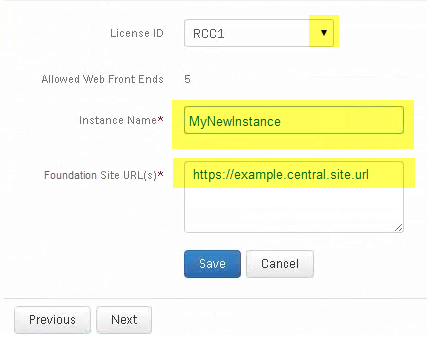
- Next to License ID, select a License ID.
- Next to Instance Name, type a name for the activation. (You can type any name that makes sense to you and your organization.)
- In the Site URL field, enter the Foundation Site URL(s) for your installation. You can enter more than one site using a semi-colon (;) delimited list.
For example: http://mysite.com; http://anothersite.com
4. Configure Winshuttle Workflow
Back to top
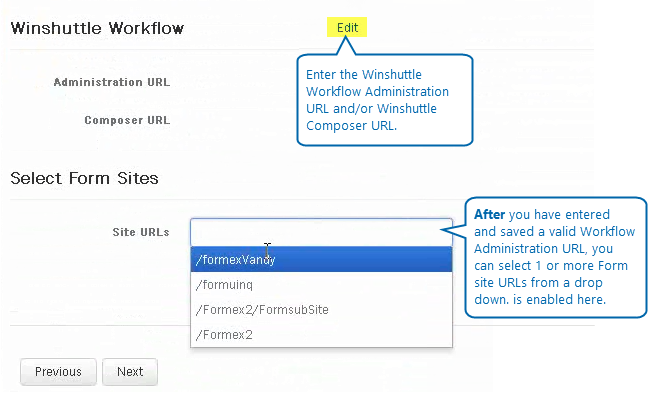
Note: If a site collection is created after Winshuttle Workflow is installed, the Winshuttle Workflow Site feature will need to be activated so that it appears as a Formex site in the Site URLs drop down menu (see screenshot, below) after the Worklfow Administration URL is saved.
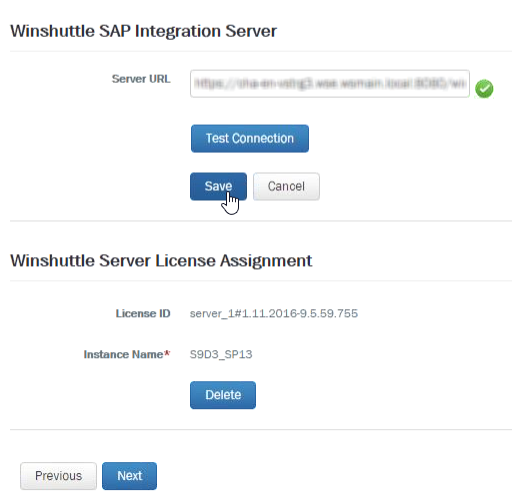
- Next to Winshuttle Server, click Edit.
- Next to Server URL, enter the Server URL.
- Click Test Connection.
- Click Save.
- Next to Winshuttle Workflow, click Edit.
- Enter the Winshuttle WorkflowAdministration URL and/or Winshuttle Composer URL.
- Click Test Connection.
- Click Save.
- Under Select Form Sites, select one or more Form Sites from the drop down. (Note: This will only be available after a Workflow Administration site is configured in step 6.)
- Click Next.
5. Enter Winshuttle SAP Integration Server details
Back to top- Next to Server URL, enter the URL for your Winshuttle SAP Integration Server.
- Next to License ID, select a License ID from the menu.
- Next to Instance Name, type a name (e.g. Development, Production, etc.) for the instance.
- Click Next.
6. Complete administrative setup
Back to top- On the Administration screen the Winshuttle Administrator account (i.e. the account used to manage the Winshuttle Foundation User Governance site) is displayed.
- Click Save, and then click Setup Foundation to complete setup.
If you need to change settings later, you can change them from Settings, under Foundation Setup.