Applies to:
Installing the Winshuttle LMS (License Management System)
Related Topics
Notes:
Please review system and account requirements for important information prior to installing.
To use the HTTPS SSL Certificate with Workflow and User Governance, you must copy the certificate to the personal store. WIN-15623
SSL certificates cannot be specified during installation; they must be added through IIS. WIN-15622
Versions prior to 11.4.0/11.2.12: When testing a site connection, a Net.Pipe error might be thrown if there is intermittent unavailability of the Net.Pipe service on the LMS server. Make sure that the Net.Pipe service is running, and then try again.
On this page
- Installing the Winshuttle LMS
- Installing the Winshuttle LMS in a Network Lode Balanced (NLB) environment
- Post-installation steps
Installing the Winshuttle License Management System
Back to topImportant Note: Make sure the URL you establish for the License Management System is accessible by your Winshuttle clients.
- Right-click Setup.exe and select Run as Administrator.
- Click Install.
- Read and accept the license agreement. Select "I have read the entire EULA..." and then click Next.
- Select the installation mode.

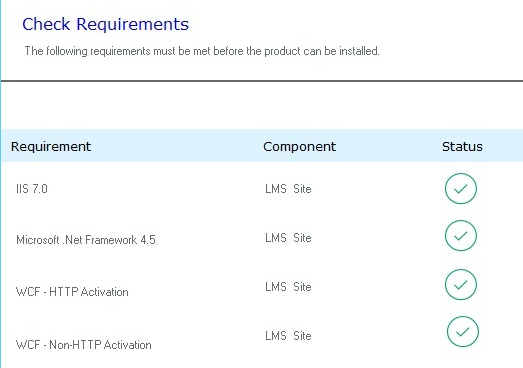
- On the Check Requirements screen, verify that all minimum system requirements have been met, and then click Next.
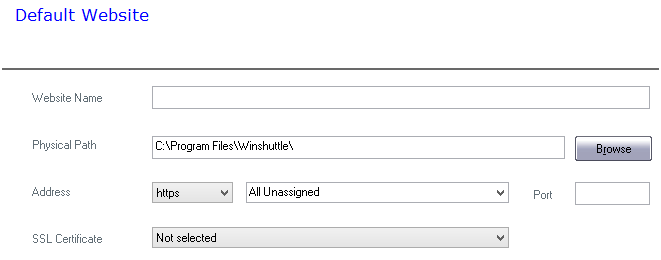
- Enter the following information:
- Website Name: The Website Name is the name of the site as displayed in IIS. This can be any name that helps you identify this as a Foundation component. Common names are Winshuttle LMS, LMS, or adding an identifier for the environment such as LMS Development, or LMS Production.
- Physical path: Where the program files will be installed to. Type a path or click Browse.
- Address: Select HTTP or HTTPS.
- Hostname: A hostname is not required, but it is strongly recommended that you use a host header and create the associated DNS CNAME record. If the host header is blank, the server host name will be used. For more information, see Creating a custom a host name.
- Port: The port number used to communicate through by the server. You can use any port number that is not blocked.
- SSL Certificate: (Only required if you selected HTTPS: for the Address setting above): Click the arrow, and then select an SSL certificate from the list.
- On the LMS Site screen, fill in the following information:
- Application Pool Name: The Application Pool name should reflect the Installation screen title (LMS Site, for example). On the first screen, this is LMS Site, then the second page it will be LMS Services, then LMS DataAPI, and lastly LMS Reports.
- Application Pool Identity: Type a domain\username and password, or click Browse to find a user account.
Important: The account should have Read/Write permissions to the Physical Path specified in the previous step, and it should be the database owner of the database that will be created in the next dialog.

- Click Next.
- Repeat step 6 for the remaining Application Pools: Services, DataAPI, and Reports.
Note: You can check the Provide access to the above user on Database in case the selected user does not have any permissions on the database.
Important: You must be logged in with Administrator permissions for this step.
- On the LMS Database screen, enter the following:
- Database Server: Type the path or click Browse to enter the path for the Database server.
- Licensing Database: The name for the Winshuttle licensing database.
- Reporting Database: The name for the Winshuttle reporting database
- Authentication mode: Windows Authentication for the current user, or SQL Authentication. If you are using SQL Authentication, type the Username and Password.

WARNING: Never tamper with the LMS database or it will go into a locked (inaccessible) state.
- Click Next.
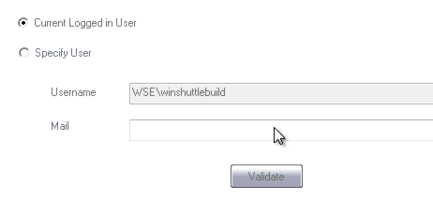
- On the Specify Administrator screen you will establish the user that will be the initial and permanent Winshuttle Administrator account. More Winshuttle Administrators can be added after completing Foundation Setup. It is recommended this account be a service account rather than a user account. Using a service account provides a fall back account to use in case another Winshuttle Administrator is unavailable.
- Current logged in user: Use the account credentials for the currently logged in user as the site administrator.
- Specify user: Type the domain/username and email address (required) for the user.
Note: The account specified here must be a Winshuttle Foundation Site Collection Administrator.
- Click Install to begin installation, or click Back if you wish to review or change configuration settings.
- Click Finish to complete installation.
Click Validate to ensure the settings are correct, and then click Next.
Installing in a Network Load Balanced (NLB) environment
Back to topIf you are installing the LMS in a Network Load-Balanced environment:
- Install the LMS according to the installation instructions (above) on the first machine.
- On the second node, run the installer again.
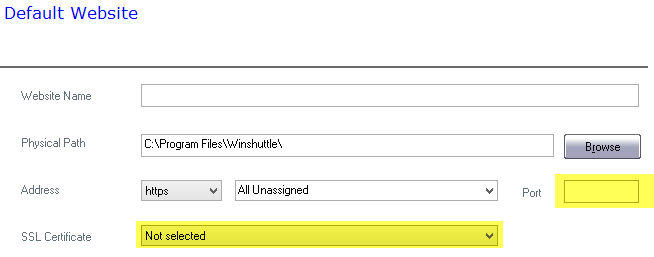
- Update the default website details and configure all 4 Application Pools. Also note the following:
- Make sure all application pools and environments are properly installed and configured.
- The Port used for Node 1, Node 2 and the NLB URL should be same.
- In an NLB HTTPS configuration, both nodes should be setup with a 'wild card' certificate. For example: <*.domainname>
- On the Database screen:
- Database Server: Enter the same licensing Database Server used to set up Node 1 (see Step 9 under Installation,).
- Licensing Database: Select Use an existing Licensing database, and then select Is NLB installation.
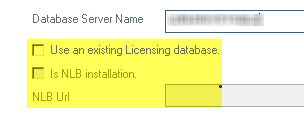
- NLB Url: Enter the NLB URL for the NLB machine in the format as http://Hostname:Port or https://Hostname:Port
- Reporting Database: Enter a new reporting database—Do not use the one setup in Node 1.
- Authentication mode: Select Windows Authentication to use the credentials for the currently logged-in user, or select SQL Authentication. If you are using SQL Authentication, type the Username and Password.
Important: Make sure to use the same port and LMS hostname/IP configuration.
For example: If the LMS site URL is http://testlms:1234/site, then you would pick Type: HTTP, Port: 1234, and LMS Hostname: testlms.
If the LMS url differs from that used in your first installation, the Existing Database option will not work. -
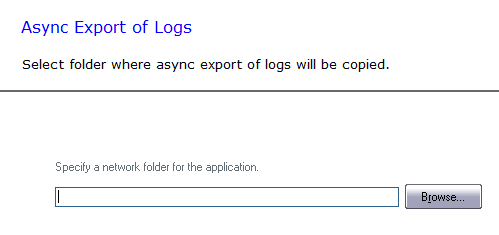
Provide a shared network location to save the exported bulk data reports (async reports). (Note: You should have read/write permissions on the folder in the shared location.)
- On the Specify Administrator screen you will establish the user that will be the initial and permanent Winshuttle Administrator account. More Winshuttle Administrators can be added after completing Foundation Setup. It is recommended this account be a service account rather than a user account. Using a service account provides a fall back account to use in case another Winshuttle Administrator is unavailable.
- Current logged in user: Use the account credentials for the currently logged in user as the site administrator.
- Specify user: Type the domain/username and email address (required) for the user.
-
Note: The account specified here must be a Winshuttle Foundation Site Collection Administrator.
- Click Validate to ensure the settings are correct, and then click Next.
- Click Install.
After NLB installation is complete, do the following
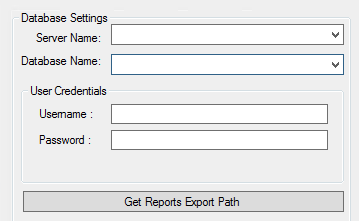
- On first LMS machine, go to the Winshuttle LMS install directory. In the Services\bin folder, right-click UtilityToUpdateIISSitePhysicalPath.exe, and then click Run as Administrator.
- In the Server Name drop menu, select a SQL server.
- In the Database Name drop menu, select the Database name (i.e. the licensing database name).
- Under User Credentials, enter a Username and Password into their respective fields.
- Click Get Reports Export Path.
- Click Set Path as Default, and then click Exit.
Scaling LMS to a Network Load Balanced (NLB) environment
If you plan to install LMS on a single server and then scale to NLB, make sure to update the LMS NLB URL under 'Gibralter.Server.Service.exe' on the first LMS machine (<LMS installation folder >\Gibralter\Bin) and restart the loupe service on both machines after installation.
<appSettings>
<add key="reportingServiceEndpointAdress" value="<NLB host URL Port/services>"
</appSettings>