Applies to:
Step 3: Run QueueDeployment Utility
Back to
Server 10.6.1 installation
- Install Erlang and RabbitMQ
- Install Winshuttle Server Manager
- Run QueueDeployment Utility
- Modify the Web.Config file
- Install Server Worker
- (Optional): Configure Central for Autopost
Related topics
Before proceeding, be sure to verify the integrity of the cookie file in the in the %SystemRoot% and %HOMEDRIVE%%HOMEPATH% directories for the service account that the Winshuttle Worker is running under. (This is also the same account used to run the Integration Server Application Pool in IIS, and the QueueDeployment utility. See Account Requirements for more information.)
See Verifying Erlang cookie integrity under Step 1: Install Erlang and RabbitMQ for additional information.
On this page
Installing for a single RabbitMQ queue
Some modifications to RabbitMQ that are specific to Winshuttle Server are required after installation. To make the necessary changes, run the QueueDeployment utility on the machine where RabbitMQ is installed. The default location of the QueueDeployment utility is:
C:\Program Files\Winshuttle\Server\Tools\QueueDeployment\QueueDeployment.exe
- Copy the QueueDeployment utility to the machine where RabbitMQ is installed.
- Run the QueueDeployment.exe file (as Administrator).
- Enter the path to the RabbitMQ\Sbin folder. The default path is already available in the field. If your RabbitMQ installation directory is different from the default, then browse to the sbin path.
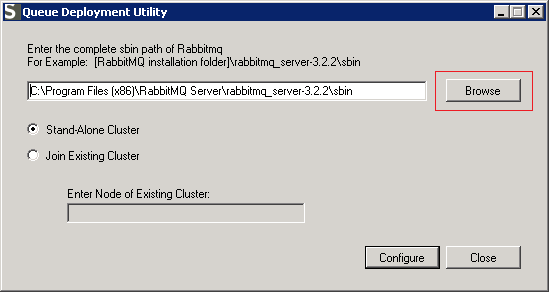
- Keep ‘Stand-Alone Cluster’ option selected, and then click Configure. This will reset the current RabbitMQ configuration and delete all nodes and their data.
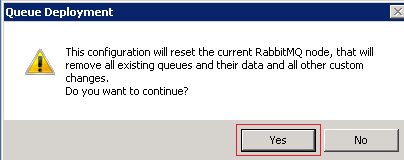
- At the Queue Deployment dialog box, click Yes.
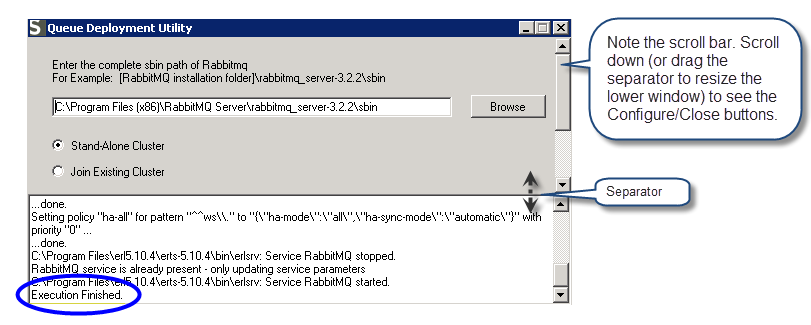
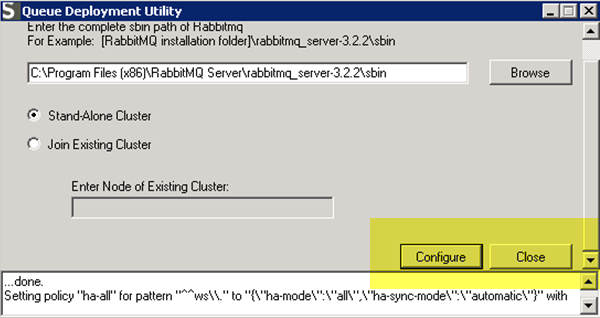
- After the deployment has completed, click Close.
Installing for a High Availability Queue (Server 10.6.1 and later only)
Back to topBeginning with Winshuttle Server 10.6.1, you can install RabbitMQ on multiple machines to create a RabbitMQ High-Availability (HA) cluster.
To create a RabbitMQ High Available Cluster, you need two or more machines. On each machine, you need to install Erlang and RabbitMQ. Follow the instructions for Step 1: Install Erlang and RabbitMQ
- First, you need to create the first node of the cluster. The first node will be the Master node. Copy the QueueDeployment utility to this machine.
- For the Master Node machine, follow the steps for a Single RabbitMQ Instance (see above).
After installing RabbitMQ on the Master node, each subsequent installation will become a RabbitMQ node. Because every node will communicate with every other node, all the nodes must have the same cookie file.
- Copy the .erlang.cookie file from %SystemRoot% directory of first node (master) to the %SystemRoot% and %HOMEDRIVE%%HOMEPATH% directories of all other nodes (slaves). (See Verifying Erlang cookie integrity under Step 1: Install Erlang and RabbitMQ for additional information.)
- Copy the QueueDeployment utility to the machine where the second RabbitMQ node is to be installed.
- Enter the path to the RabbitMQ\Sbin folder (see image below for an example). The default path is already available in the field. If your RabbitMQ installation directory is different from the default, then browse to the sbin path.
- Click Join Existing Cluster.
- Type the machine name of the existing (Master) node (without domain information).
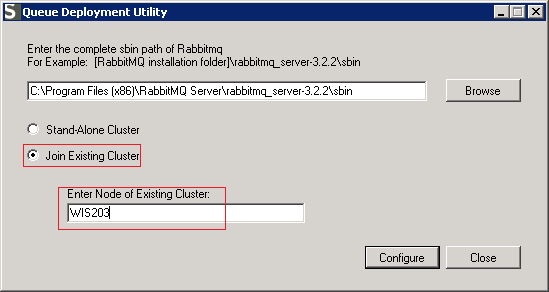
- Click Configure.
- Click Yes.
- Click Close.
Repeat steps 3-10 for each additional node you wish to add to the cluster.