Applies to:
- Winshuttle Foundation
2-1. Create form sections
Back to
Steps in this phase
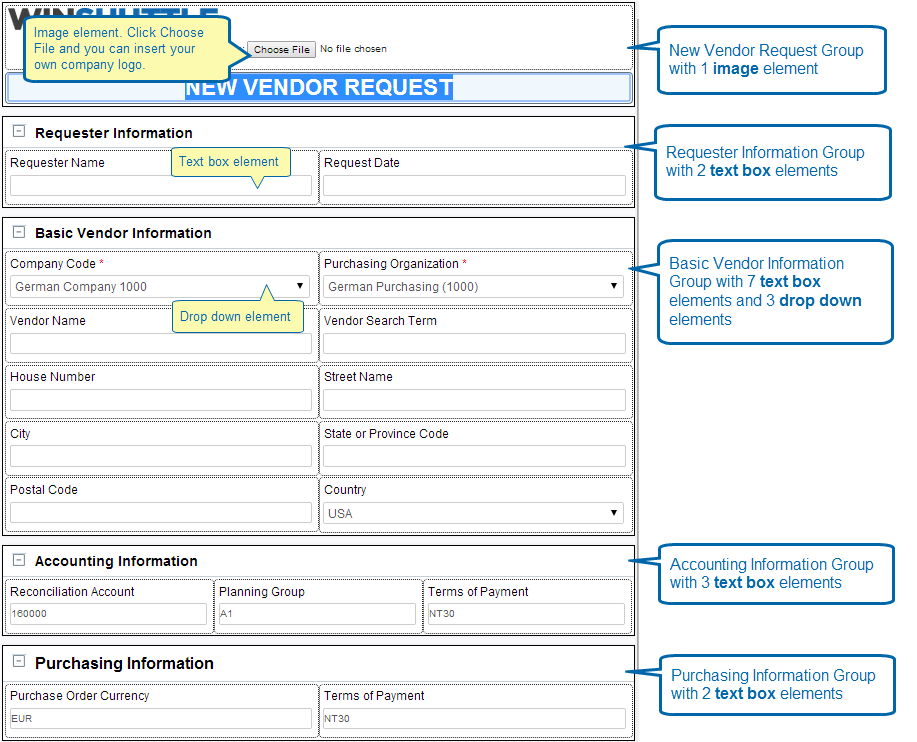
We will start by creating 5 groups (sections) in our form to help organize information, and creating a number of elements in each group. These are briefly described below:
|
Form Group |
Description |
Column Width |
Elements |
|
New Vendor Request |
Title for the form and an optional company logo graphic |
1 |
1 Image element |
|
Requester Information |
Basic requester information - name and date |
2 |
2 Text Boxes |
|
Basic Vendor Information |
All of the required Vendor Information such as address, purchasing organization, etc. |
2 |
7 Text Boxes, |
|
Accounting Information |
Fields for the Accounting Manager to fill in (reconciliation, planning group, terms of payment) |
3 |
3 Text Boxes |
|
Purchasing Information |
Fields for the Purchasing Manager to fill in (currency and terms of payment) |
2 |
2 Text Boxes |
Use the steps following the image below to help you create the form groups and fields described above and shown in the example below. With some fairly simple editing and organizing, you should be able to create a form similar to the one shown below (we will continue building upon it in subsequent examples).
Adding a new group to a form
- On the Composer ribbon, click the Form tab.
- Click New Group. The group will be added in the canvas.
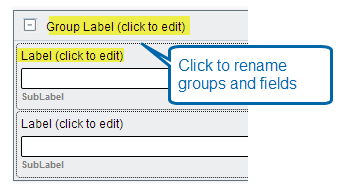
- In the form canvas, click the name of the group to rename it.
Moving groups in a form
- In the canvas, click the group you wish to move.
- On the Form tab, click one of the following:
- Top: moves the selected group to the top of the form.
- Bottom: move the selected group to the bottom of the form.
- Up: moves the selected group up.
- Down: moves the selected group down.
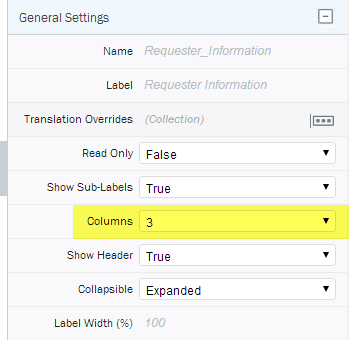
Tip: To make a group break up into columns (as shown in the example below), click the group name in the form and then change the Columns setting for the group in the Properties pane for that group (see below).
Adding fields to the form
- Click the Group to which you want to add fields.
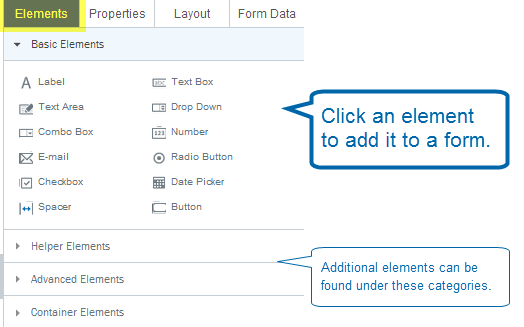
- In the Properties pane, click Elements.
- Click an element to add it to the form.
At this point in the tutorial, to create the form shown below, you only need to add Text Box, Drop Down, and Button elements.
- In the Form Canvas, click on a group or element name (click to edit) to rename it.
- For the form below:
- Add Text Fields for all fields except Company Code, Purchasing Organization, and Country.
- Add Drop Down elements for the Company Code, Purchasing Organization, and Country fields.
- Add a Button element for the Create Vendor button.