Applies to:
- Winshuttle Foundation
4-5. Create a rule to extract the vendor number
Back to
Steps in this phase
In this step we are going to build a feature into the form that will use a rule to extract the Vendor Number field from the Log field when a Vendor is successfully created in SAP.
On this page
Create a Vendor Number group and create a rule
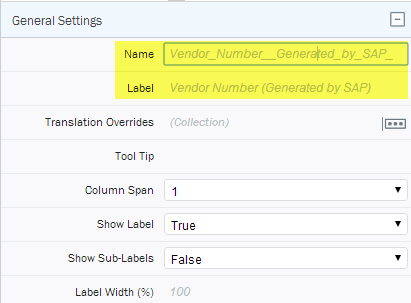
- First we will create a new group called Vendor Number and add it to the bottom of the form. Give it the following properties:
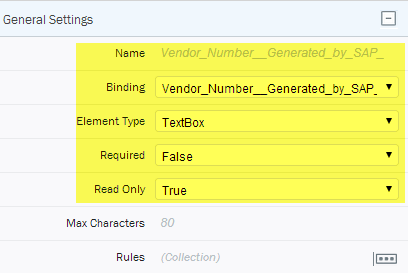
- Next, add a Text Box element to the Vendor Number group. Give the Text Box element the following settings:
- Name: Vendor_Number_Generated_by_SAP
- Binding: Vendor_Number_Generated_by_SAP
- Element Type: TextBox
- Required: False
- Read Only: True
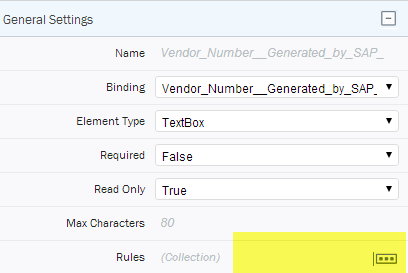
- In the Text Box Properties pane, next to Rules, click the [...] options button.
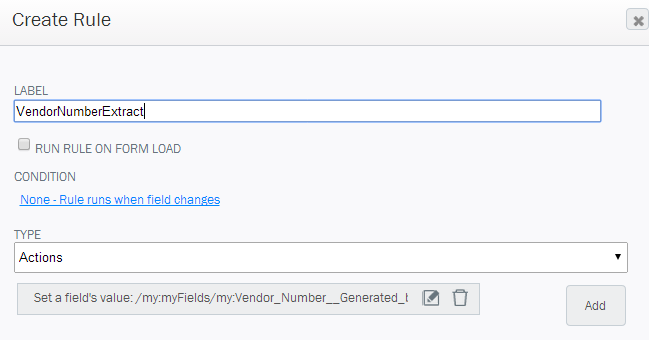
- On the Create Rule screen:
- Label: Type VendorNumberExtract.
- Type: Select Action from the drop-down menu.
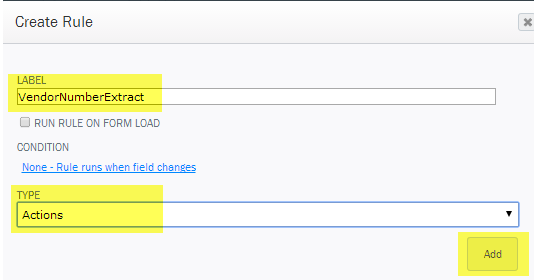
- Click Add, and then select Rule Wizard.
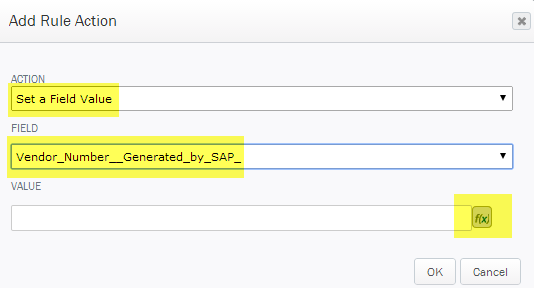
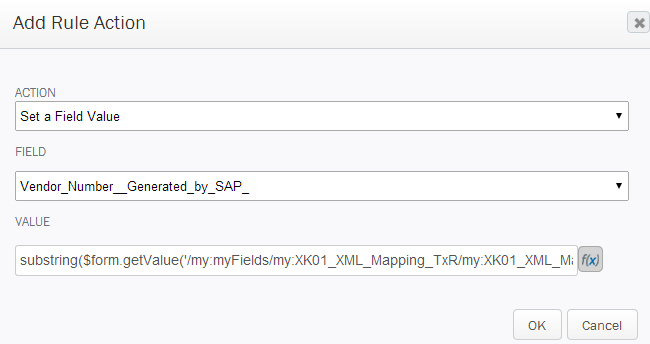
- On the Add Rule Action screen:
- Action: Select Set a Field Value from the menu.
- Field: Select Vendor_Number_Generated_by_SAP from the menu.
- Value: Click the [F/x] (Formula)button.
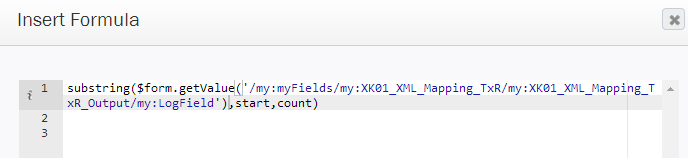
The typical SAP Log message that appears when a Vendor is successfully created lists a 10 digit string that occurs in the 8th positionof the output log. So we are going to create the rule such that it will set the Vendor number using the Substring function.
- On the Insert Formula screen, click Insert Function.
- On the Select a Function screen, select Substring from the drop-down menu.

- Click Insert Field Value.
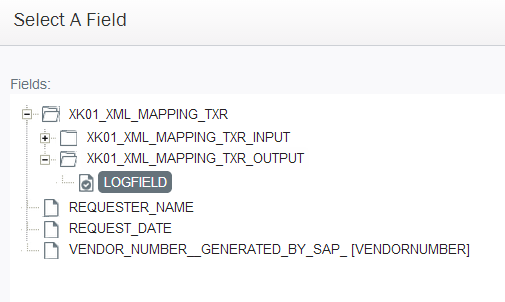
- On the Select a Field screen, expand XK01_XML_Mapping_TXR, then expand XK01_XML_Mapping_TXR_Output. Click LOGFIELD,and then click OK.
You should see this:
- Click OK.
- Click OK.
- Click OK a final time to finish.
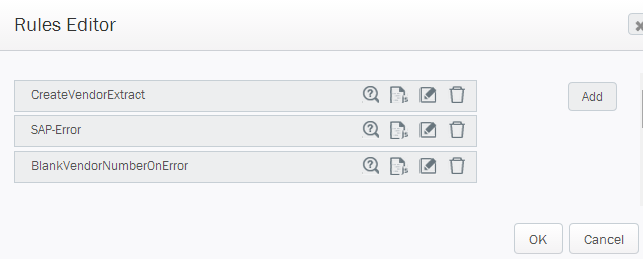
Create rules for error conditions
Now we are going to create 2 rules:
- The first rule is a formatting rule that simply highlights the field when there is an error in the log field.
- The second rule sets the Vendor number to 'blank'.
Create a formatting rule
- Click the Vendor Number Field.
- In the TextBox Properties pane, next to Rules, click the [...] options button.
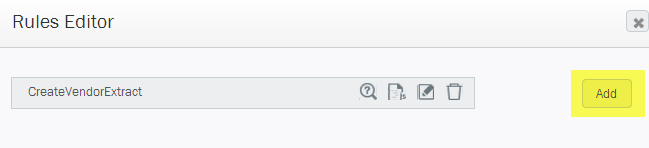
- On the Rules Editor screen, click Add, and then click Rule Wizard.
- On the Create Rule screen:
- Label: Type SAP-Error.
- Condition:Click None - Rule runs when field changes.
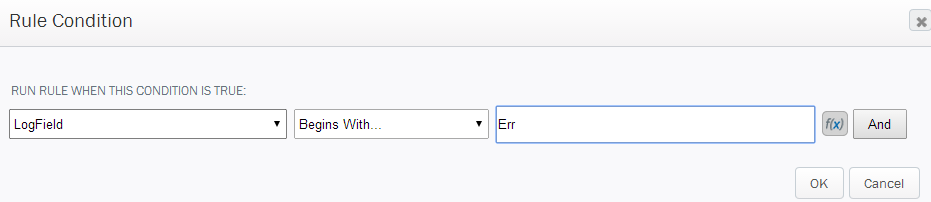
On the Rule Condition screen, under RunRule When This Condition Is True: Select Logfield from the menu. In the next field, select Begins With..., and in the final field, type Err, as shown in the example below. Click OK.
- Under Type, click the drop arrow, and then select Formatting from the menu.
- Under Apply Styles to Fields, click the drop arrow, and then select Logfield from the menu.
- Set the text background color and text color to indicate an error. In our example below, we set the Logfield background to yellow, and the text to red.
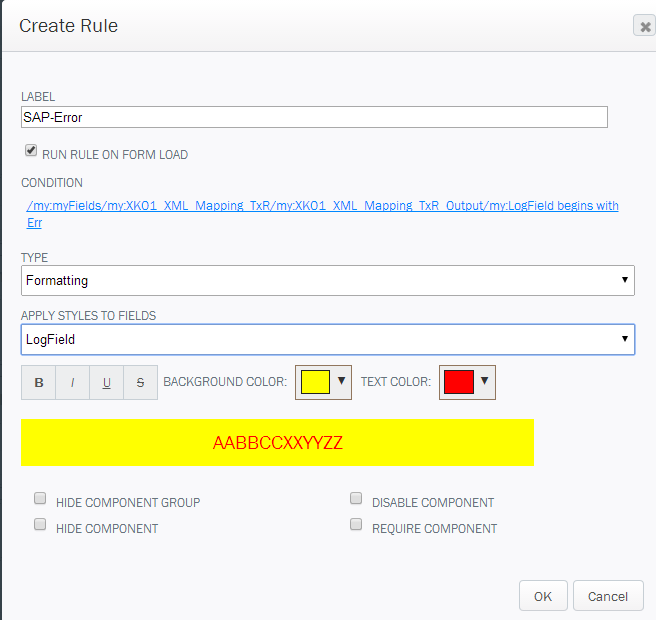
- Click OK to finish.
Create a rule to blank the error field
- Click the Vendor Number Field.
- In the TextBox Properties pane, next to Rules, click the [...] options button.
- On the Rules Editor screen, click Add, and then click Rule Wizard.
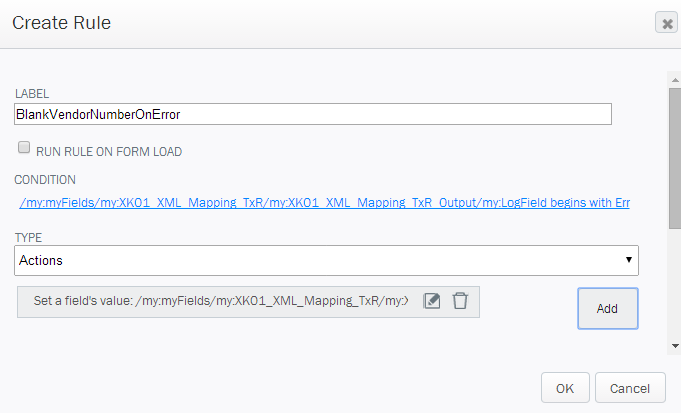
- On the Create Rule screen:
- Label: Type BlankVendorNumberonError.
- Type: Click the drop arrow, and select Actions.
- Click Add.
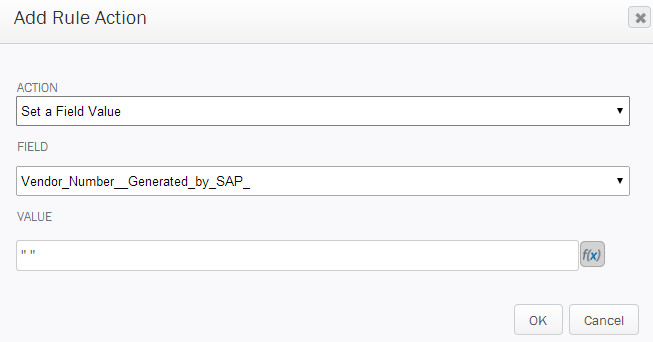
- On the Add Rule Action screen:
- Action: Select Set a field value from the menu.
- Field: Select Vendor_Number_Generated_by_SAP_.
- Value: Type quotation marks with a space in between them, like this: " ".
Click OK.
- On the Create Rule screen, Under Condition, click None-Rule runs when field changes.
On the Rule Condition screen, under RunRule When This Condition Is True: Select Logfield from the menu. In the next field, select Begins With..., and in the final field, type Err, as shown in the example below.
- Click OK.
- Click OK.
- Click OK to finish.